

I’m an intermediate level embedded developer and I’ve heard the term “MQTT” a lot recently but never really delved into the details. I decided to spend a Saturday to understand what it is and implement it on an embedded device so I can use it for other projects, like sensors and various controllers that need to be monitored and controlled but are behind a router and firewall. I have experience with C/C++ embedded programming, network programming, Windows and Linux. I’ll use the MODM7AE70 as the embedded platform, but the exact same code will work on any NetBurner platform, like the new SOMRT1061.
NetBurner also has a new build-in MQTT library, which allows integrating with MQTT in just a few lines of code and no external libraries, unlike prior AWS, Azure, and Paho tutorials.
My goals were:
- Understand what MQTT is
- Send MQTT messages from an embedded device to a client PC, both locally and through the Internet.
What is MQTT
My first stop was to do some research about MQTT. The information that came up is summarized below. The MQTT standard site is at mqtt.org.
MQTT, (Message Queuing Telemetry Transport), is a lightweight, TCP-based messaging protocol designed for low-bandwidth and high-latency environments, particularly well-suited for machine-to-machine (M2M) communication and IoT applications. It uses a publish-subscribe messaging model, where devices (clients) publish messages to topics, and other devices subscribe to those topics to receive messages.
Being a visual person, I searched for a picture and found the one below:

Ref: https://medium.com/@jaydev.dave93/what-is-mqtt-protocol-c6a0cafffa8c
But this picture leaves out what to me is the biggest benefit of MQTT, the ability to actually communicate with these devices on their respective networks. Inserted between the MQTT broker and each those three devices is usually a router or firewall that prevents any two of them from talking to each other.
In a typical scenario, the laptop is unable to communicate directly with the temperature sensor because the router/firewall blocks incoming connections. I often don’t even know what the internal IP address of the temperature sensor is. The MQTT Broker solves this problem by enabling each of the three devices to connect to the broker with an outgoing TCP connection which is allowed by the router/firewall. The broker then keeps track of what each client is subscribed to, called the “topic”. When the temperature sensor “publishes” data to the broker with the “temperature” topic, the broker sends the data to the clients subscribed to the temperature topic. Subscribers can also choose to subscribe to a “topic filter” using wildcards, making it easy to subscribe to many similarly-named topics at once.
In the old days what we had to do was configure the temperature sensor router/firewall to do port forwarding so that any incoming TCP connections for the temperatures sensor on a specific port number would be forwarded to the temperature sensor IP address. This is both a security risk and difficult to maintain with router updates and configuration. Now, with this “push” architecture, only the MQTT Broker needs to be centrally accessible.
Hardware, Software and Tools
Wanting to take baby steps my strategy was to first test that the broker was working by using publish and subscriber utilities, then move on to the NetBurner. My list of items to find was:
- Embedded platform to be the MQTT publisher
- MQTT Subscriber Client to run on my computer
- Local MQTT Broker so I can test without using an external Internet broker
- Internet MQTT Broker that would represent a production implementation
Embedded Platform
This will be the NetBurner development kit, which includes the hardware, software, tools and many MQTT example programs. I decided to use the MQTT Simple example that publishes an integer value when the value changes. The part numbers for these kits are NNDK-MODM7AE70-KIT or NNDK-SOMRT1061-KIT, available at www.netburner.com.
MQTT Broker
The best broker I came across is called Mosquitto (https://mosquitto.org/). They offer both a free test server on the Internet, and a local broker that runs on Linux and docker.
For my local MQTT Broker I was unable to locate one that runs natively on Windows and I am not familiar with Docker, so I chose my Linux VM that runs on my Windows 11 PC. You could also use a Raspberry Pi. If you can only use Windows, you may need to use Docker, but I think the Mosquitto implementation is the same as I describe in this article. Disclaimer: my Docker experience in the past was bad because enabling Windows WSL2 on my PC caused issues. I neither endorse nor oppose it, it seems most people use it just fine.
There are Mosquitto Docker images at: https://hub.docker.com/_/eclipse-mosquitto.
The description on their web page is:
Eclipse Mosquitto is an open source (EPL/EDL licensed) message broker that implements the MQTT protocol versions 5.0, 3.1.1 and 3.1. Mosquitto is lightweight and is suitable for use on all devices from low power single board computers to full servers. The Mosquitto project also provides a C library for implementing MQTT clients, and the very popular mosquitto_pub and mosquitto_sub command line MQTT clients.
There are a number of ways Mosquitto can be used:
- The mosquitto_pub and mosquitto_sub commands provide publish and subscribe functionality.
- The Mosquitto Broker can be run locally.
- Mosquitto offers a free Internet MQTT broker you can use at test.mosquitto.org in the following modes:
- Plain MQTT
- MQTT over TLS
- MQTT over TLS (with client certificate)
- MQTT over WebSockets
- MQTT over WebSockets with TLS
If you would like to use them in a professional deployment, they also offer a Cedalo MQTT Platform trial.
Note: If you are running a Linux VM like me, make sure it is in bridge mode and not NAT mode. Also, the firewall needs to be off or you need to enable a rule to let port 1883 through on TCP for plain MQTT, or 8883 for MQTT over TLS.
MQTT Publish and Subscriber Utilities
Since my main computer runs Windows 11, I found a free Windows tool called MQTTX at https://mqttx.app. It is a great diagnostic tool and can both publish and subscribe. For my Linux VM, I have the Mosquitto utilities. I like this because I can first test the broker, publish and subscribe operation on the Linux VM as localhost, then verify I can access the Mosquitto Broker on the Linux machine externally from Windows. Once I can do that, I have confidence I can do it from the NetBurner embedded platform.
Mosquitto Broker and Utilities Installation
I installed Mosquitto on the linux VM according to these instructions: https://docs.vultr.com/install-mosquitto-mqtt-broker-on-ubuntu-20-04-server
Note: If you are reading this long after this article was published, do a search for: “how to install mosquitto on linux”.
Mosquitto Internet Broker Test
I tested a connection to the test.mosquitto.org MQTT Broker three different ways:
- Windows MQTTX
- Linux VM
- NetBurner
Windows MQTTX
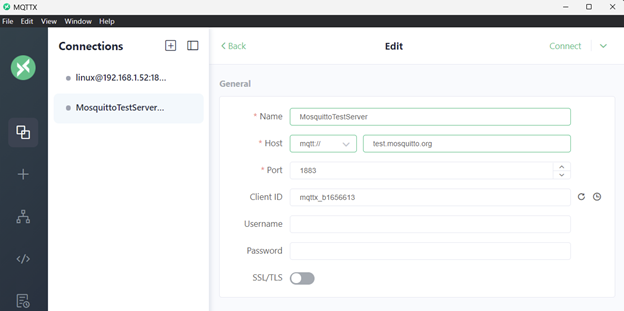
Running MQTTX, I created a new connection for test.mosquitto.org called MosquittoTestServer. It is running on port 1883 which is the default port for plain MQTT. The Client ID must be unique for every device. An easy way to do that is to use a prefix and the last few octets of the MAC address, like “nburn1234”. You can also see the Linux connection in the list, more on that later.
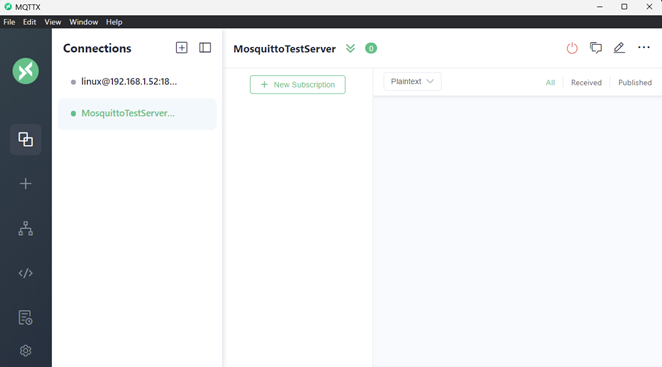
Once the data is entered, click on Connect in the upper right corner.
If all goes well and the connection is successful, you will see the screen below. The next step is to subscribe to a topic by clicking on the + New Subscription box.
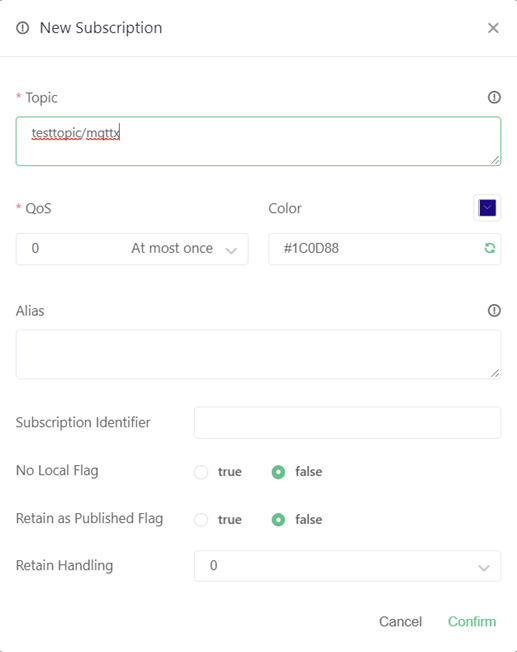
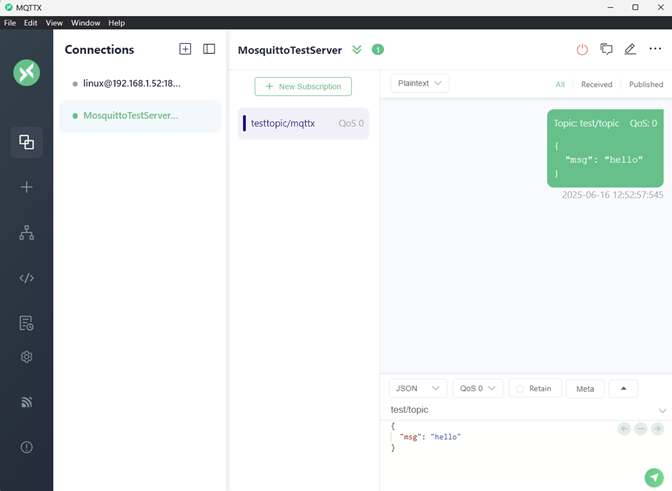
For my testing I picked a topic name of: testtopic/mqttx. That is all we need to do, so click on Confirm at the bottom of the page. QoS means quality of service (what level of guarantee MQTT will give your message’s delivery), you can leave that at the default for now.
Back at the connection screen I can see my subscription topic, the subscriber receive message window on the right side, and a publish message window with the message content and a button on the bottom right to send the message: “hello”.
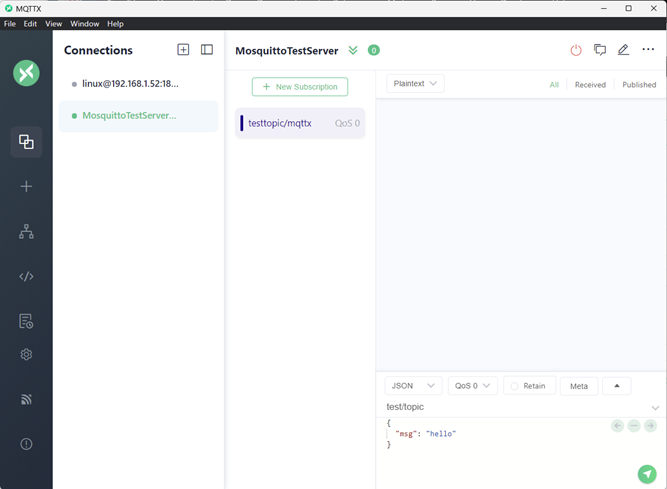
Clicking on the green send arrow in the bottom right publishes the message, and I can see the message received in the receive window. Mission accomplished ! So what exactly has happened here?
- MQTTX made a TCP connection to the test.mosquitto.org MQTT Broker.
- We created a topic on the broker named “testtopic/mqttx”. MQTTX can both publish and subscribe to that topic.
- We published a hello message to the broker.
- The broker sent the message to the MQTTX subscriber.
Linux Mosquitto
My linux test consists of 3 terminal windows. From top to bottom: the broker status, publisher and subscriber. Note that even though it is installed, we are not using the local broker for this test; we are using the same test broker as in the previous window’s MQTTX test at test.mosquitto.org.
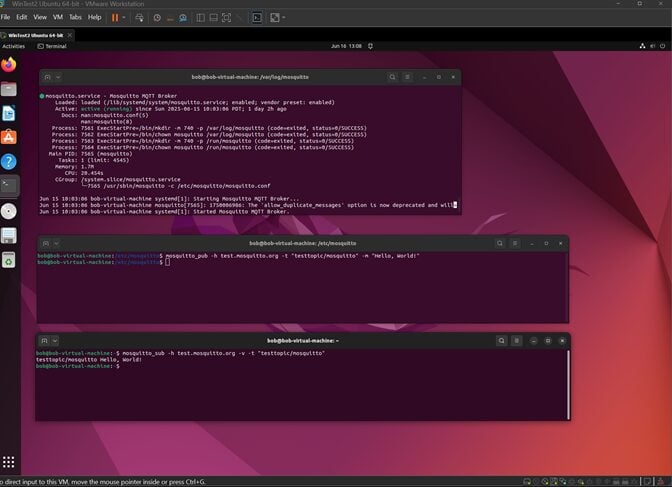
The local Mosquitto Broker will be covered more below, but for those interested, the broker status is provided by running “sudo systemctl status mosquito”:
mosquitto.service - Mosquitto MQTT Broker
     Loaded: loaded (/lib/systemd/system/mosquitto.service; enabled; vendor preset: enabled)
     Active: active (running) since Sun 2025-06-15 10:03:06 PDT; 1 day 2h ago
       Docs: man:mosquitto.conf(5)
             man:mosquitto(8)
    Process: 7561 ExecStartPre=/bin/mkdir -m 740 -p /var/log/mosquitto (code=exited, status=0/SUCCESS)
    Process: 7562 ExecStartPre=/bin/chown mosquitto /var/log/mosquitto (code=exited, status=0/SUCCESS)
    Process: 7563 ExecStartPre=/bin/mkdir -m 740 -p /run/mosquitto (code=exited, status=0/SUCCESS)
   Process: 7564 ExecStartPre=/bin/chown mosquitto /run/mosquitto (code=exited, status=0/SUCCESS)
   Main PID: 7565 (mosquitto)
      Tasks: 1 (limit: 4545)
     Memory: 1.7M
        CPU: 20.454s
     CGroup: /system.slice/mosquitto.service
             └─7565 /usr/sbin/mosquitto -c /etc/mosquitto/mosquitto.conf

Jun 15 10:03:06 bob-virtual-machine systemd[1]: Starting Mosquitto MQTT Broker...
Jun 15 10:03:06 bob-virtual-machine systemd[1]: Started Mosquitto MQTT Broker.
The first step in our test is to make a TCP connection and subscribe to testtopic/mosquito by typing
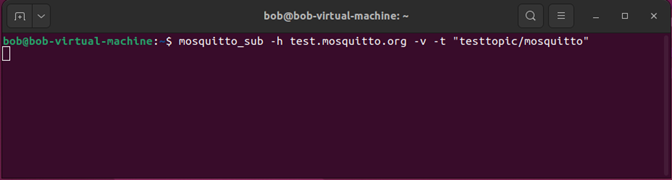
mosquitto_sub -h test.mosquitto.org -v -t "testtopic/mosquitto"in the subscribe terminal window. It will keep listening for messages until the program is terminated with Ctrl-C.
Next, the MQTT message is published to the broker in the publish terminal window with:
mosquitto_pub -h test.mosquitto.org -t "testtopic/mosquitto" -m "Hello, World!"
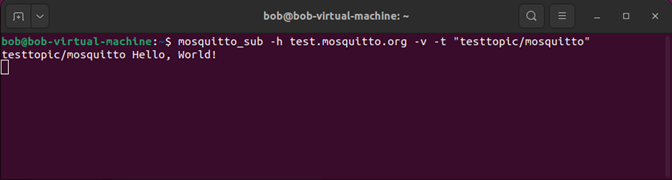
Checking back with the subscriber terminal window we see our message from the broker! The -v verbose flag was used, so we see the topic as well as the message.
Using the NetBurner Device
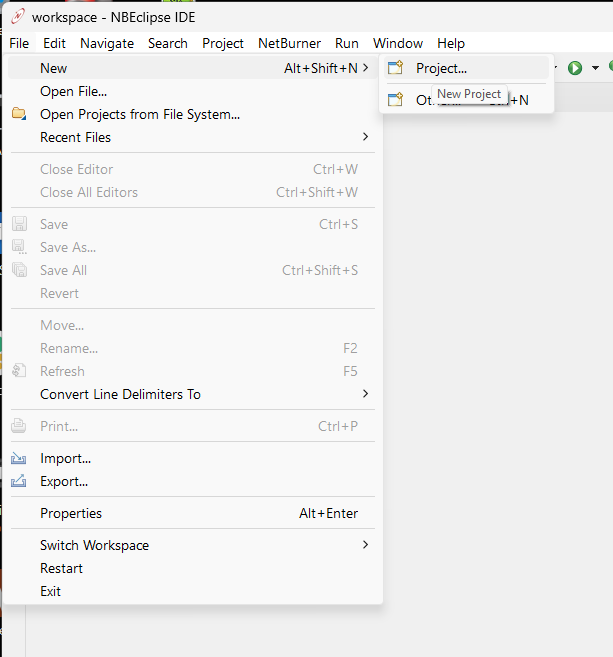
Finally, let’s get that NetBurner talking MQTT. The first step is to build the MQTT Simple example. We will do that with the project wizard and choose “example” at the final screen. That will create the project and import any necessary files.
Create a Project
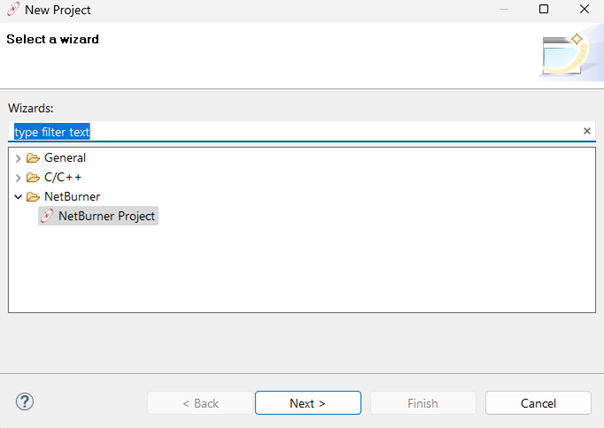
Select a NetBurner project:
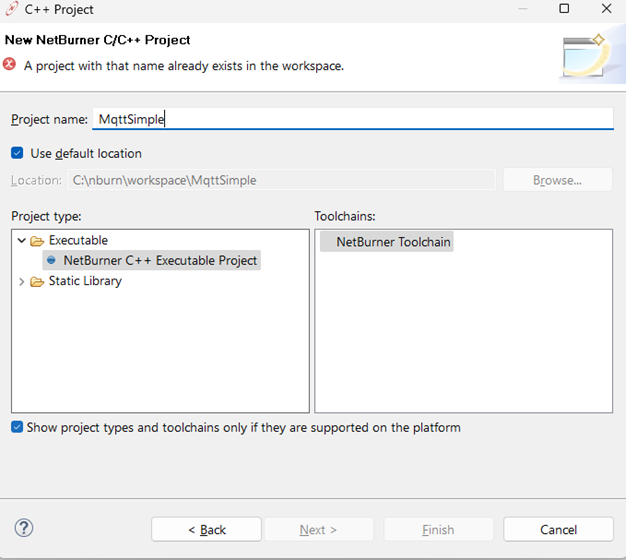
Set the Project Name to MqttSimple:
Click on the Search button for the Target Platform and select the device:
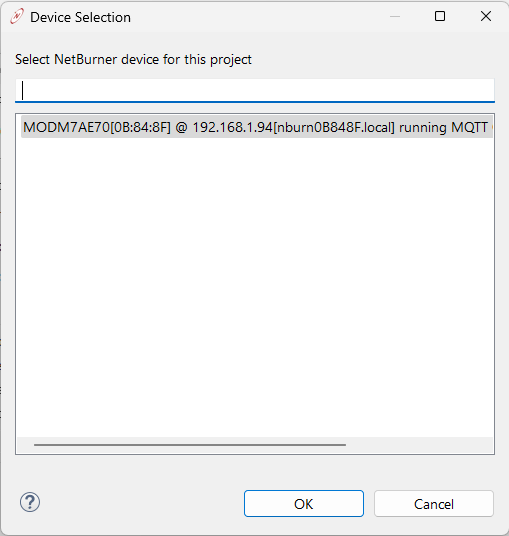
Notice that for the IP address is has nburn0B848F.local. NetBurner supports the .local naming to make things easier, but you could also use the numerical IP address of 192.168.1.94 instead.

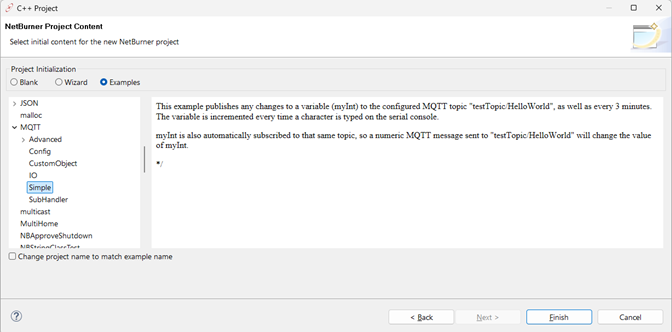
Select the Examples radio button. A list of all NetBurner examples will appear on the left. Select the MQTT Simple example
The project will automatically build. The IDE is shown below with main.cpp in the editor. The bottom left window shows the NetBurner device details, the bottom right window shows the build output. Clicking on the green Play button in the NBEclipse tool bar will download the application.
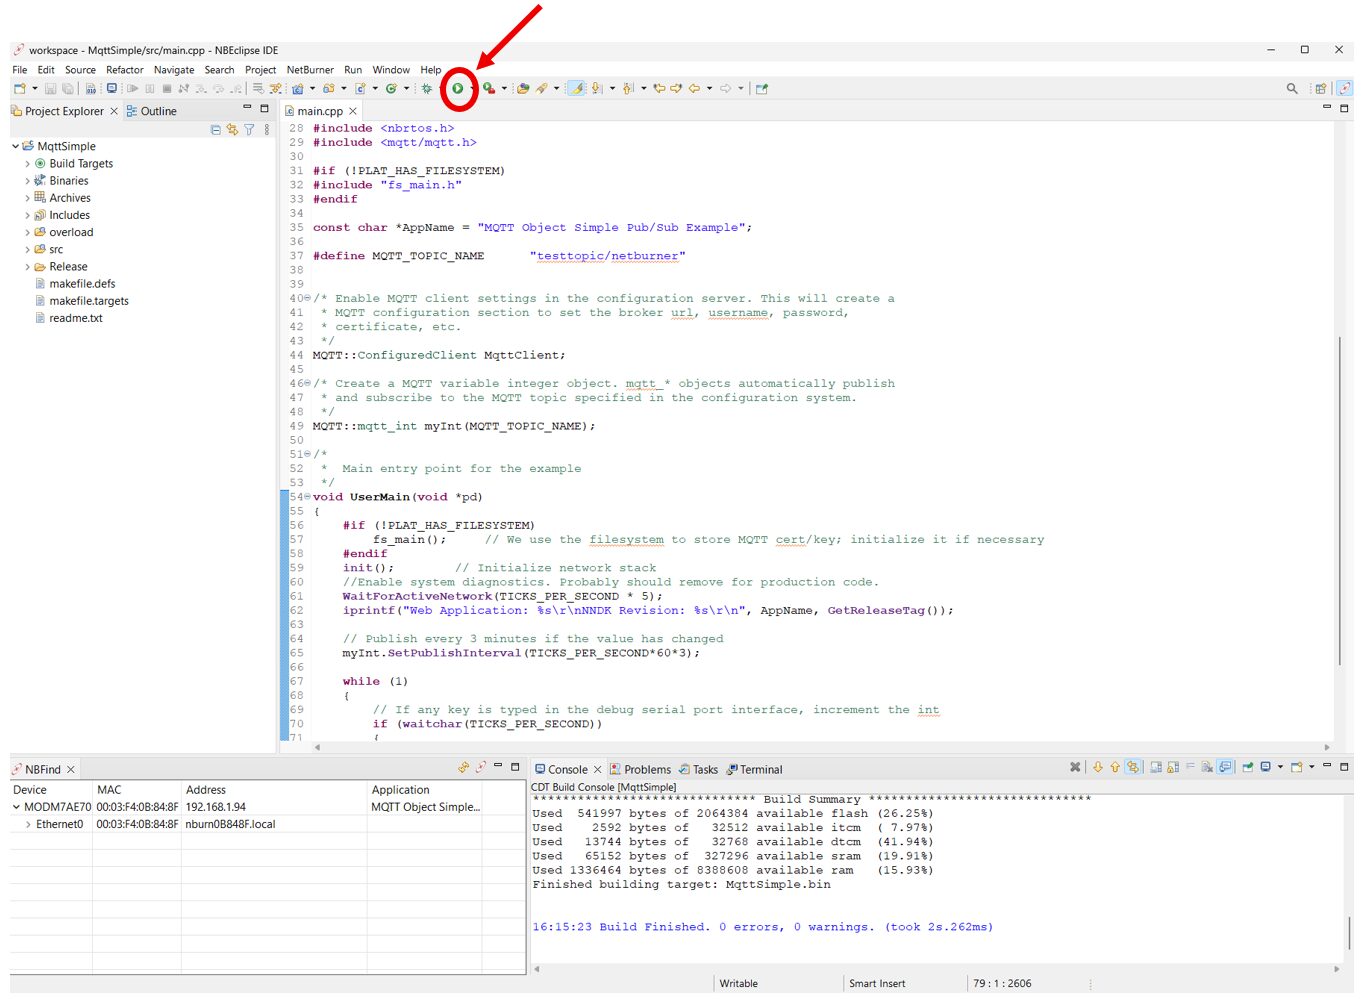
The full source code is below:
#include <init.h>
#include <nbrtos.h>
#include <mqtt/mqtt.h>

#if (!PLAT_HAS_FILESYSTEM)
#include "fs_main.h"
#endif

const char *AppName = "MQTT Object Simple Pub/Sub Example";

#define MQTT_TOPIC_NAME      "testtopic/netburner"


/* Enable MQTT client settings in the configuration server. This will create a
 * MQTT configuration section to set the broker url, username, password,
 * certificate, etc.
 */
MQTT::ConfiguredClient MqttClient;

/* Create a MQTT variable integer object. mqtt_* objects automatically publish
 * and subscribe to the MQTT topic specified in the configuration system.
 */
MQTT::mqtt_int myInt(MQTT_TOPIC_NAME);

/*
 *  Main entry point for the example
 */
void UserMain(void *pd)
{
    #if (!PLAT_HAS_FILESYSTEM)
	fs_main();     // filesystem for MQTT cert/key
    #endif

    init();        // Initialize network stack
    WaitForActiveNetwork(TICKS_PER_SECOND * 5);
    iprintf("Web Application: %s\r\nNNDK Revision: %s\r\n",
               AppName, GetReleaseTag());

    // Publish every 3 minutes if the value has changed
    myInt.SetPublishInterval(TICKS_PER_SECOND*60*3);

    while (1)
    {
    	// If any key is typed in the debug serial port interface, increment the
      // integer value. It will automatically be published.
        if (waitchar(TICKS_PER_SECOND))
        {
            getchar();	// wait for keypress on serial terminal to increment
            myInt++;	// increment mqtt variable
        }
        printf("myInt: %ld\r\n", (int32_t)myInt);
    }
}
Let’s take a quick look at that source code. We’re able to implement MQTT complete with publishing in just 3 lines of code. The first line is:
MQTT::ConfiguredClient MqttClient;This instantiates an MQTT Client, and also enables MQTT client settings in the configuration server. An MQTT configuration section will appear in the configuration server web page on the NetBurner device at port 20034 in the web browser, and will allow us to set the broker URL, username, password, certificate, etc.
Note that NetBurner Configuration Server settings can be configured in many ways, a web browser is not necessarily required:
- Serial port
- In your application itself
- JSON configuration uploads
The second line is:
MQTT::mqtt_int myInt(MQTT_TOPIC_NAME);This creates a MQTT variable integer object. There are a wide range of mqtt_* objects in the NetBurner library and they automatically publish and subscribe to the MQTT topic specified in the configuration. Some others are listed below. All will automatically publish and subscribe to the specified topic. Note that you are not required to use this library at all and can subscribe and publish in any way you wish with any data you wish. These are just here to make the implementation easier if they are a good fit for your application.
Variable Types
- mqtt_bool
- mqtt_float
- mqtt_int
- mqtt_uint
- mqtt_string
GPIO Pins
- mqtt_IO
- mqtt_IO_Input
- Defaults to GPIO input
- mqtt_IO_Output
- Defaults to GPIO output
Base Classes
- mqtt_leaf
- Base class for all Mqtt Objects (MqttObj). Mqtt Objects provide a seamless bridge/synchronization to communicate information through an MQTT Broker via a Client object. You can create your own.
- mqtt_obj
- Base class for easy MQTT Objects (MqttObj). mqtt_obj are comprised of higher order parent objects that contain registered child objects.
The 3rd and final line of MQTT code instructs the integer object to automatically publish at a specified interval. The default mode is to only publish when the value changed, but that can be changed with the function parameters.
myInt.SetPublishInterval(TICKS_PER_SECOND*60);That is all that is needed! The GPIO state change type is especially nice since all you need to do is specify the pin number.
The NetBurner MQTT API documentation is located in the NetBurner API section here: https://www.netburner.com/NBDocs/Developer/html/index.html
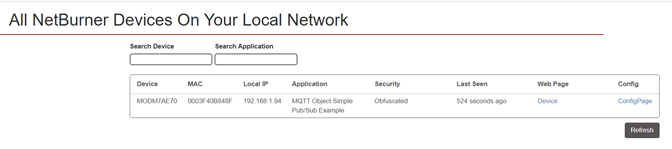
Locate the Device
I can now open a web browser and go to discover.netburner.com from the same network as my device, and device’s details. Click on the ConfigPage link to get to the configuration web page. Note that if you know the device IP address, you can type it in the web browser with port 20034. For example, http://192.168.1.94:20034 .
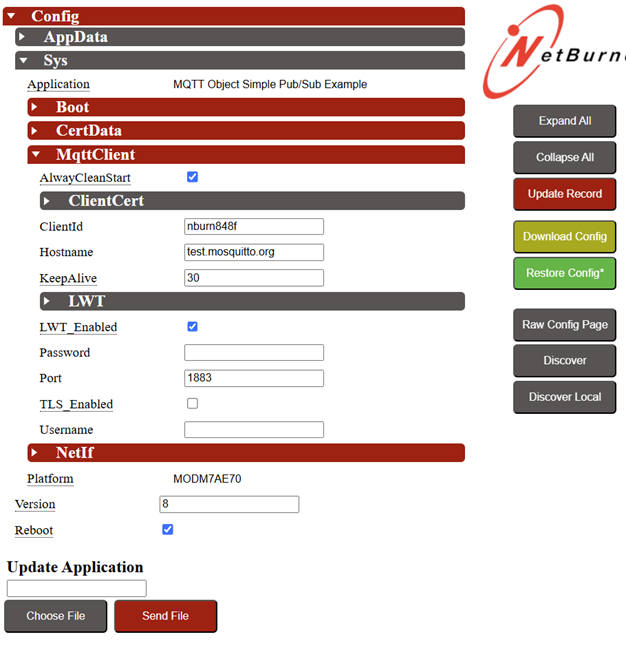
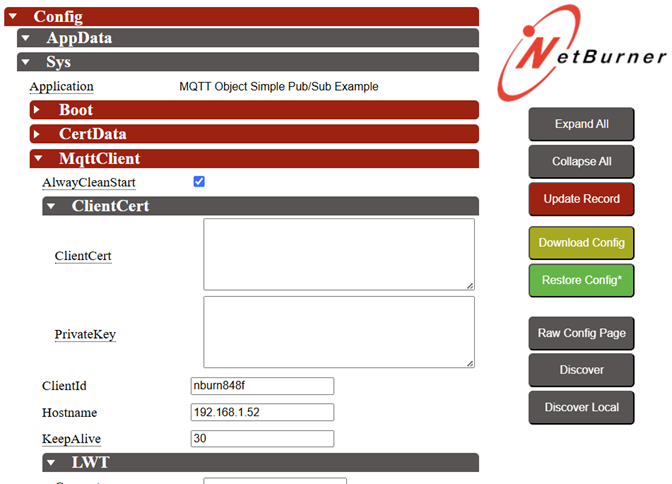
MQTT Configuration Settings
The configuration page is shown below. Open MqttClient section and set the Hostname to test.mosquitto.org, ClientId to nburn848f, and check the reboot checkbox at the bottom. Clicking on Update Record will submit and save the changes, then reboot the device.
Testing With a Client
At this point the NetBurner is publishing the integer value to the test.mosquitto.org broker. Now let’s configure MQTTX to subscribe to the topic. Below we can see the topic changed to testtopic/netburner, and the published integer values of 0 and 1 received from the broker at test.mosquitto.org:

Checking the linux VM subscribed to the same topic we see it as well. It has incremented to 4:

Setting Up The Mosquitto Broker Locally
Running the Mosquitto Broker
Mosquitto has already been installed in my Linux VM. Running a quick check in the status window I see it is running:
mosquitto.service - Mosquitto MQTT Broker
     Loaded: loaded (/lib/systemd/system/mosquitto.service; enabled; vendor preset: enabled)
     Active: active (running) since Sun 2025-06-15 10:03:06 PDT; 3 days ago
       Docs: man:mosquitto.conf(5)
             man:mosquitto(8)
    Process: 7561 ExecStartPre=/bin/mkdir -m 740 -p /var/log/mosquitto (code=exited, status=0/SUCCESS)
    Process: 7562 ExecStartPre=/bin/chown mosquitto /var/log/mosquitto (code=exited, status=0/SUCCESS)
    Process: 7563 ExecStartPre=/bin/mkdir -m 740 -p /run/mosquitto (code=exited, status=0/SUCCESS)
    Process: 7564 ExecStartPre=/bin/chown mosquitto /run/mosquitto (code=exited, status=0/SUCCESS)
   Main PID: 7565 (mosquitto)
      Tasks: 1 (limit: 4545)
     Memory: 844.0K
        CPU: 24.249s
     CGroup: /system.slice/mosquitto.service
             └─7565 /usr/sbin/mosquitto -c /etc/mosquitto/mosquitto.conf

Jun 15 10:03:06 bob-virtual-machine systemd[1]: Starting Mosquitto MQTT Broker...
Jun 15 10:03:06 bob-virtual-machine systemd[1]: Started Mosquitto MQTT Broker.
Configuring the NetBurner
The IP address of the Linux VM is 192.168.1.52, so that is the MQTT Broker server address I must now set in the NetBurner MQTT configuration under Config > Sys > MqttClient > Hostname.
The Mosquitto subscriber utility command line changes as well, from test.mosquitto.org to its own IP address, since that is where the broker is running. Note that you could use the Windows MQTTX utility as the subscriber as well. The command is:
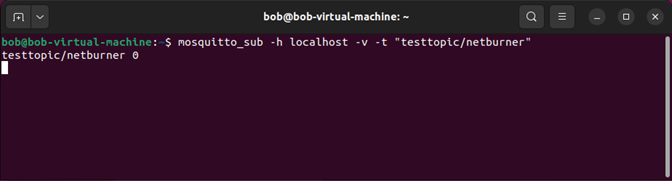
mosquitto_sub -h localhost -v -t "testtopic/netburner"or
mosquitto_sub -h 192.168.1.52 -v -t "testtopic/netburner"Subscribing to the Topic
Since the NetBurner will only publish on a change in the integer value, now that I have subscribed I push the reset button to reboot and send out the initial value of 0:
That’s it! We now have multiple utilities to publish and subscribe, a local and Internet broker to test with, and an embedded device that can publish to either. You can read the ReadMe for the various MQTT examples in your NNDK for more ideas and usage details, or browse the MQTT library documentation (click on the MQTT namespace to view most of the info.)
Tips
Here are some of the problems I ran into:
- I thought my Linux firewall was disabled, but it was not. So no incoming TCP connection requests were getting through.
- There is a MQTT Broker configuration file located at /etc/mosquitto/mosquitto.conf. I had to add these lines in order to reach the broker:
- allow_anonymous true
- listener 1883