

NetBurner’s Discover Server is a web based application that can be used to locate and provide information on NetBurner devices running on a local network. These devices must be running applications built using NNDK 3.x. Being able to find these devices quickly from any platform without installing any additional software makes configuring and tracking these devices substantially easier than is otherwise the case.

However, there are cases where you might not want NetBurner’s label on your products, or you might want to changes its native behavior in some way. It’s okay, we understand. To help with this, we’ve made the Discover Server source code available to customers so that they can customize and run their own personalized versions (contact us at [email protected] for more information).
The Discover Server is designed to be run using several of Amazon’s Web Services. This document will take you through the process of setting these up and configuring them so that you can build and run your own Discover Server. Please note that an AWS account will be required, and running a Discover Server will incur service charges. The following services are used:
- Elastic Beanstalk running NodeJS
- DynamoDB
- IAM
- CloudWatch
- VPC
Setting Up the AWS Services
Create a Virtual Private Cloud (VPC)
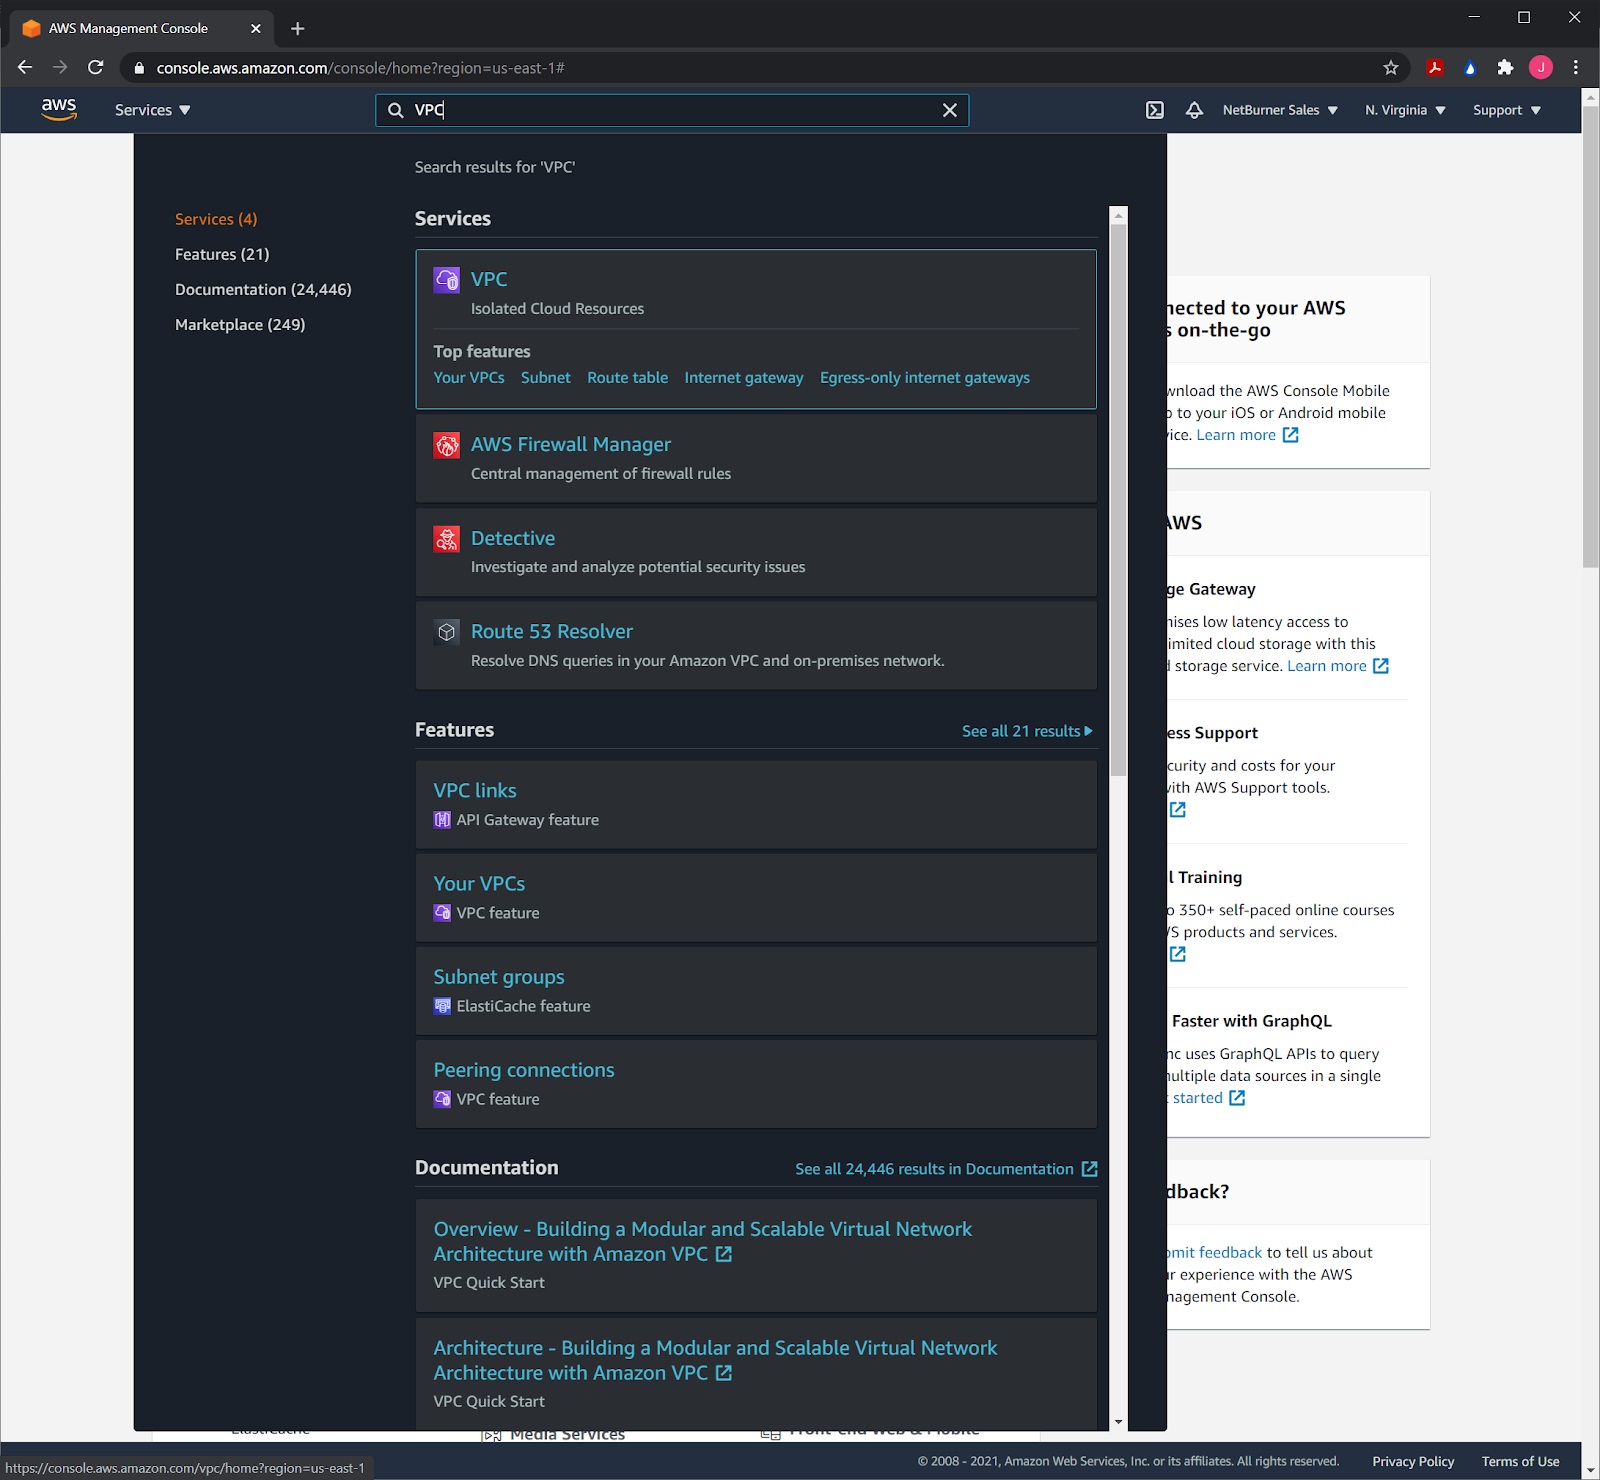
Amazon’s VPC allows us to create a virtual network that our other services will operate in. To create a VPC, first log into the Amazon Console. From there, search for the VPC service in the search bar located at the top of the dashboard, and then click on it.
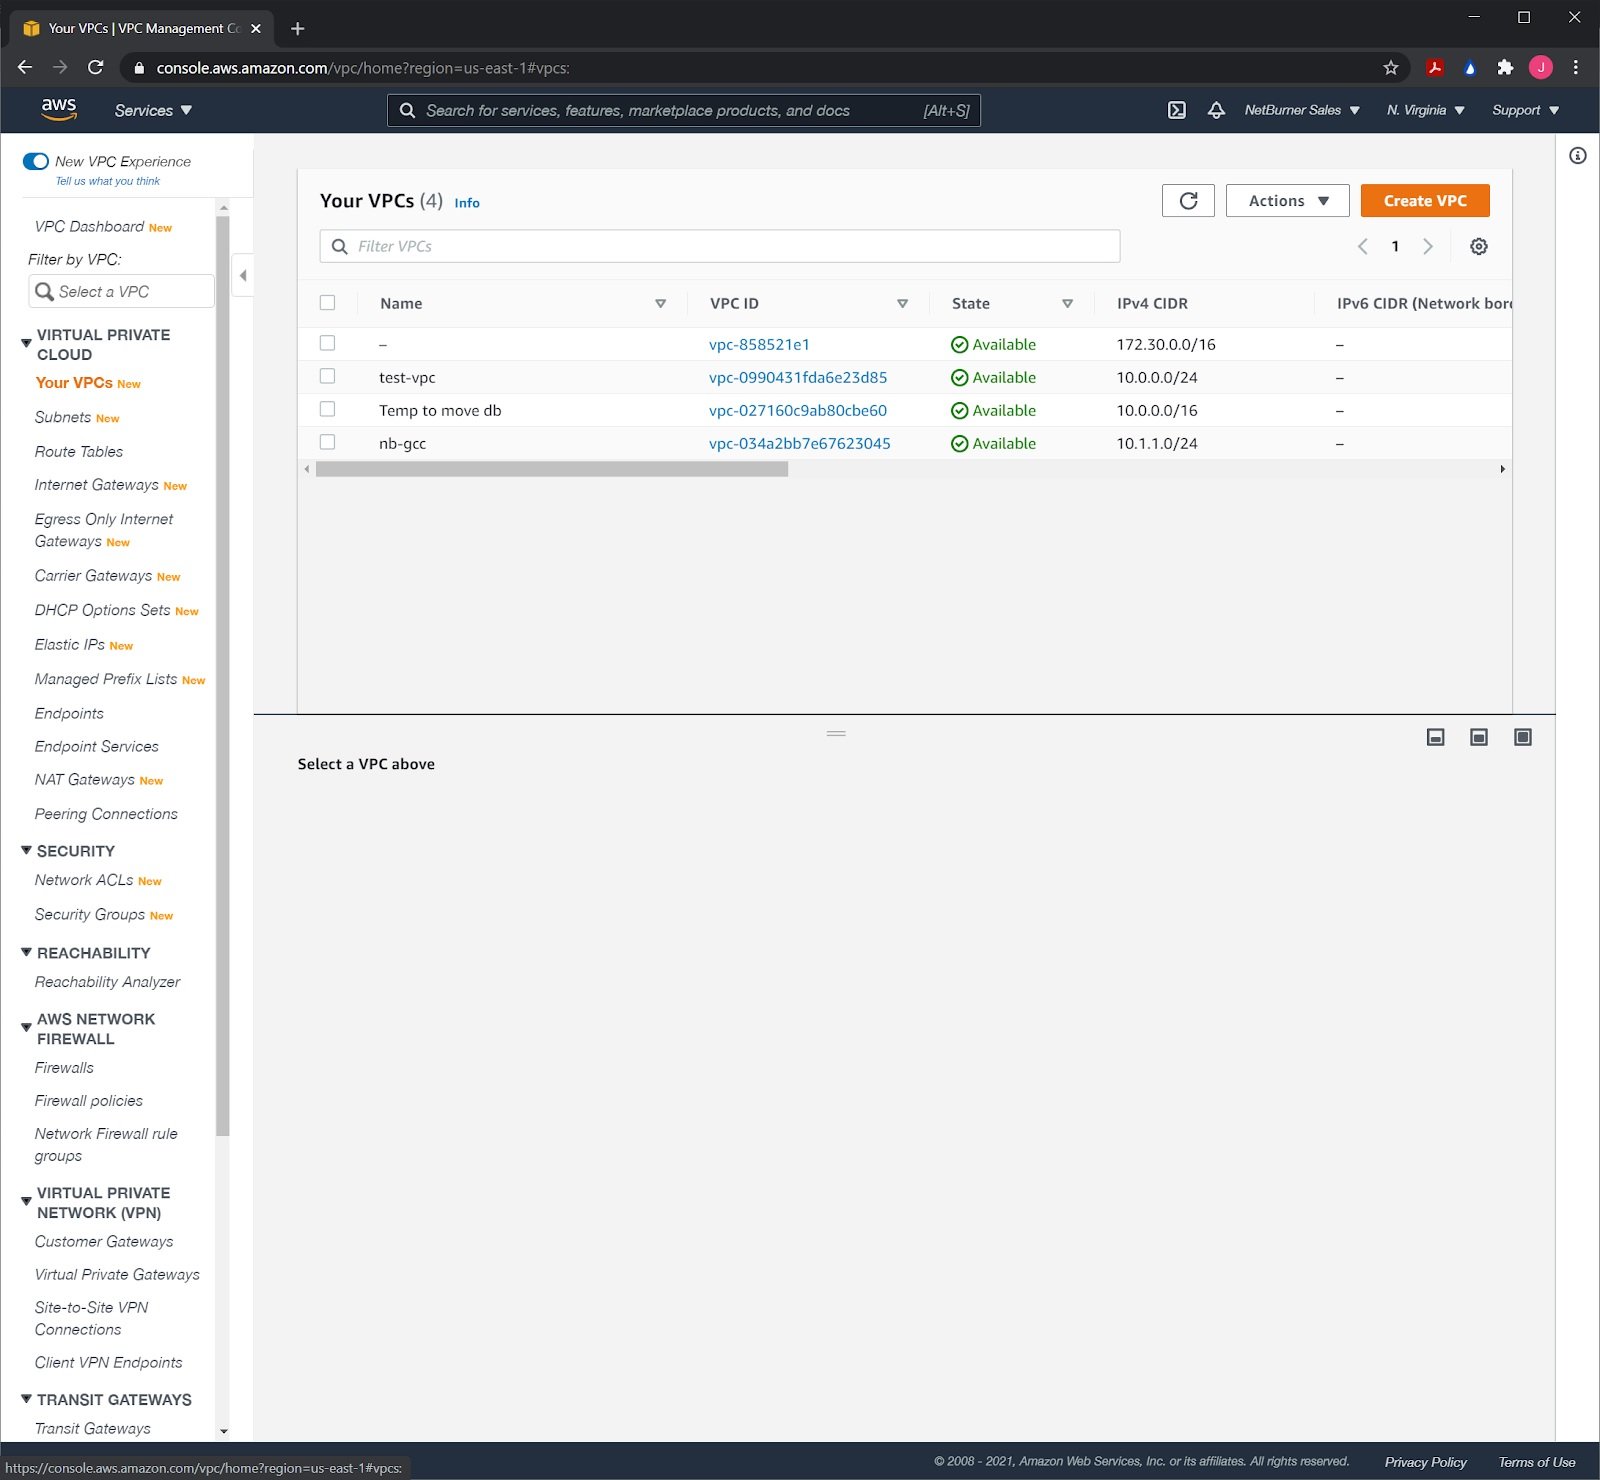
Click on the “Your VPCs” link on the left hand sidebar menu.
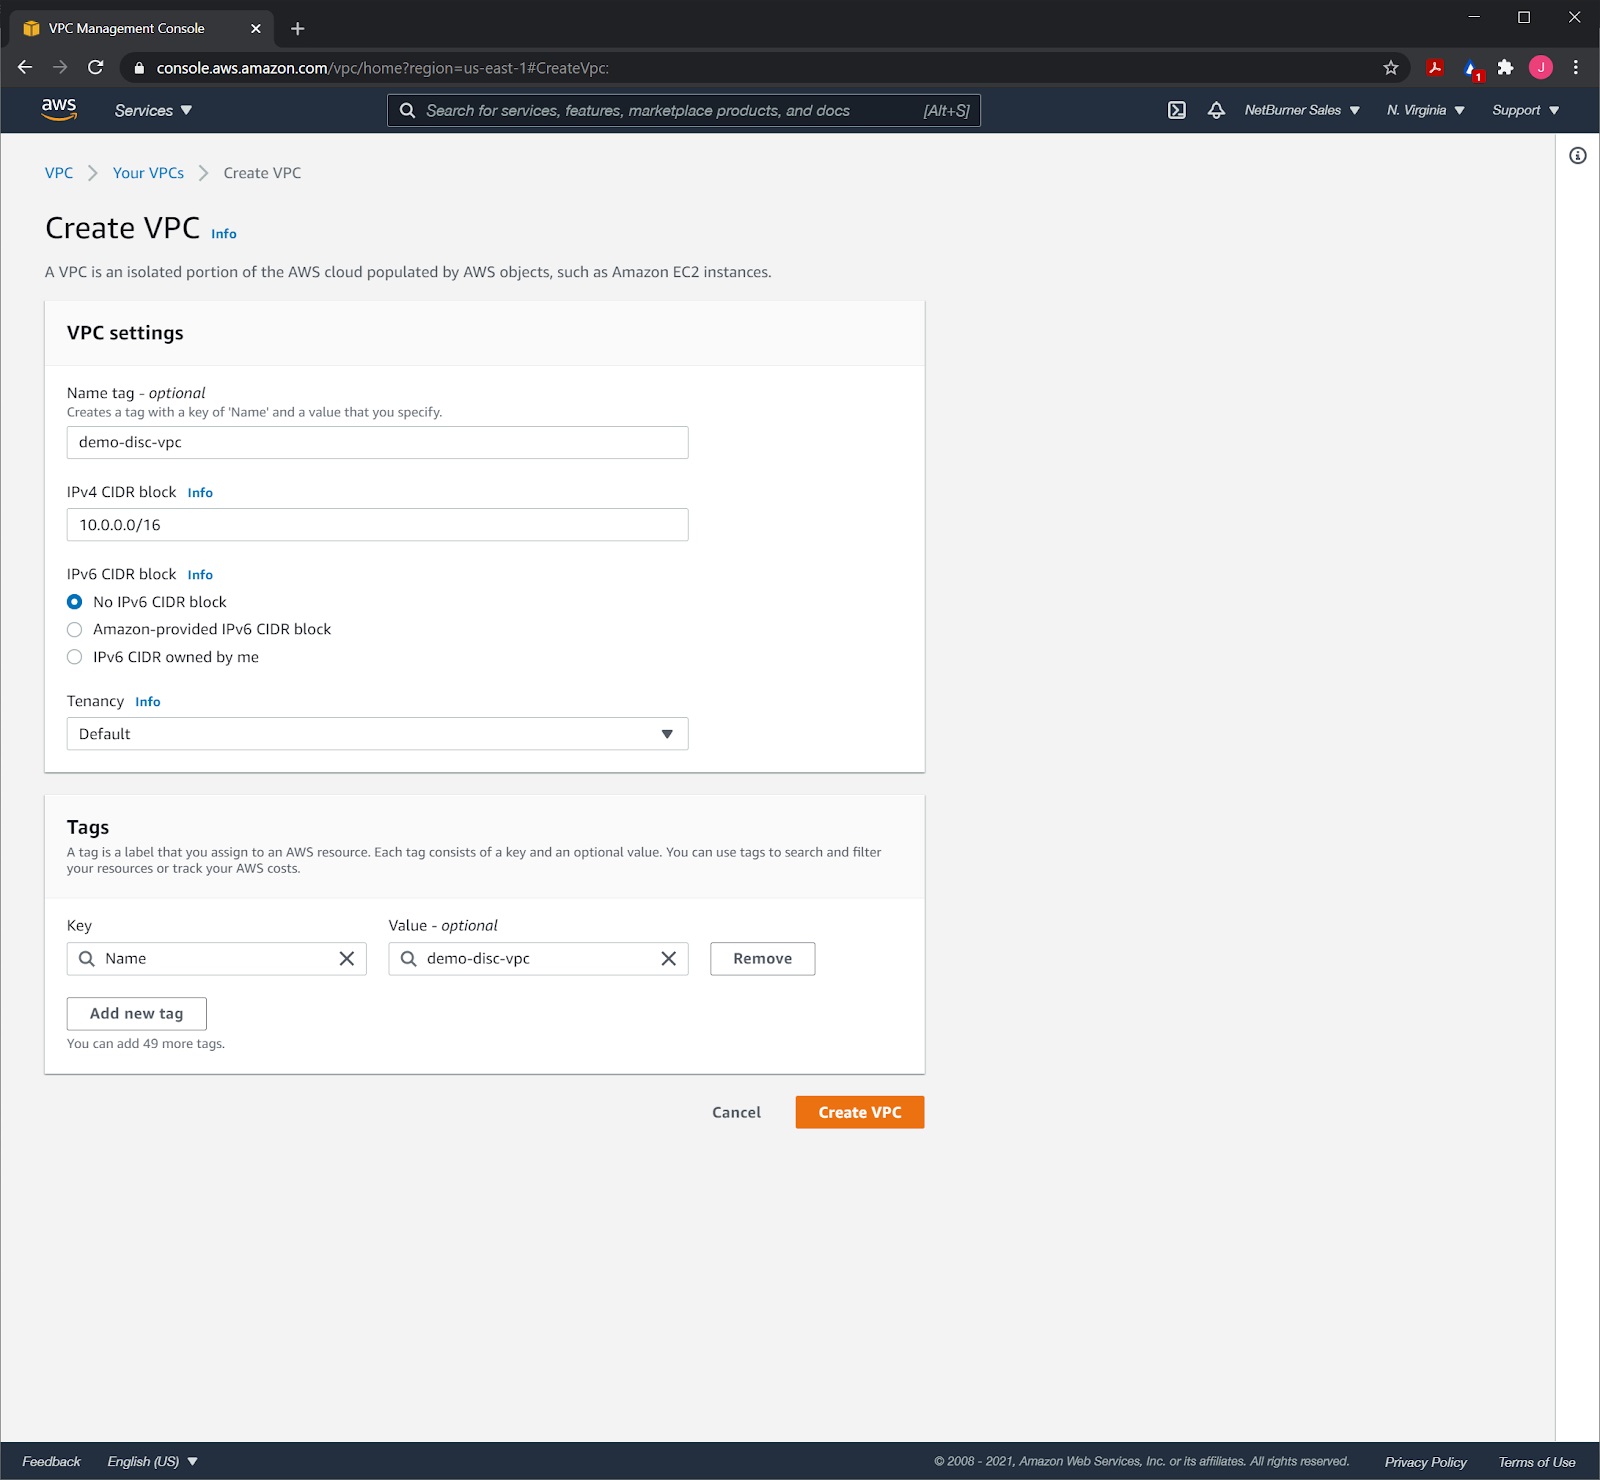
Click on the “Create VPC” button at the top right. This should take you to the screen shown below.

Give it a name and a IPv4 CIDR block. This dictates the range of IP addresses that will be available. If you’re not sure what to put here, you can just put 10.0.0.0/16. Once everything is filled out, hit the “Create VPC” button.
Create a Route Table
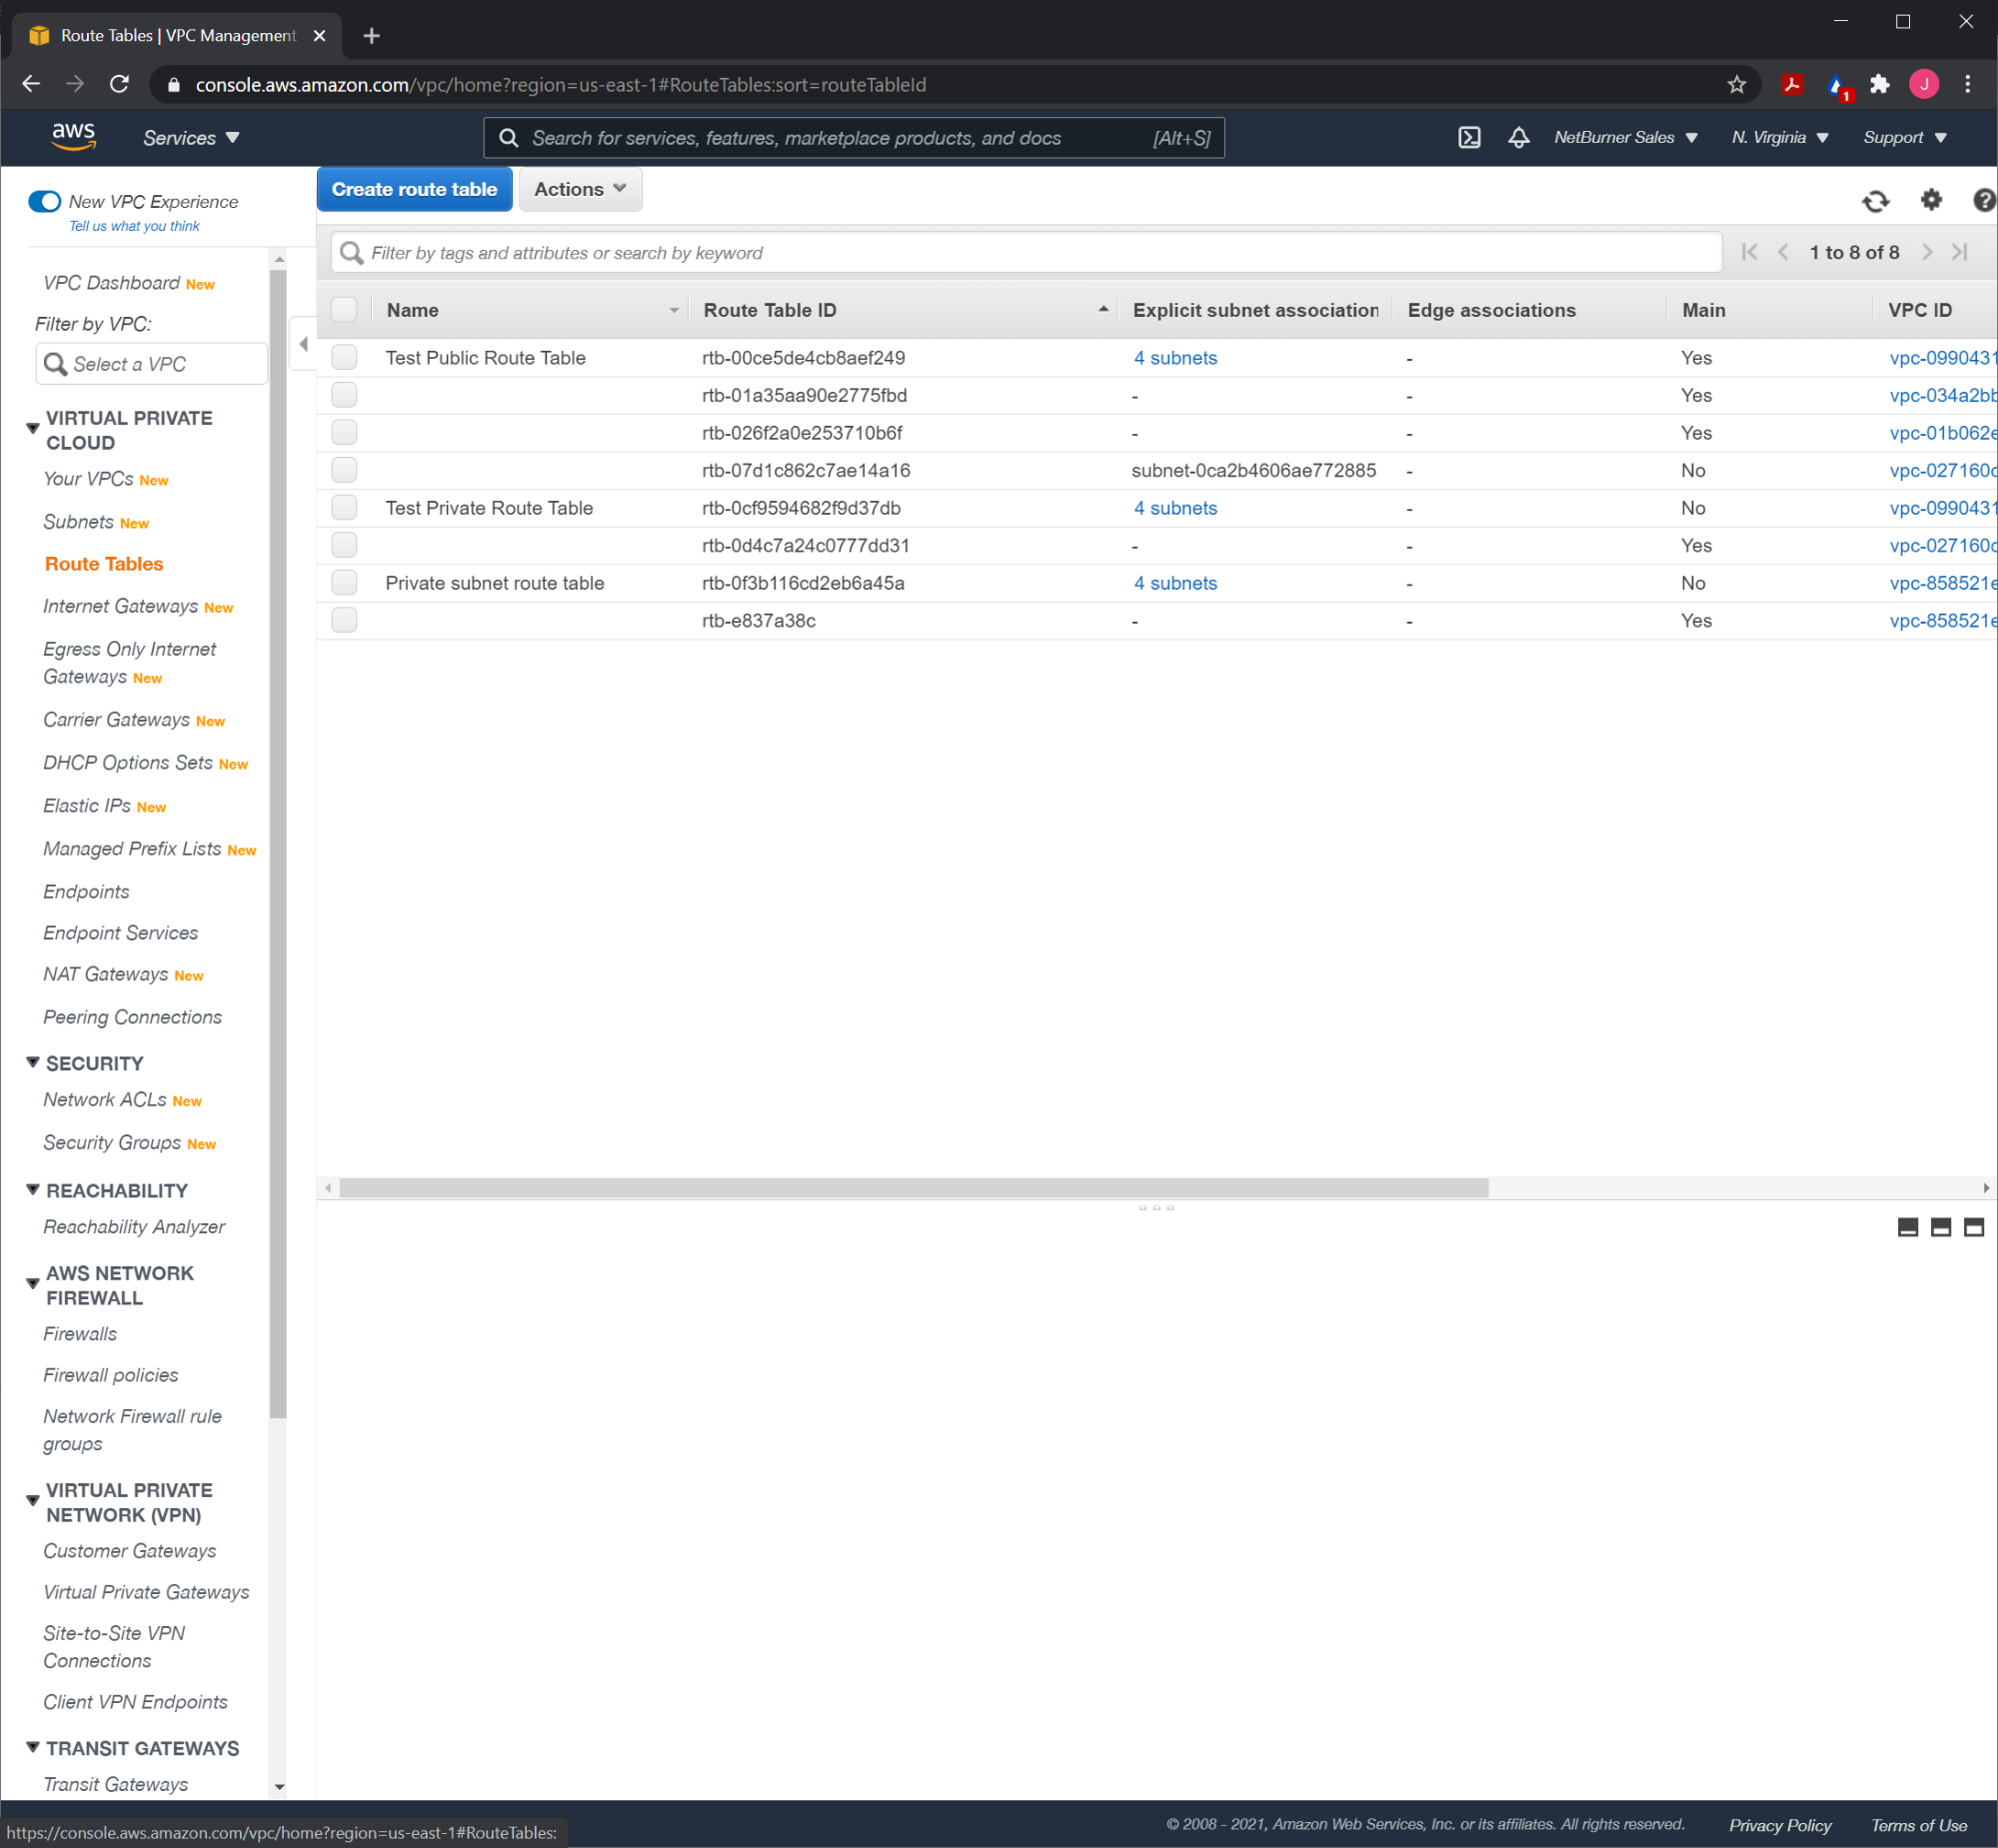
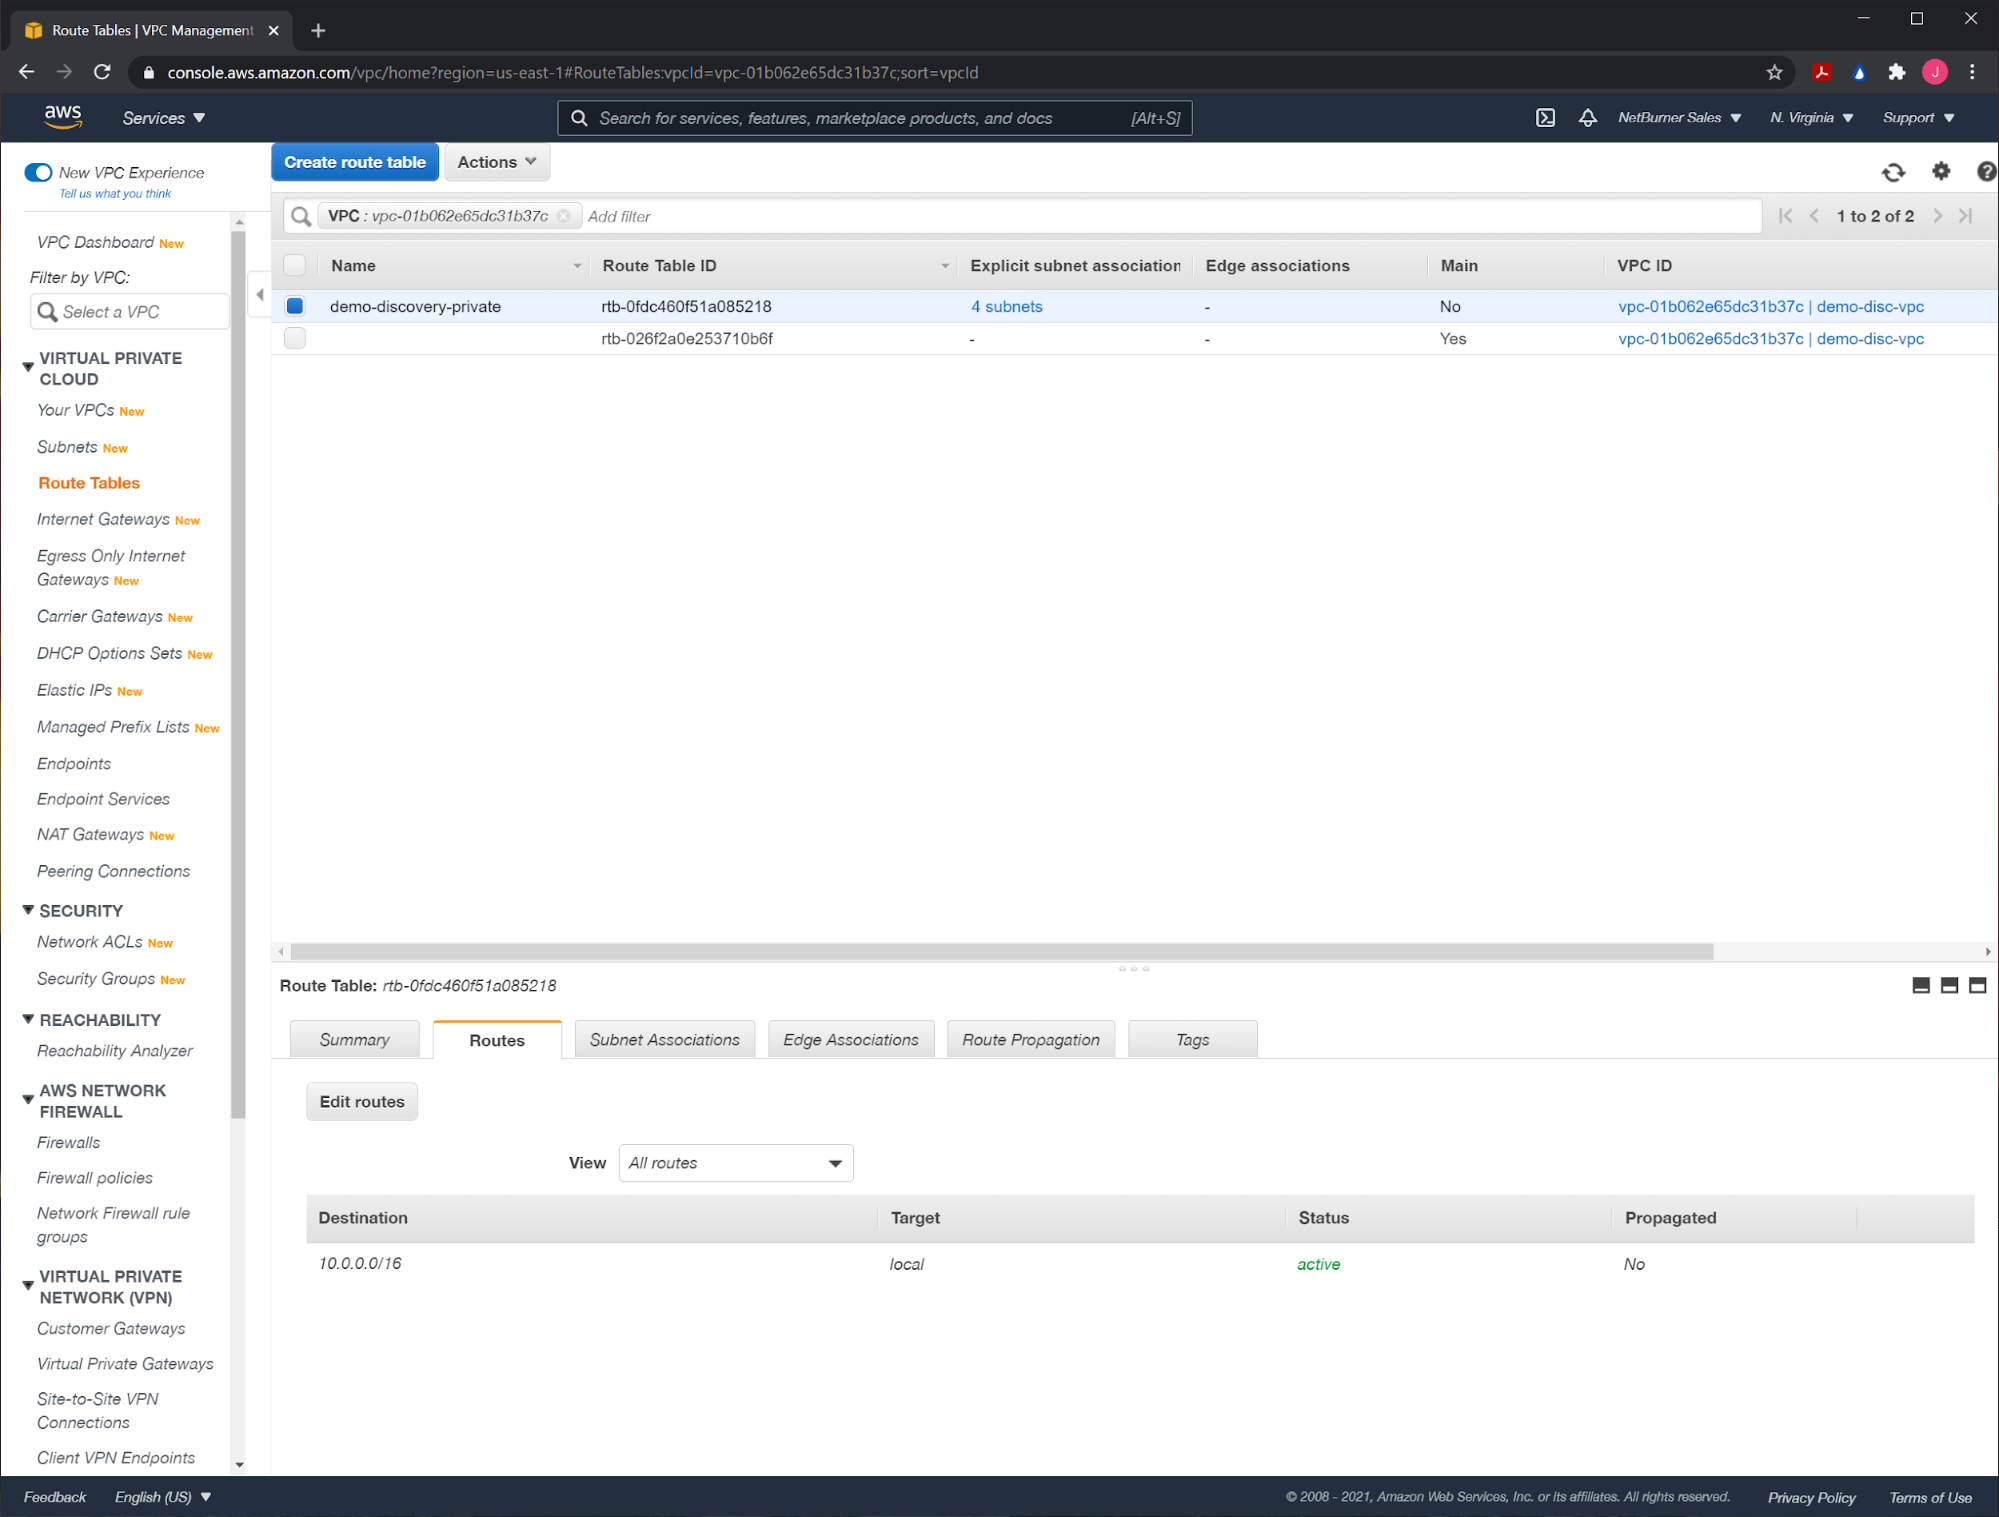
Next we need to create a route table. The route table will dictate how network traffic is directed between the resources associated with our VPC. A public one will be created automatically, but we’ll need to manually create a private one for our private subnets. Click on the “Route Tables” link on the left hand sidebar menu.
Click on the “Create route table” button at the top left of the page.
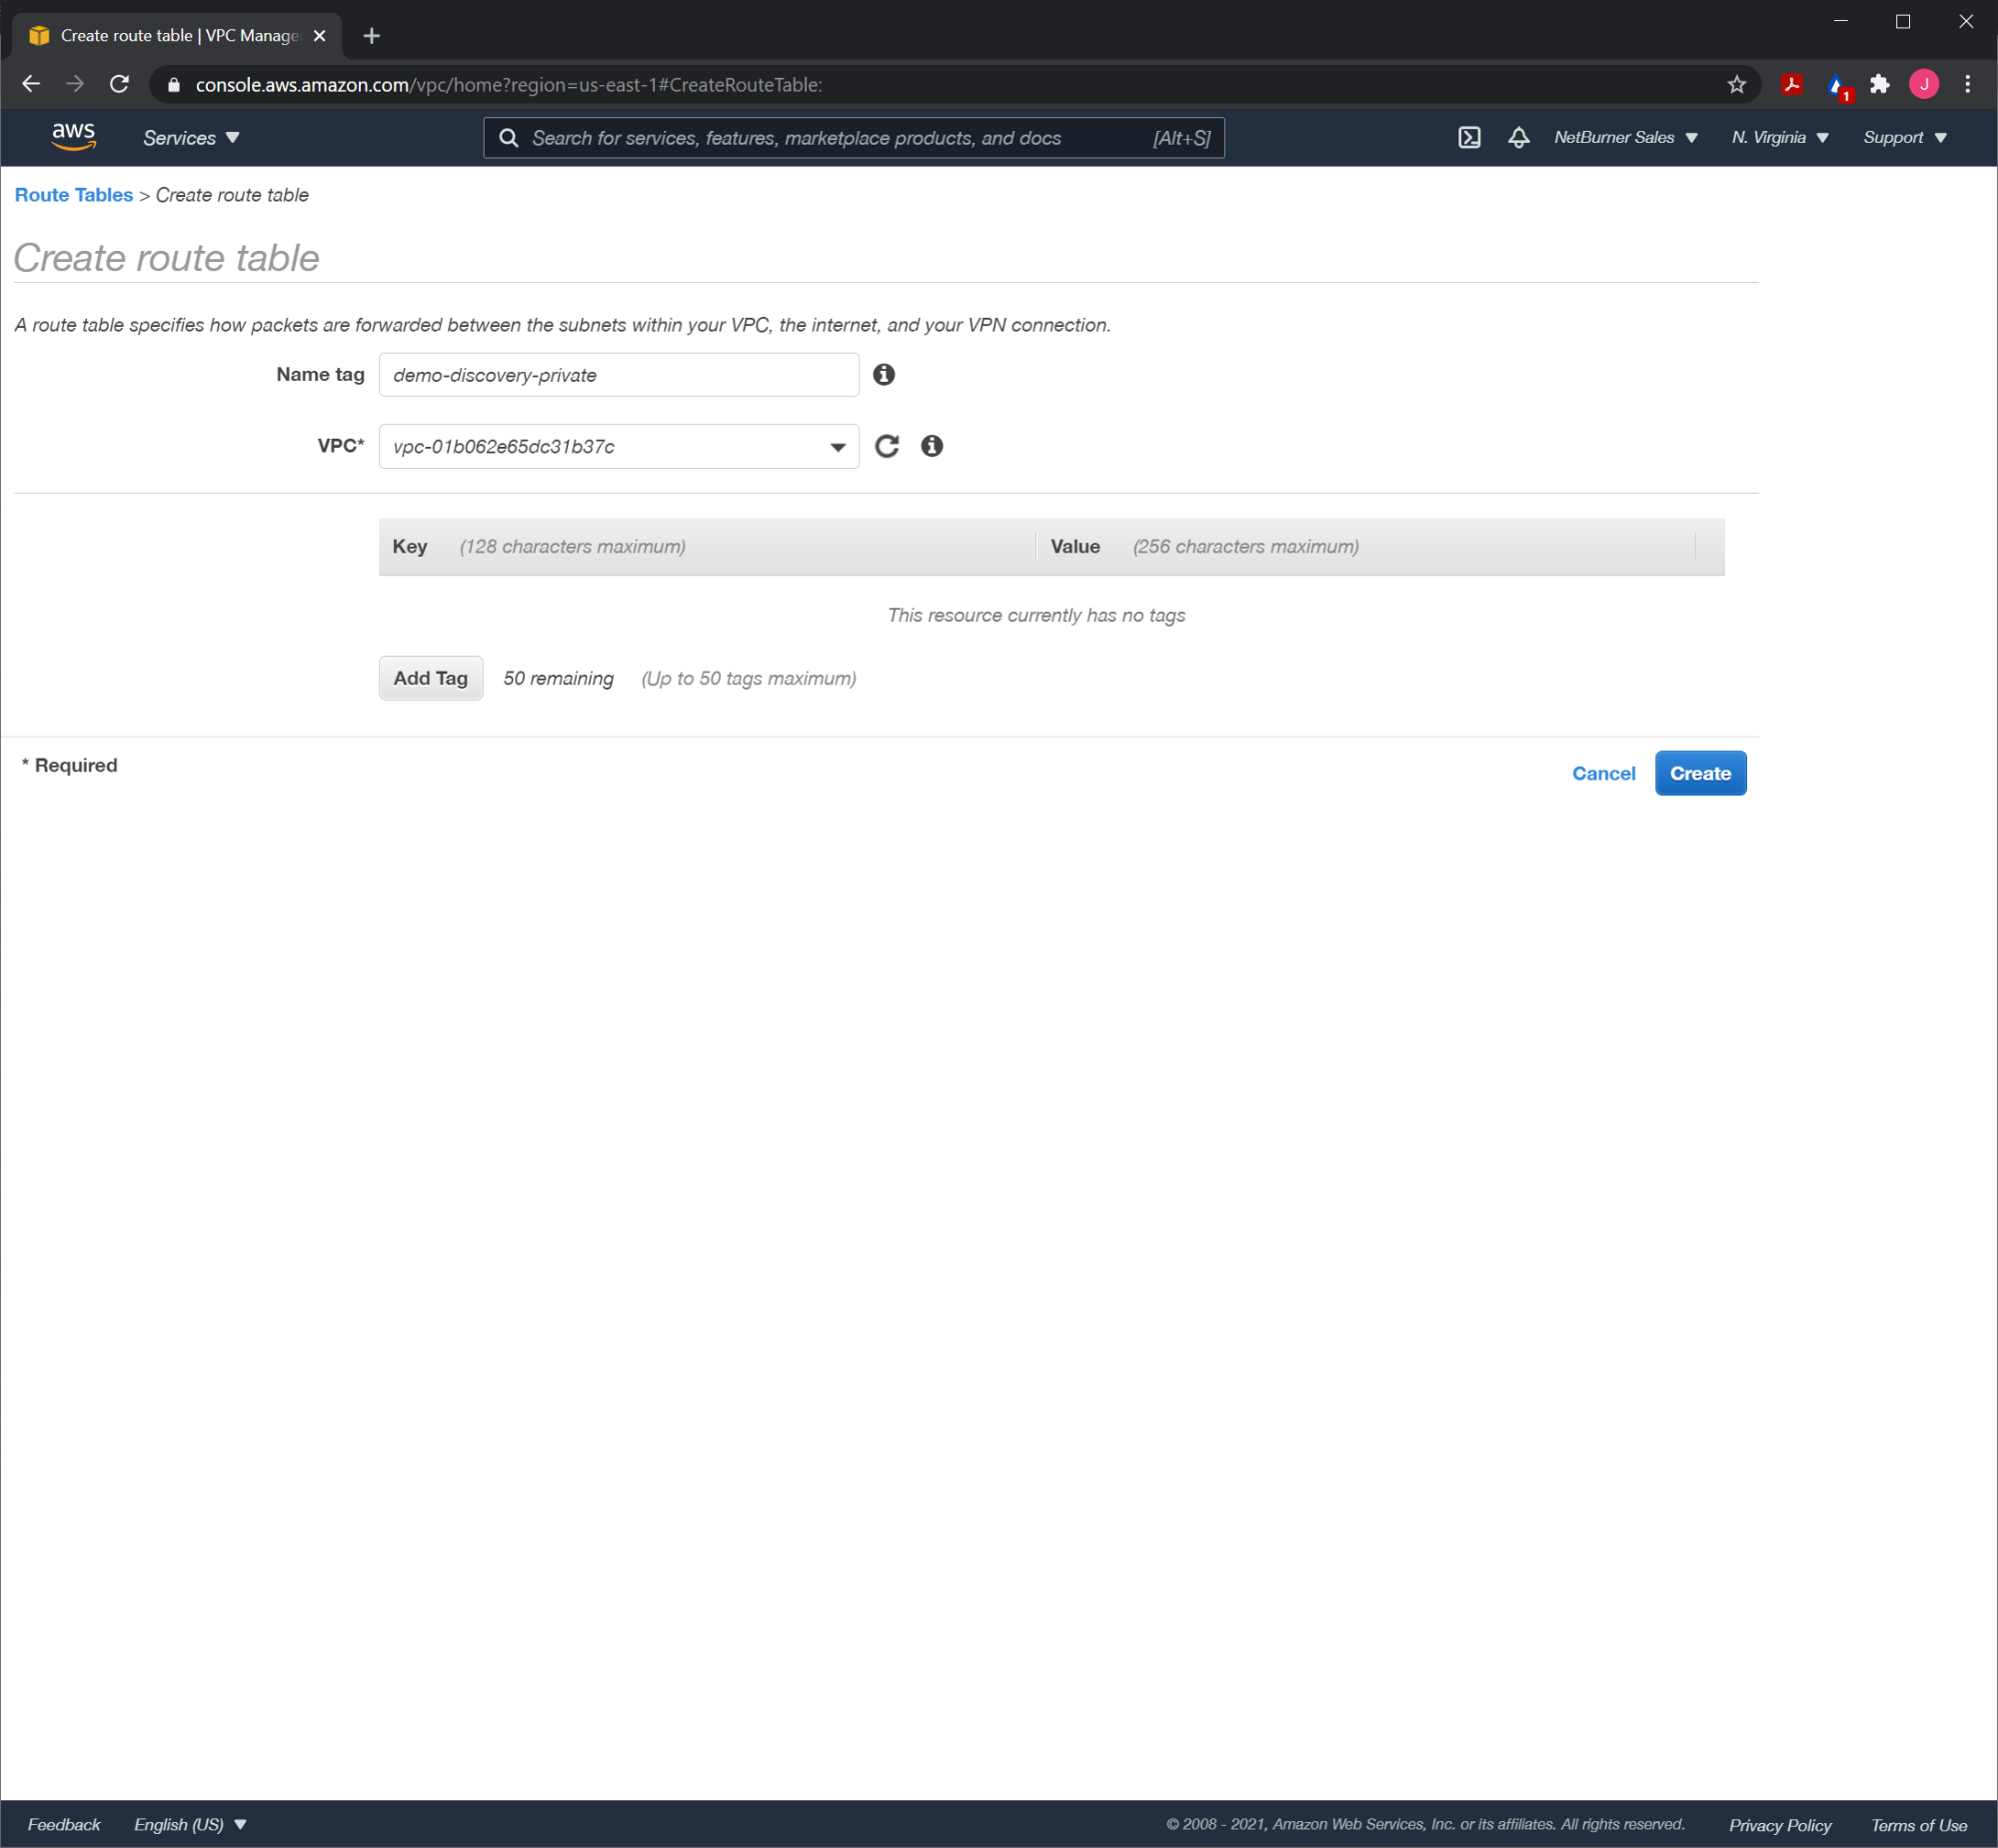
Add a name, and then select the VPC that we just created, then hit the “Create” button.
Create Subnets
We’re going to create eight subnets. These will determine what resourced are exposed to the internet, and which resources can only be accessed internally. In this case, we will create four public and four private subnets. The four public subnets should have unique availability zones selected, as should the private subnets. Select the “Subnets” menu option from the left hand sidebar menu.
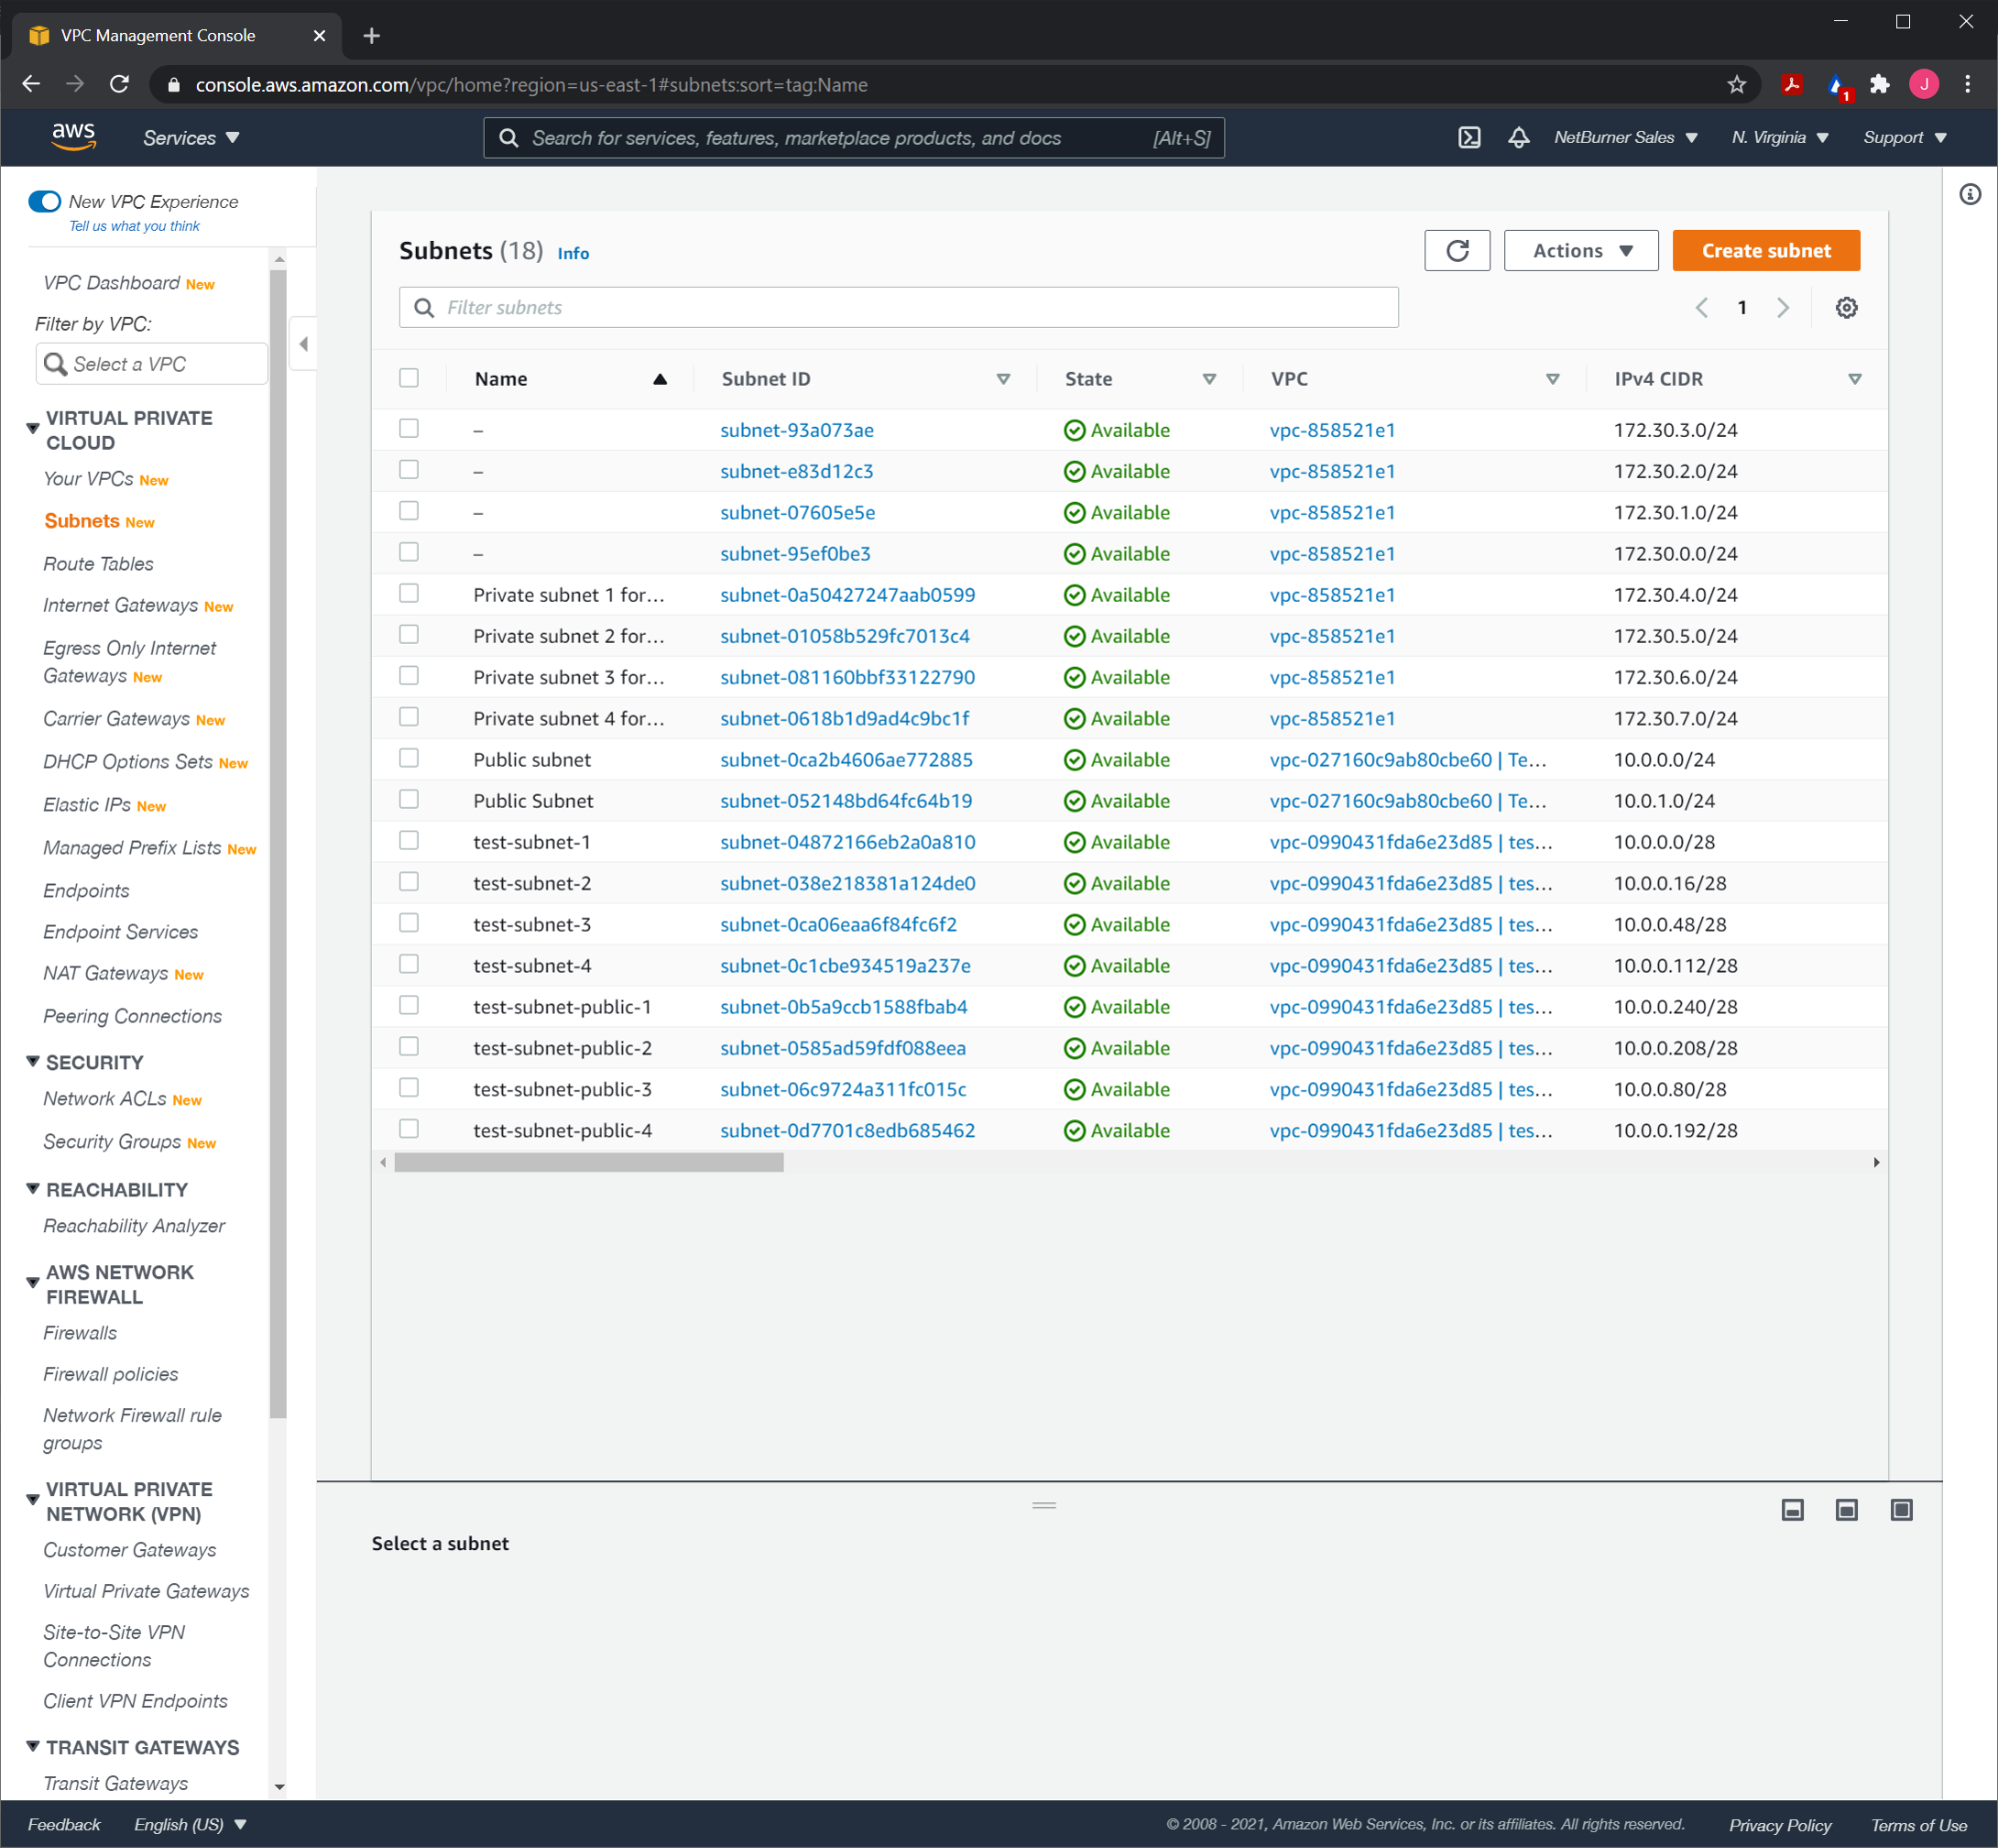
Click on the “Create subnet” button at the top right of the screen.
From the “Create subnet” screen, select the VPC that we just created in the previous step for the VPC ID.
For the subnet settings, provide a name, choose an availability zone, and then assign a IPv4 CIDR block. For the name, provide some indicator that you can use to identify it as either a private subnet.
If you’re having issues getting a correct IPv4 CIDR block, and used the value we listed above (10.0.0.0/16), you can use the following for each subnet:
- 10.0.0.0/24
- 10.0.1.0/24
- 10.0.2.0/24
- 10.0.3.0/24
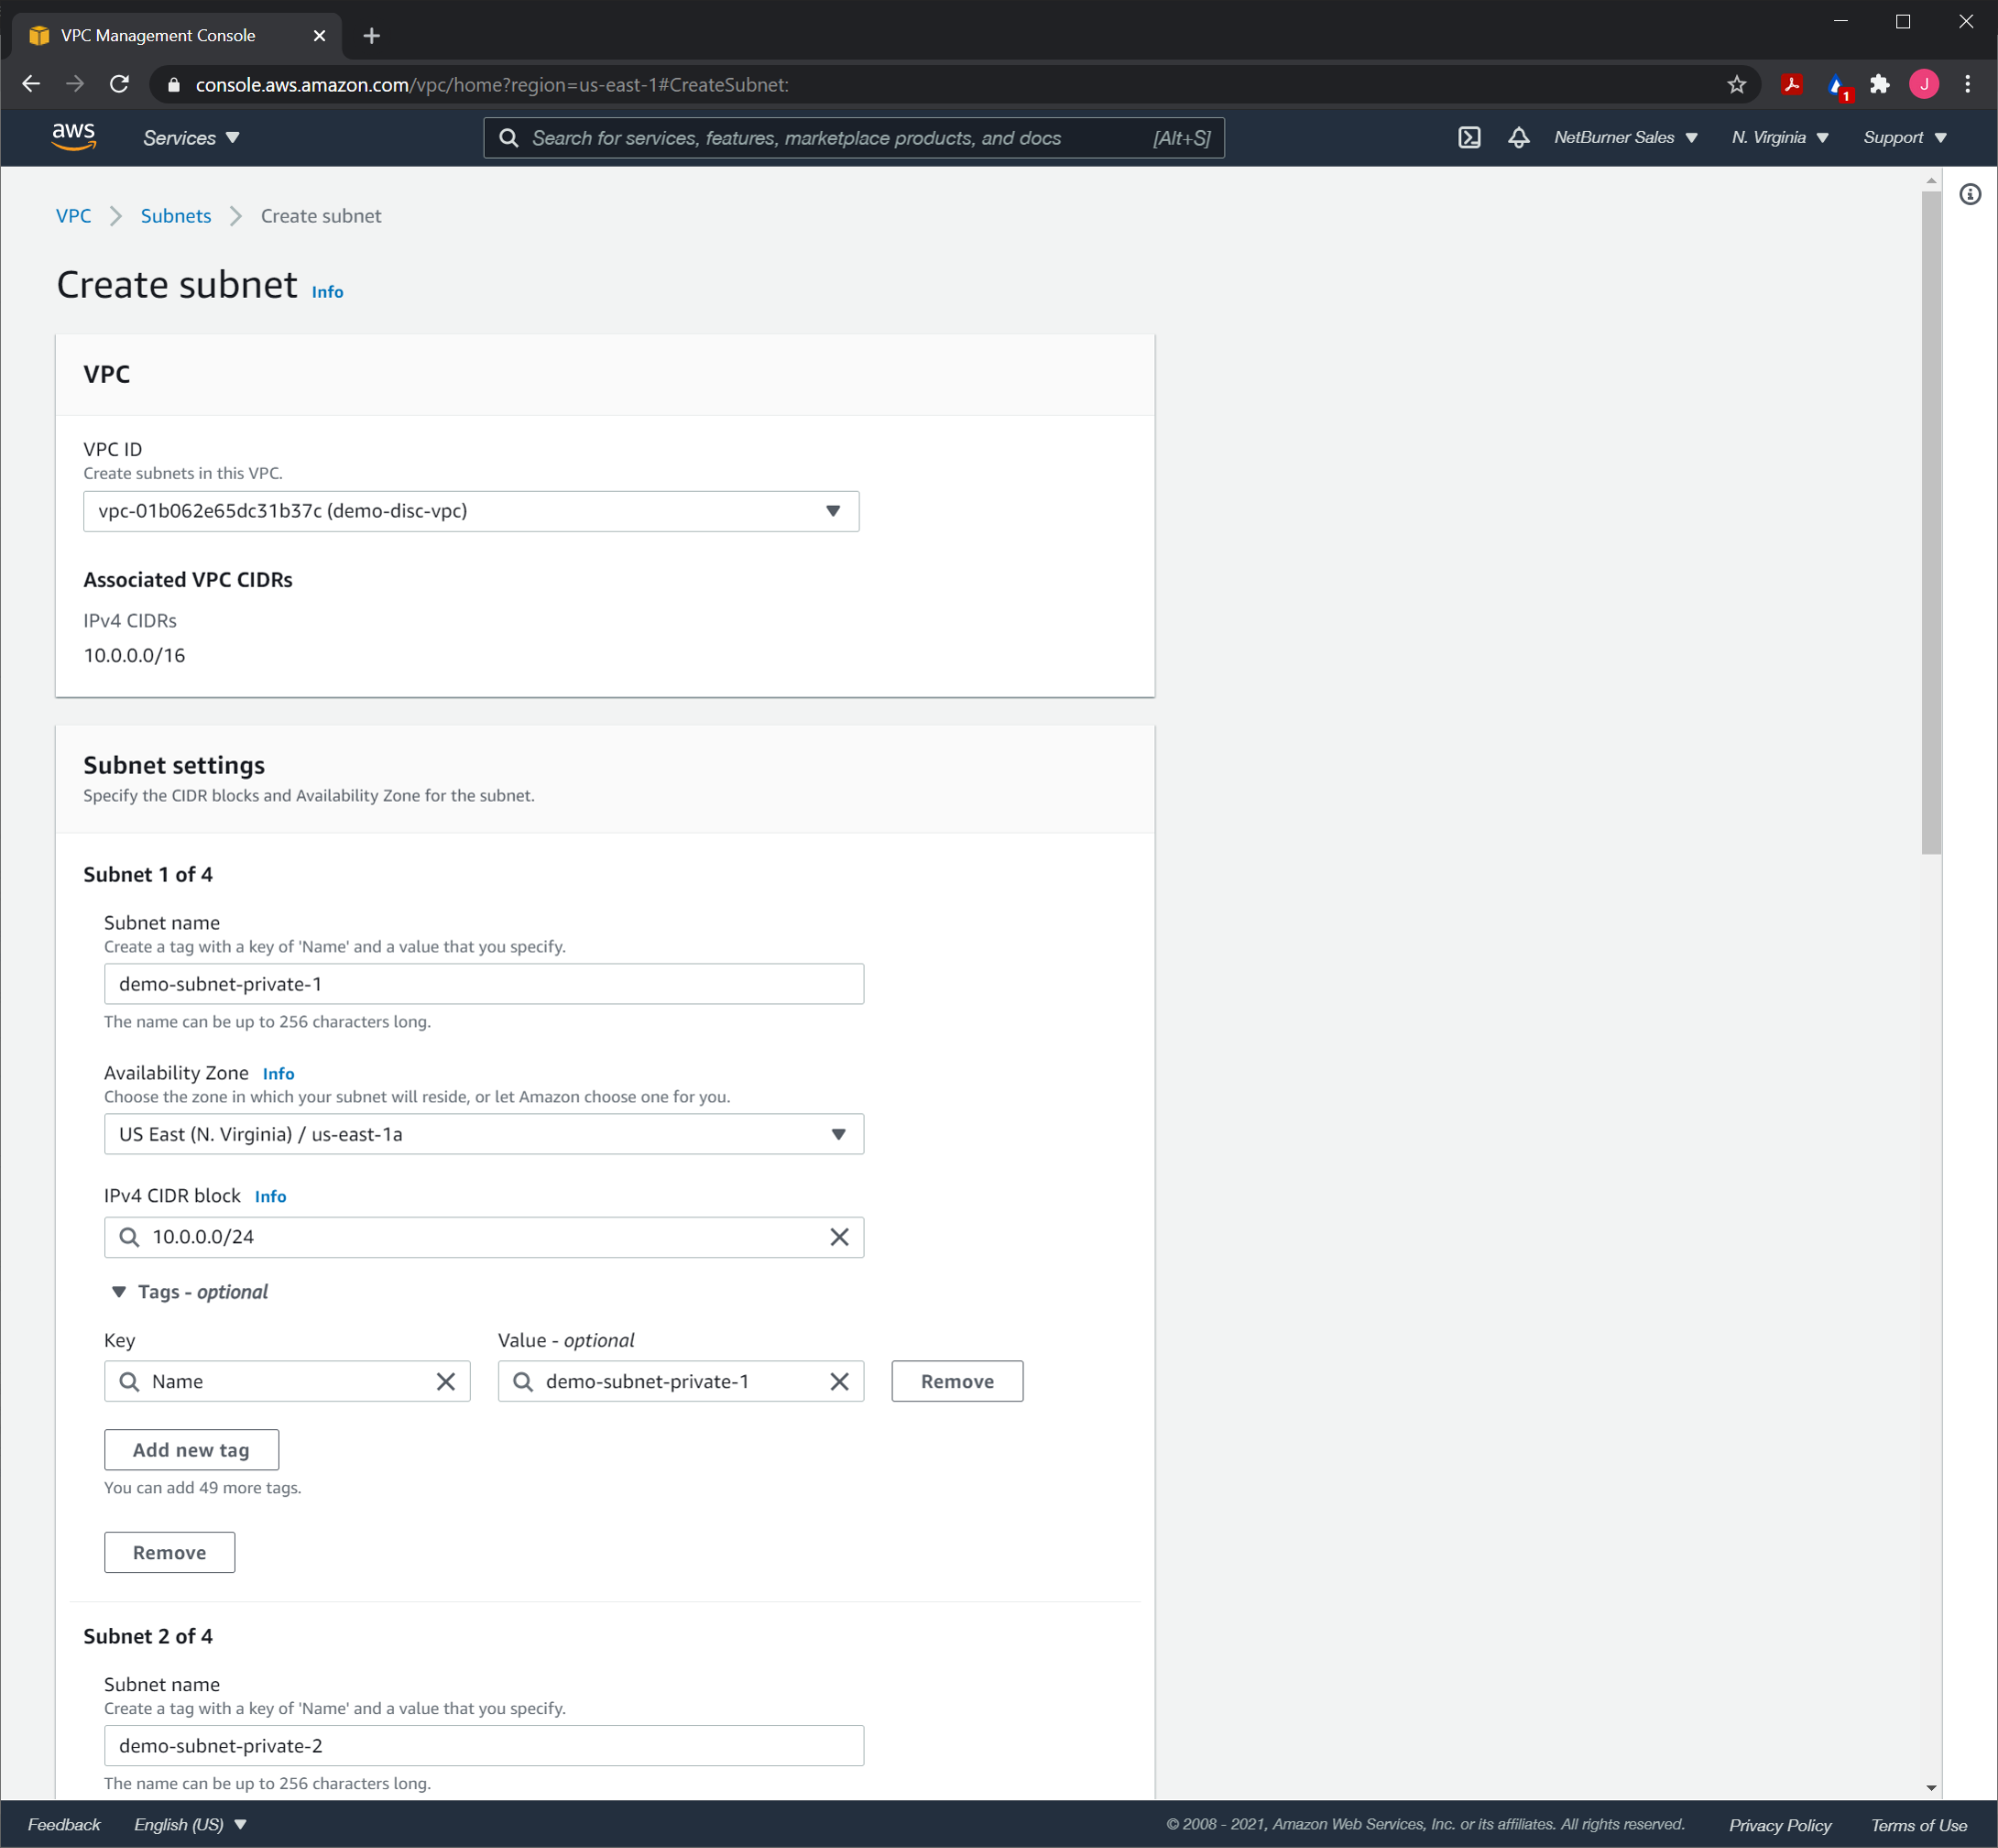
Hit the “Add new subnet” button at the bottom, and fill out the information for an additional subnet. Do this two more times, for a total of four subnets.
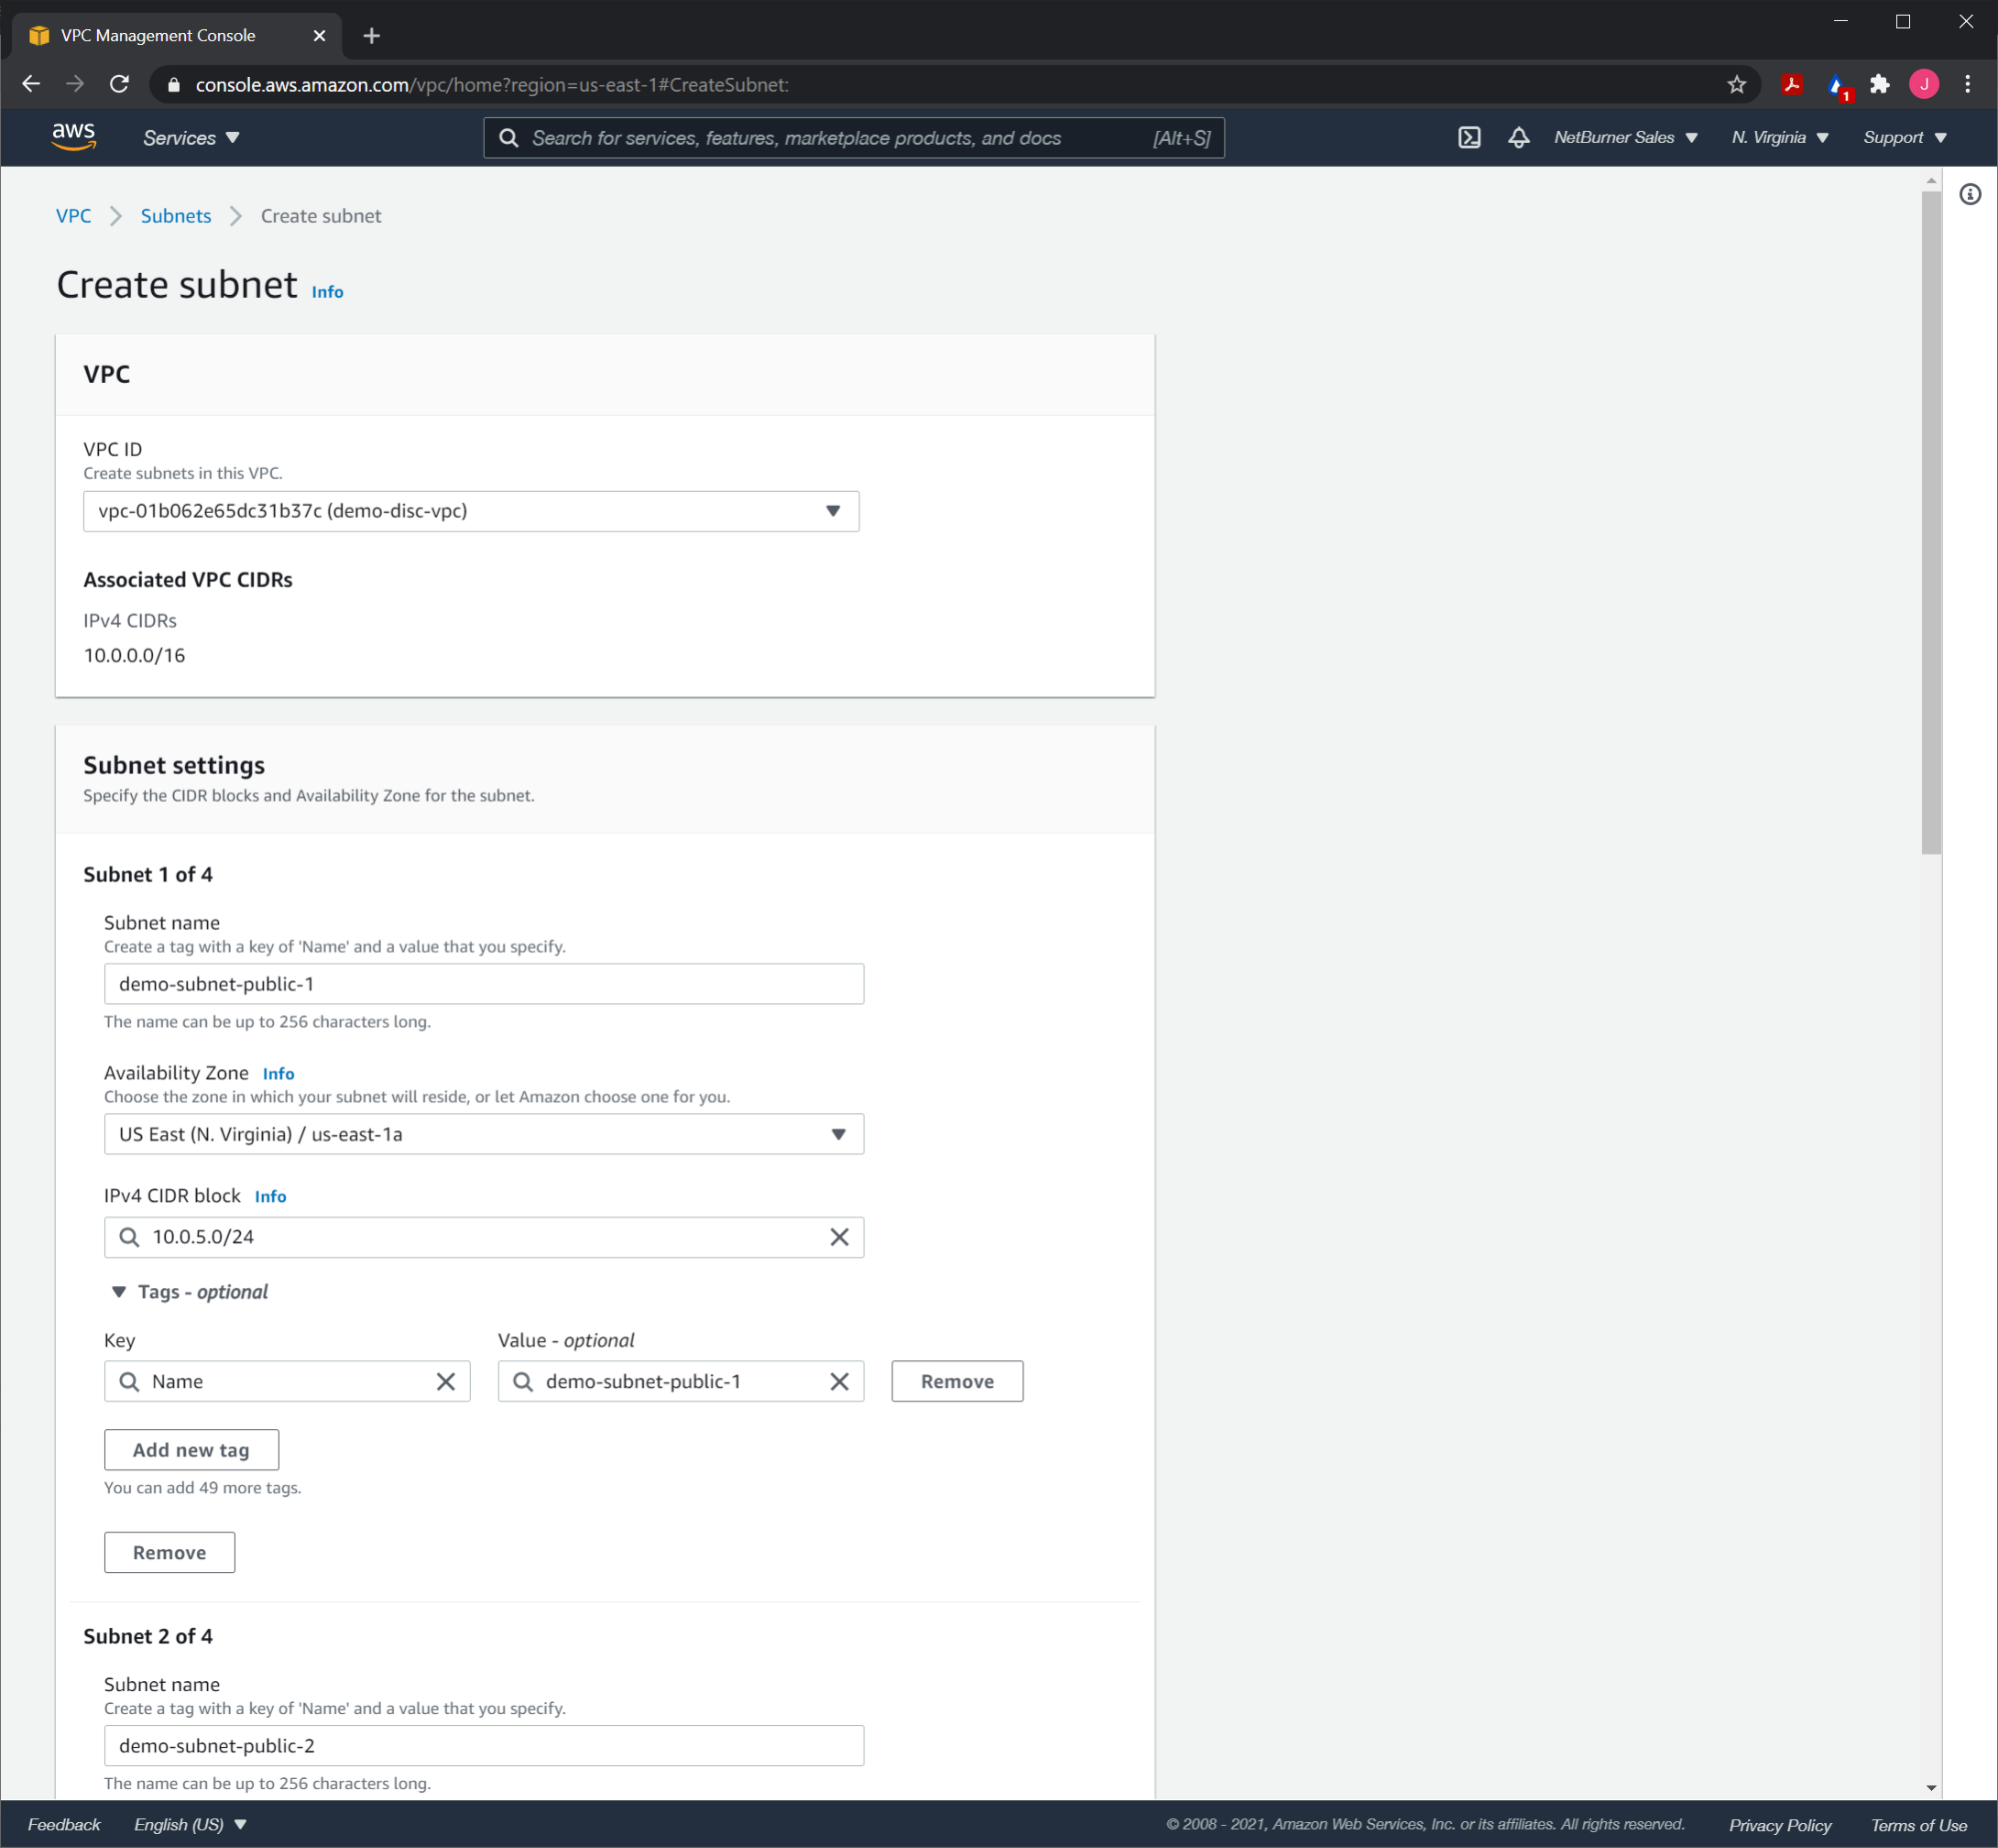
Repeat this process to create four public subnets. Again, make sure that each has a name that will help you identify them as a public subnet and a different availability zone from the other public subnets. You’ll also need to specify different IPv4 CIDR block values. If you used the CIDR block value we listed (10.0.0.0/16) when creating the VPC, and the CIDR block values we provided above for the private subnets, you can use the following for the public subnets:
- 10.0.5.0/24
- 10.0.6.0/24
- 10.0.7.0/24
- 10.0.8.0/24
From the main list of subnets we’ve created, check the box next to the one of the private subnets we’ve created. Click the button labeled “Actions▼”. From the submenu displayed, select, “Edit route table association”.
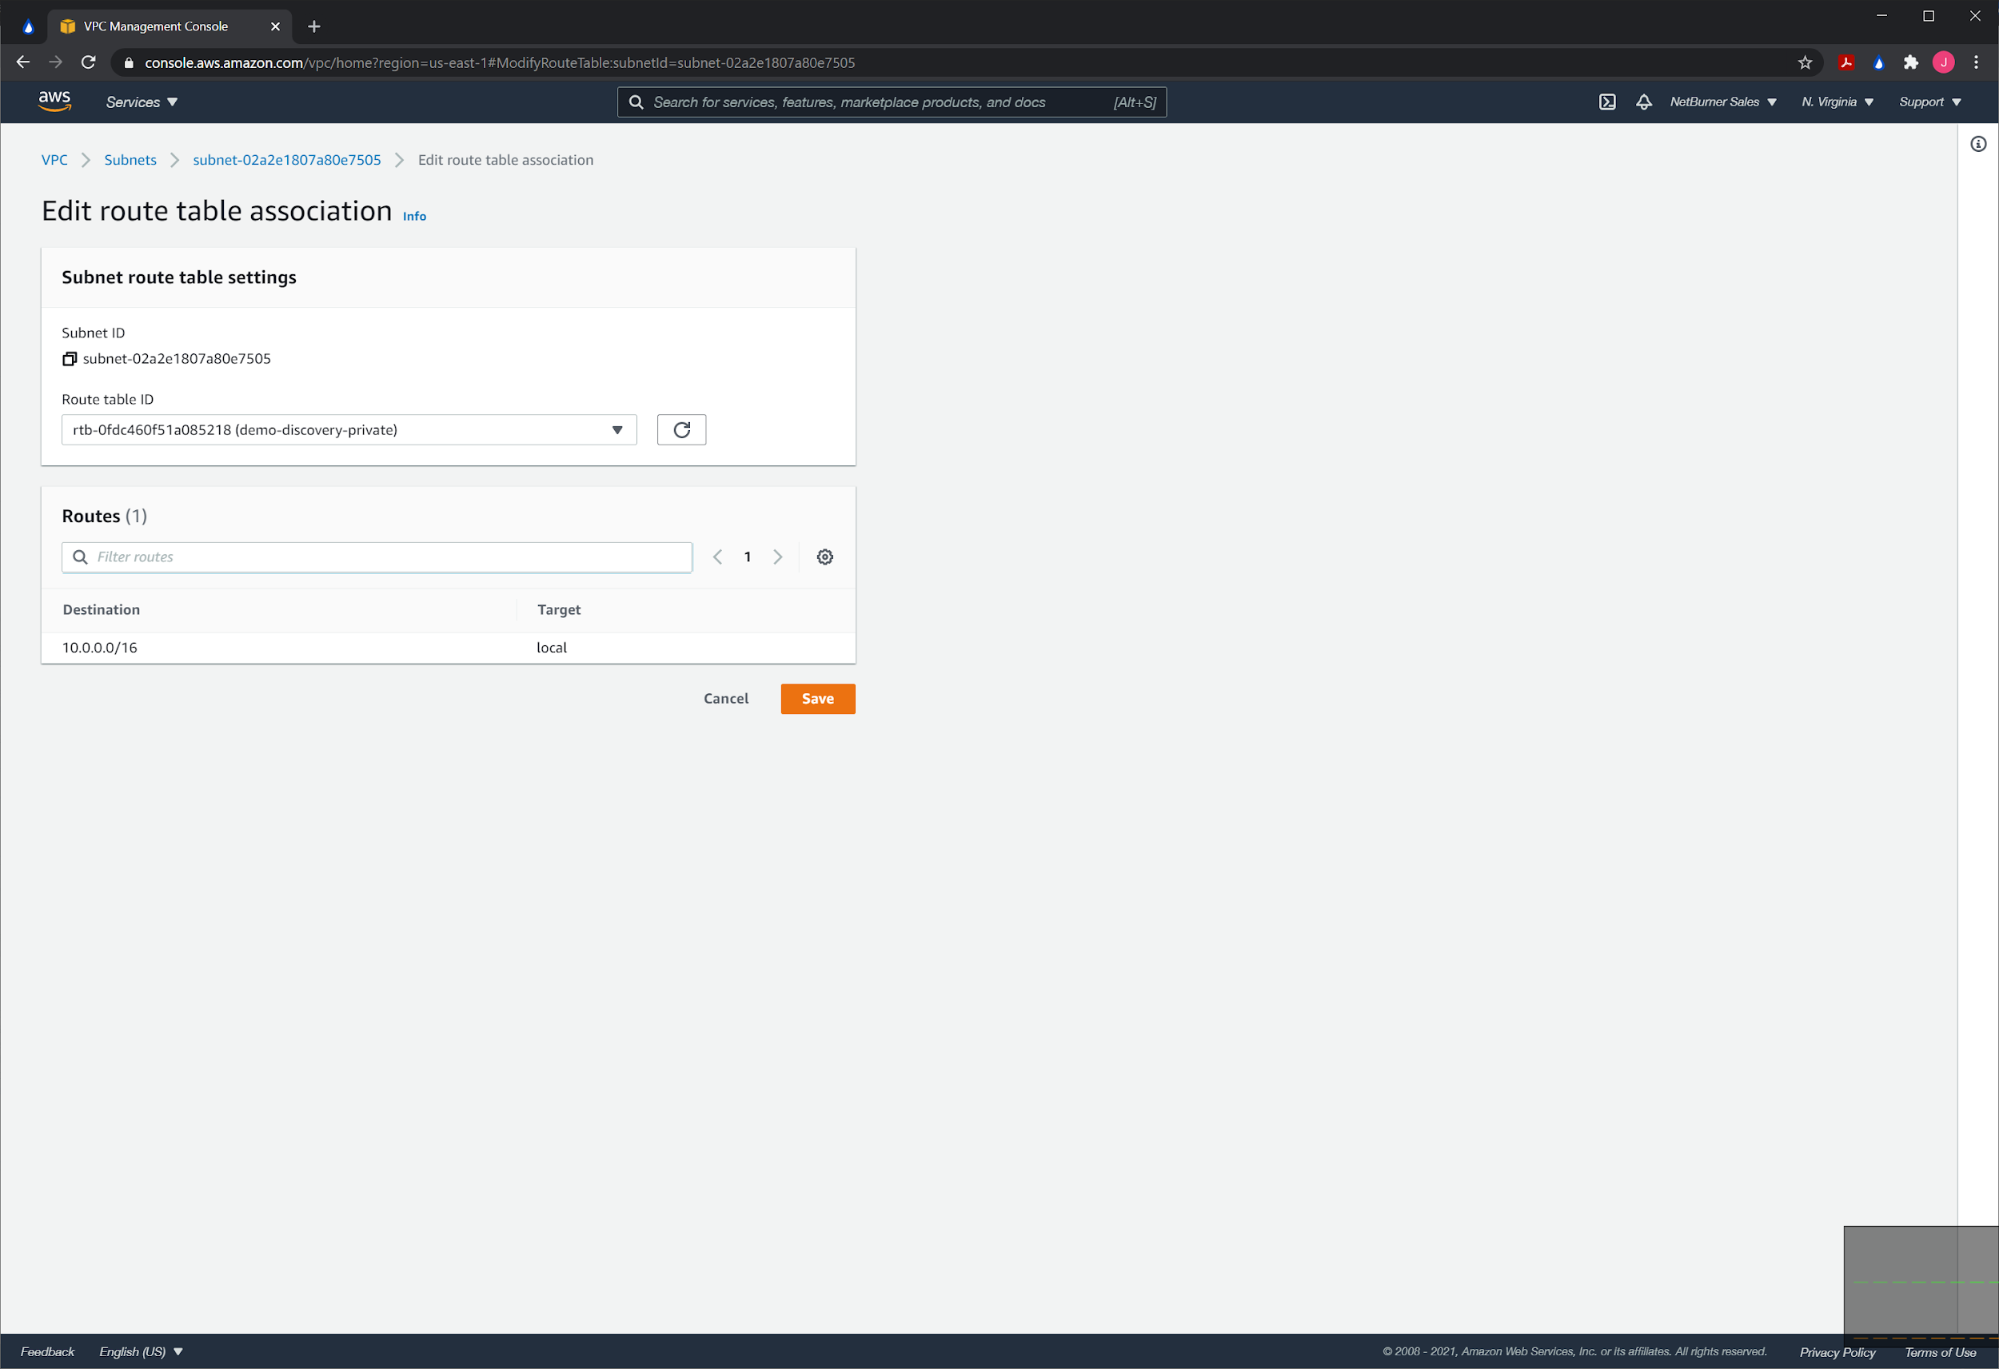
From the “Route table ID” dropdown in the “Subnet route table settings menu”, select the private route table that we created previously, then hit “Save”. Repeat this for the other three private subnets.
Note that the public subnets are already automatically associated with the public route table (which is set to the VPC’s main route table) by default, so no action there is needed. However, we do need to make another change to the public subnets. Select one, and then from the same ““Actions▼” button, select “Modify auto-assign IP settings”.
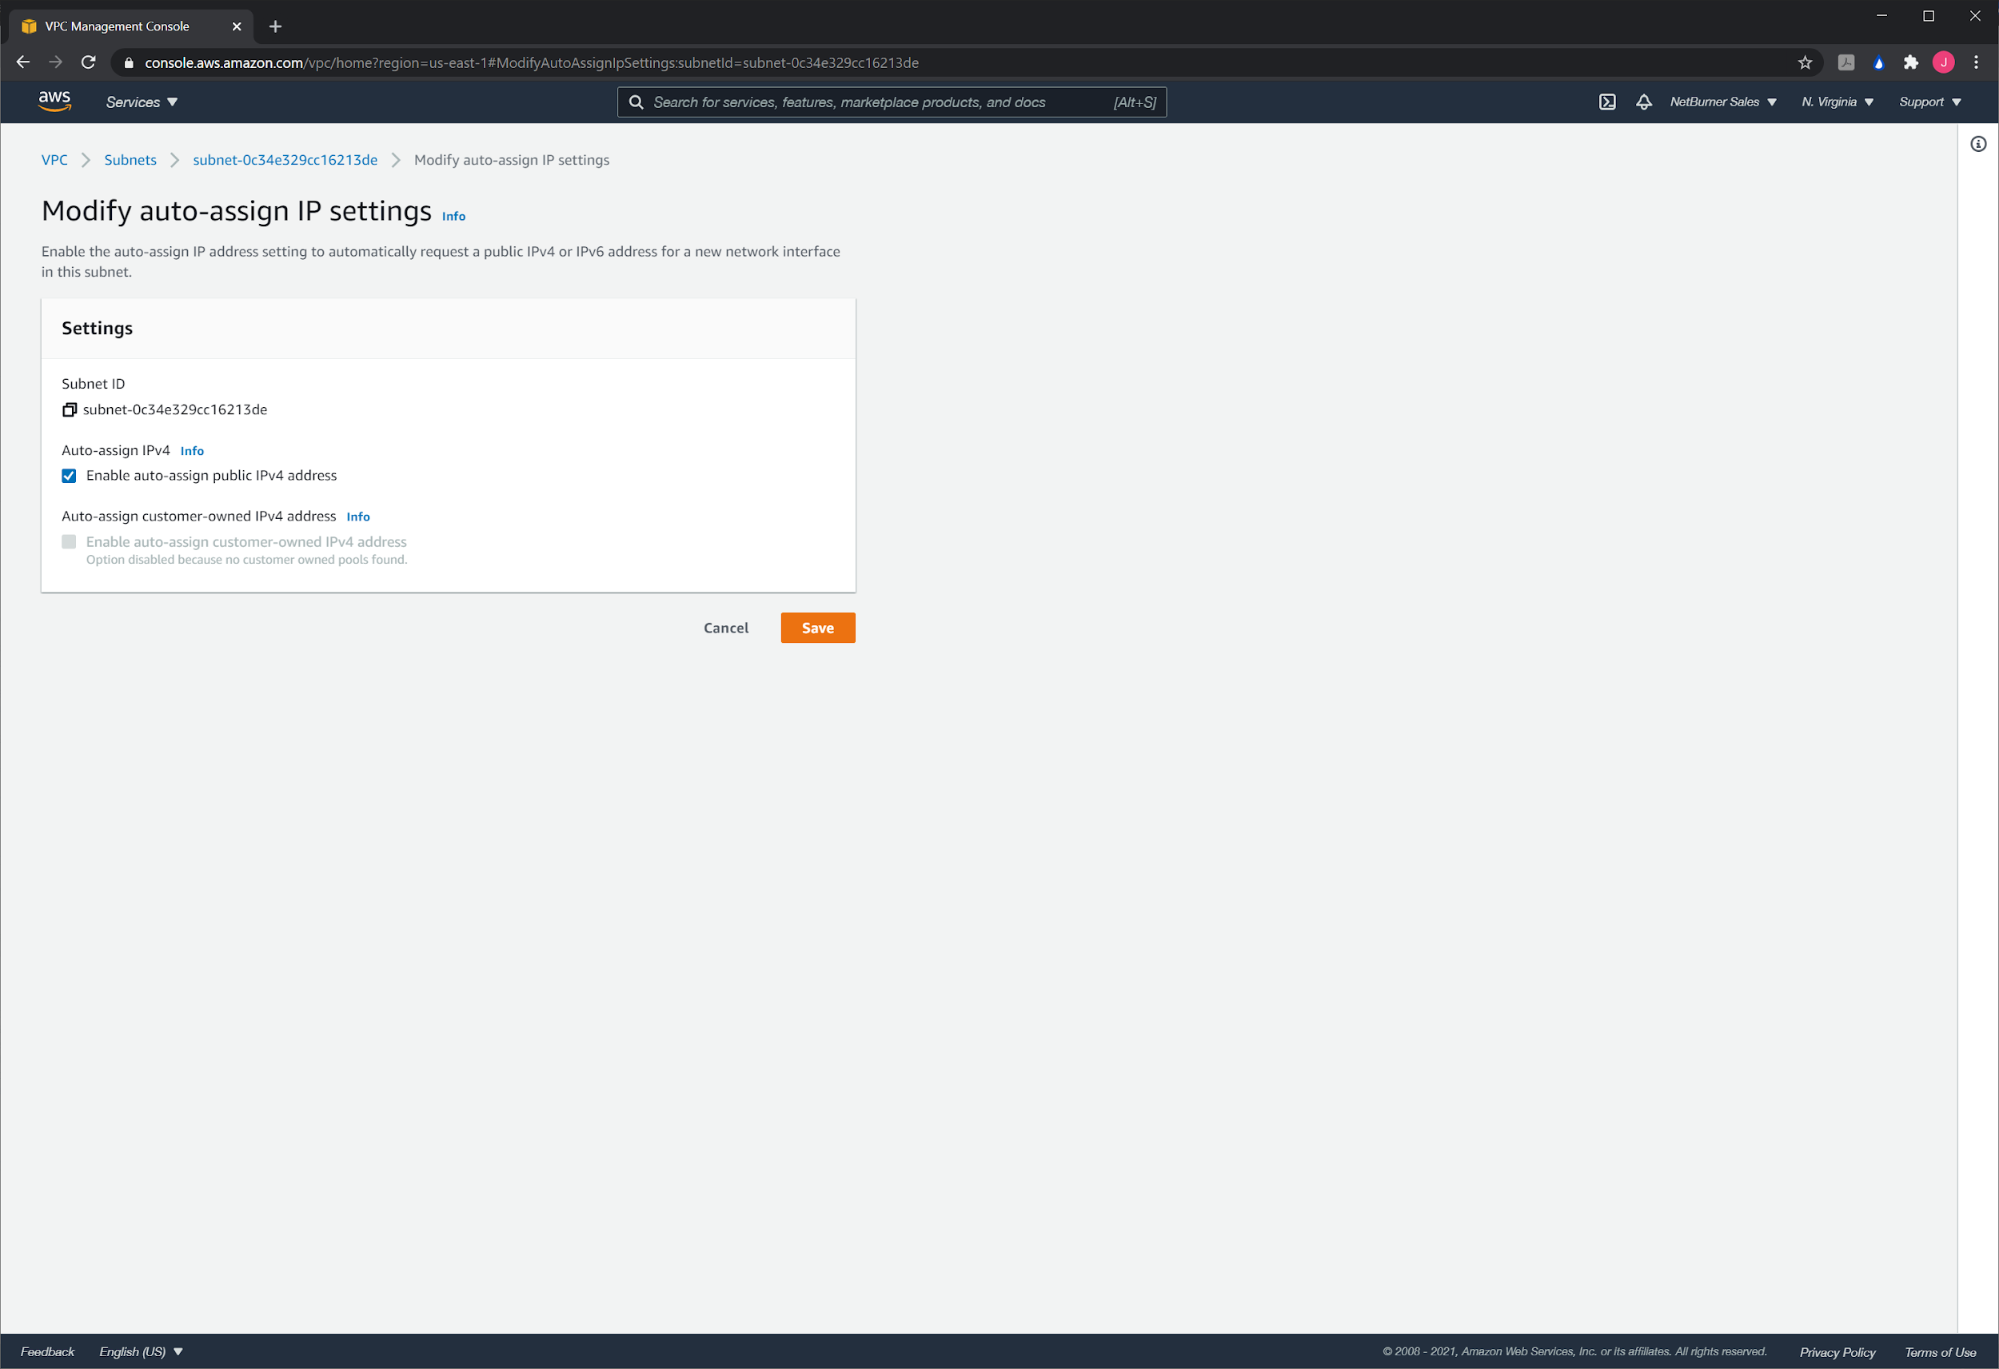
Make sure the box labeled “Enable auto-assign public IPv4 address” is checked, and hit the button, “Save”. Repeat this for the remaining three public subnets.
Create an Elastic IP Address
We’re going to need an IP address in a minute. Fortunately, AWS will let you reserve an IPv4 address and then associate it with various cloud services. We do this with their Elastic IP addresses. Let’s go ahead and create that now. First, head to the EC2 service panel. From there, select “Elastic IPs”, which can be found under the “Network & Security” menu on the left sidebar menu.
From here, click on the orange button in the top right labeled, “Allocate Elastic IP address”.

There’s not much to change on this page. Ensure that VPC is checked for the Scope, and then click on “Allocate”.
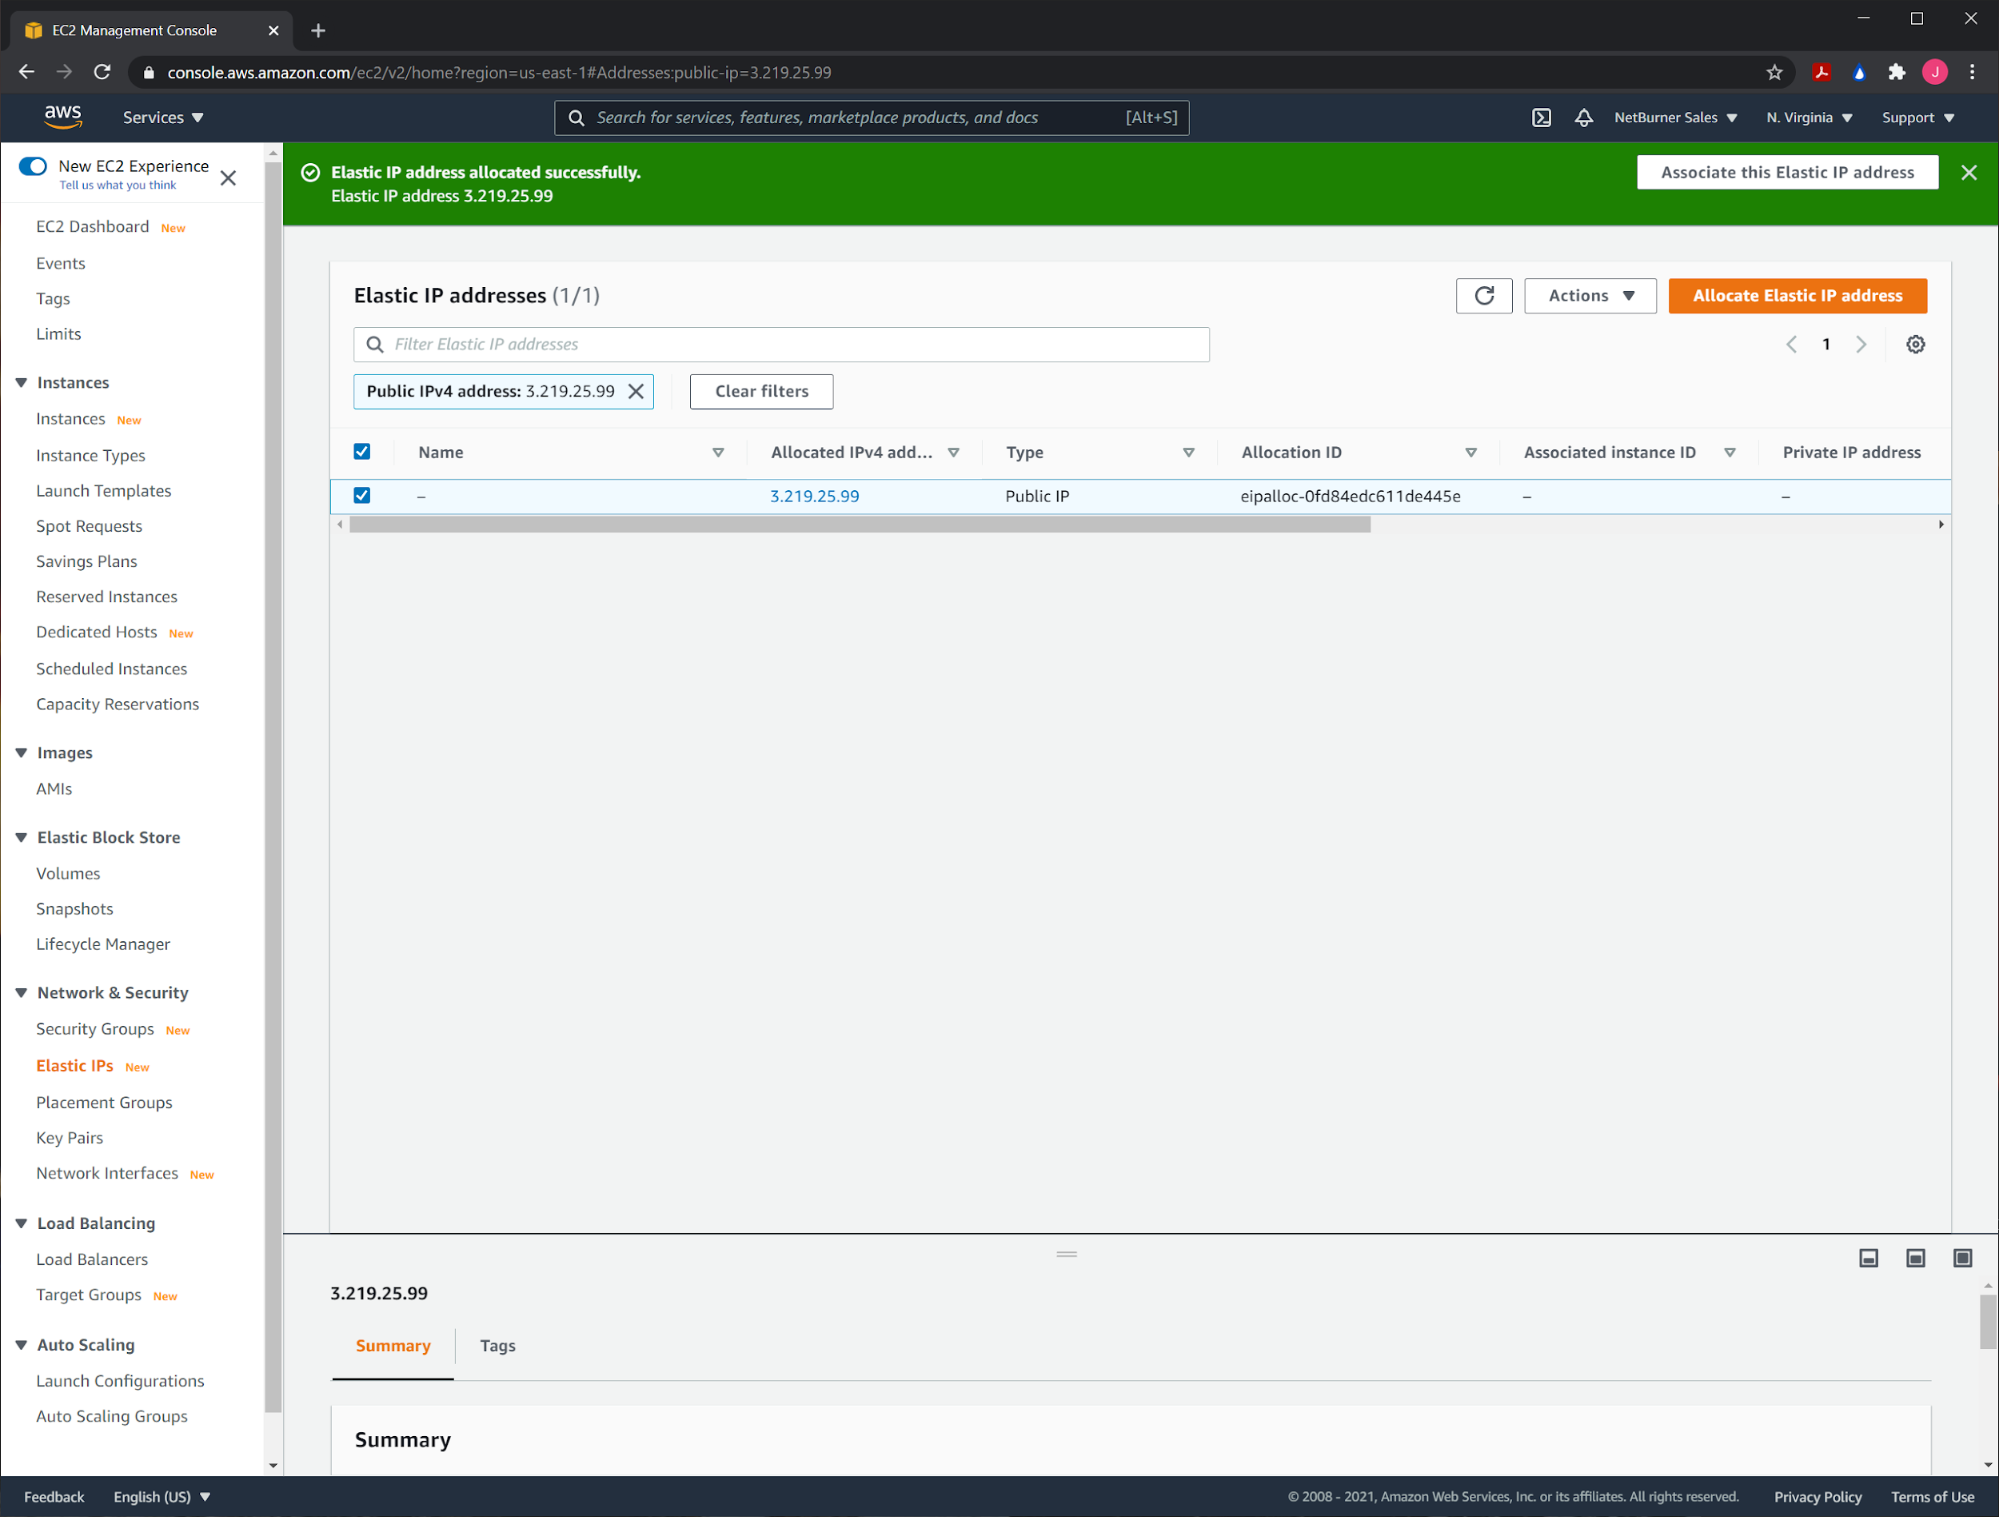
If all goes well, you’ll see the screen above. Write this IP address down so you have it handy for later. We’re going to use it a few steps from now.
Create an Internet Gateway
Now, we need to connect the piece that will connect our VPC to the outside world. This piece is called an Internet Gateway. To do this, head back to the VPC dashboard. From here, click on the “Internet Gateways” menu option under the “Virtual Private Cloud” menu on the left-hand side bar.

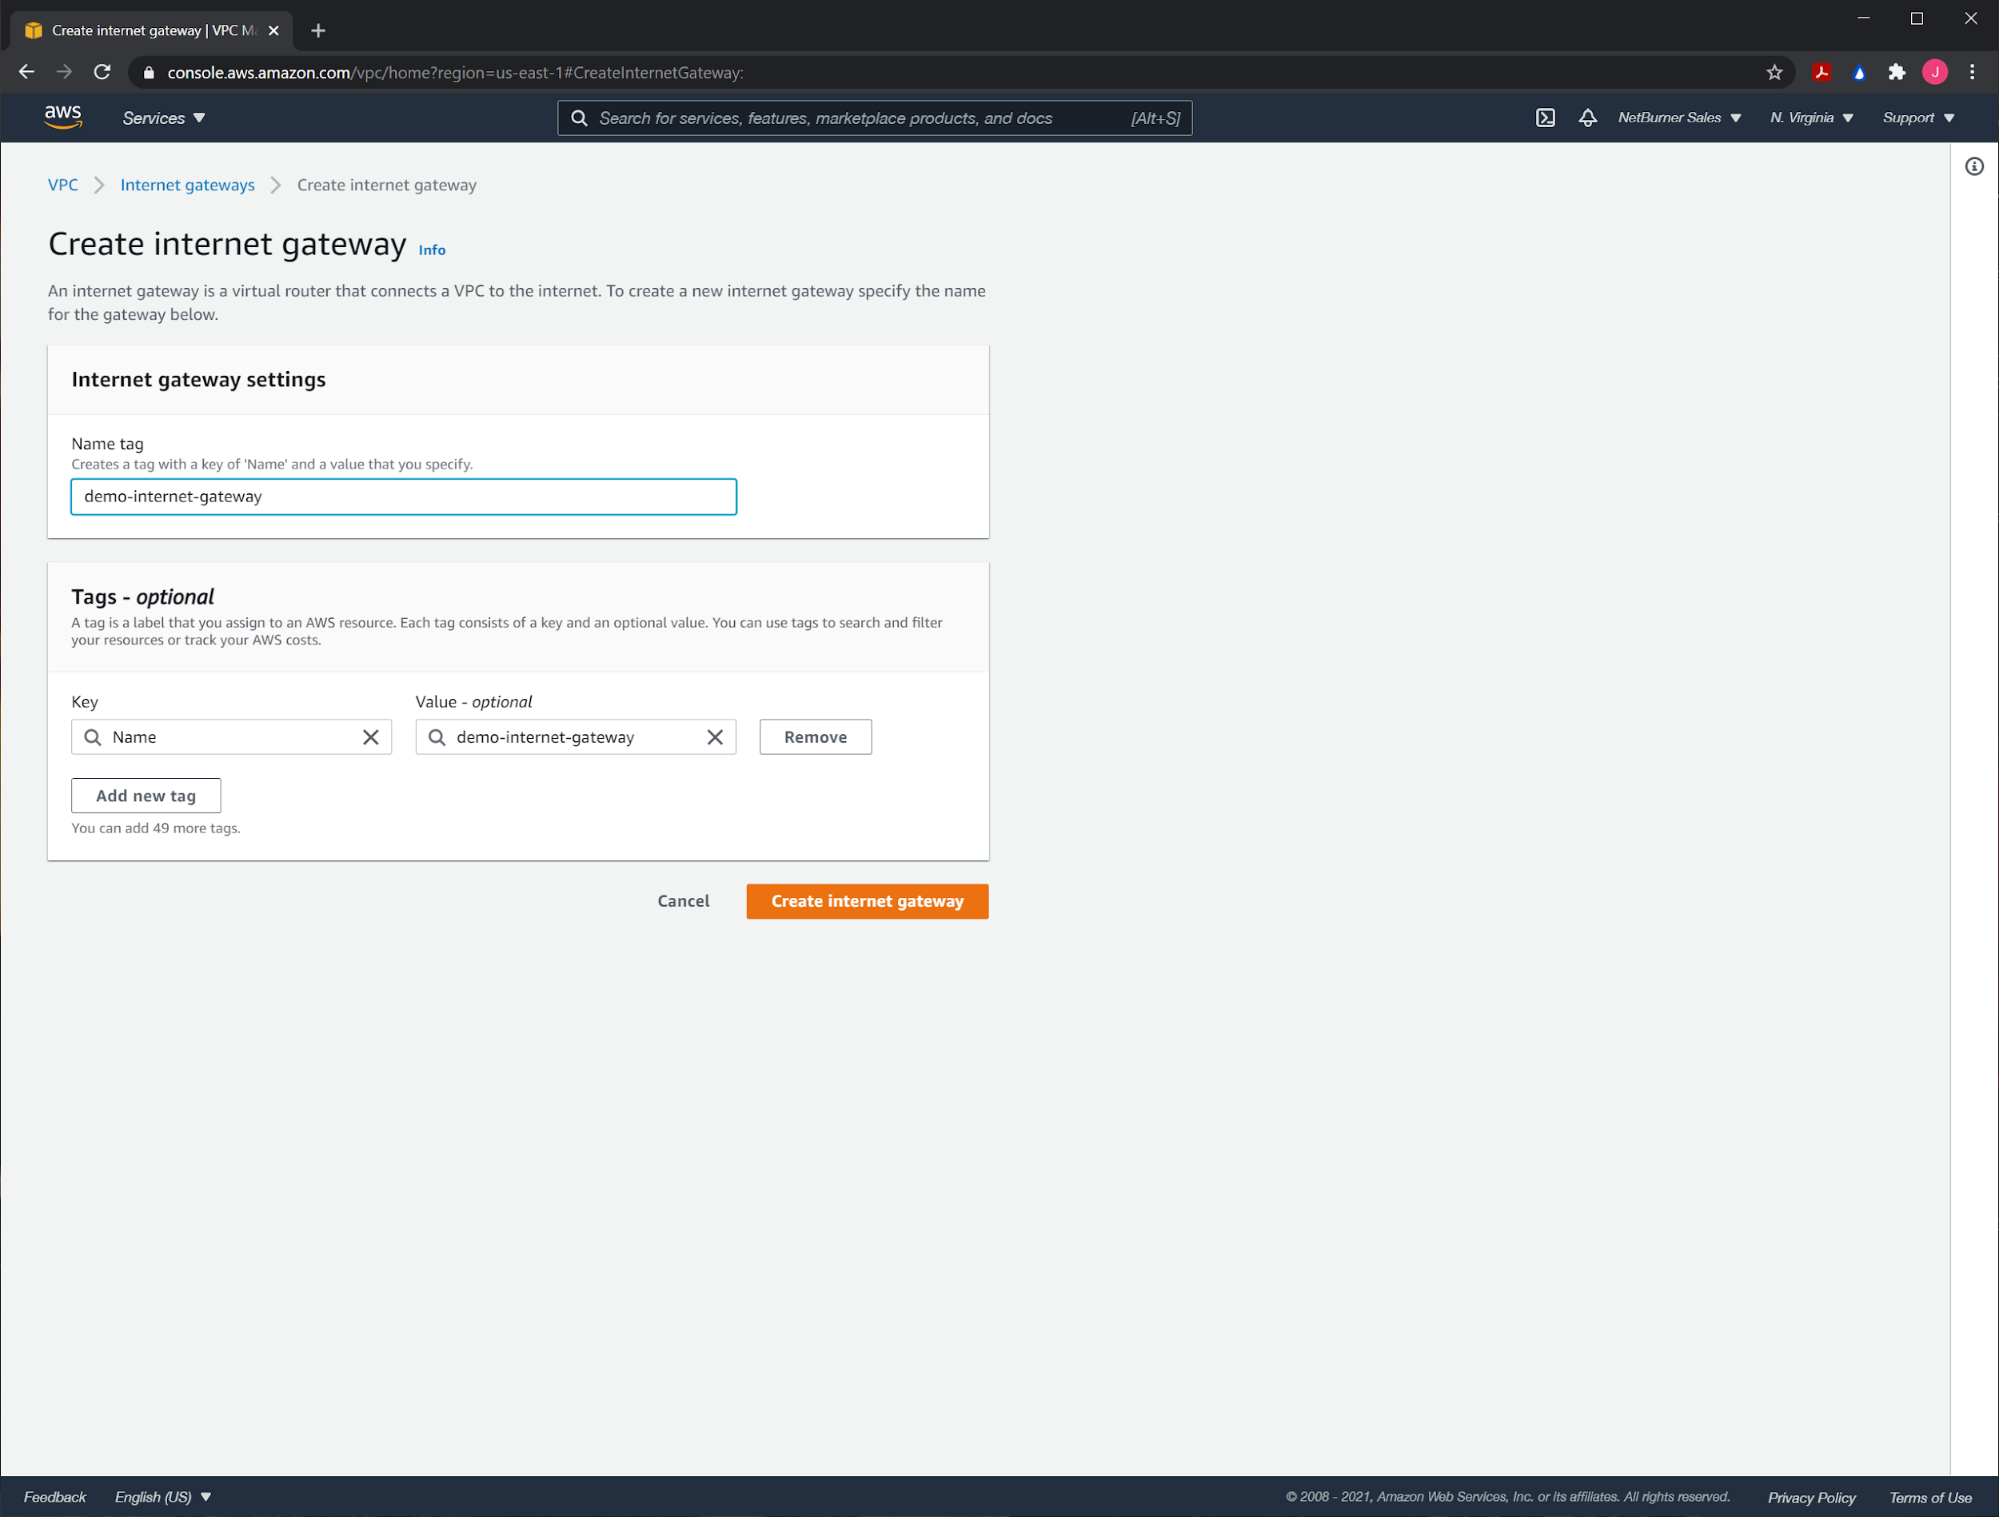
Click on the orange button labeled, “Create internet gateway” at the top right of the screen. We’re going to give it a “Name tag”, even though it’s not required, and then again hit the orange button labeled, “Create internet gateway”, this time at the bottom right of the screen.
We want to associate this with our VPC, so go ahead and click the grey button in the green bar at the top labeled, “Attach to a VPC”.
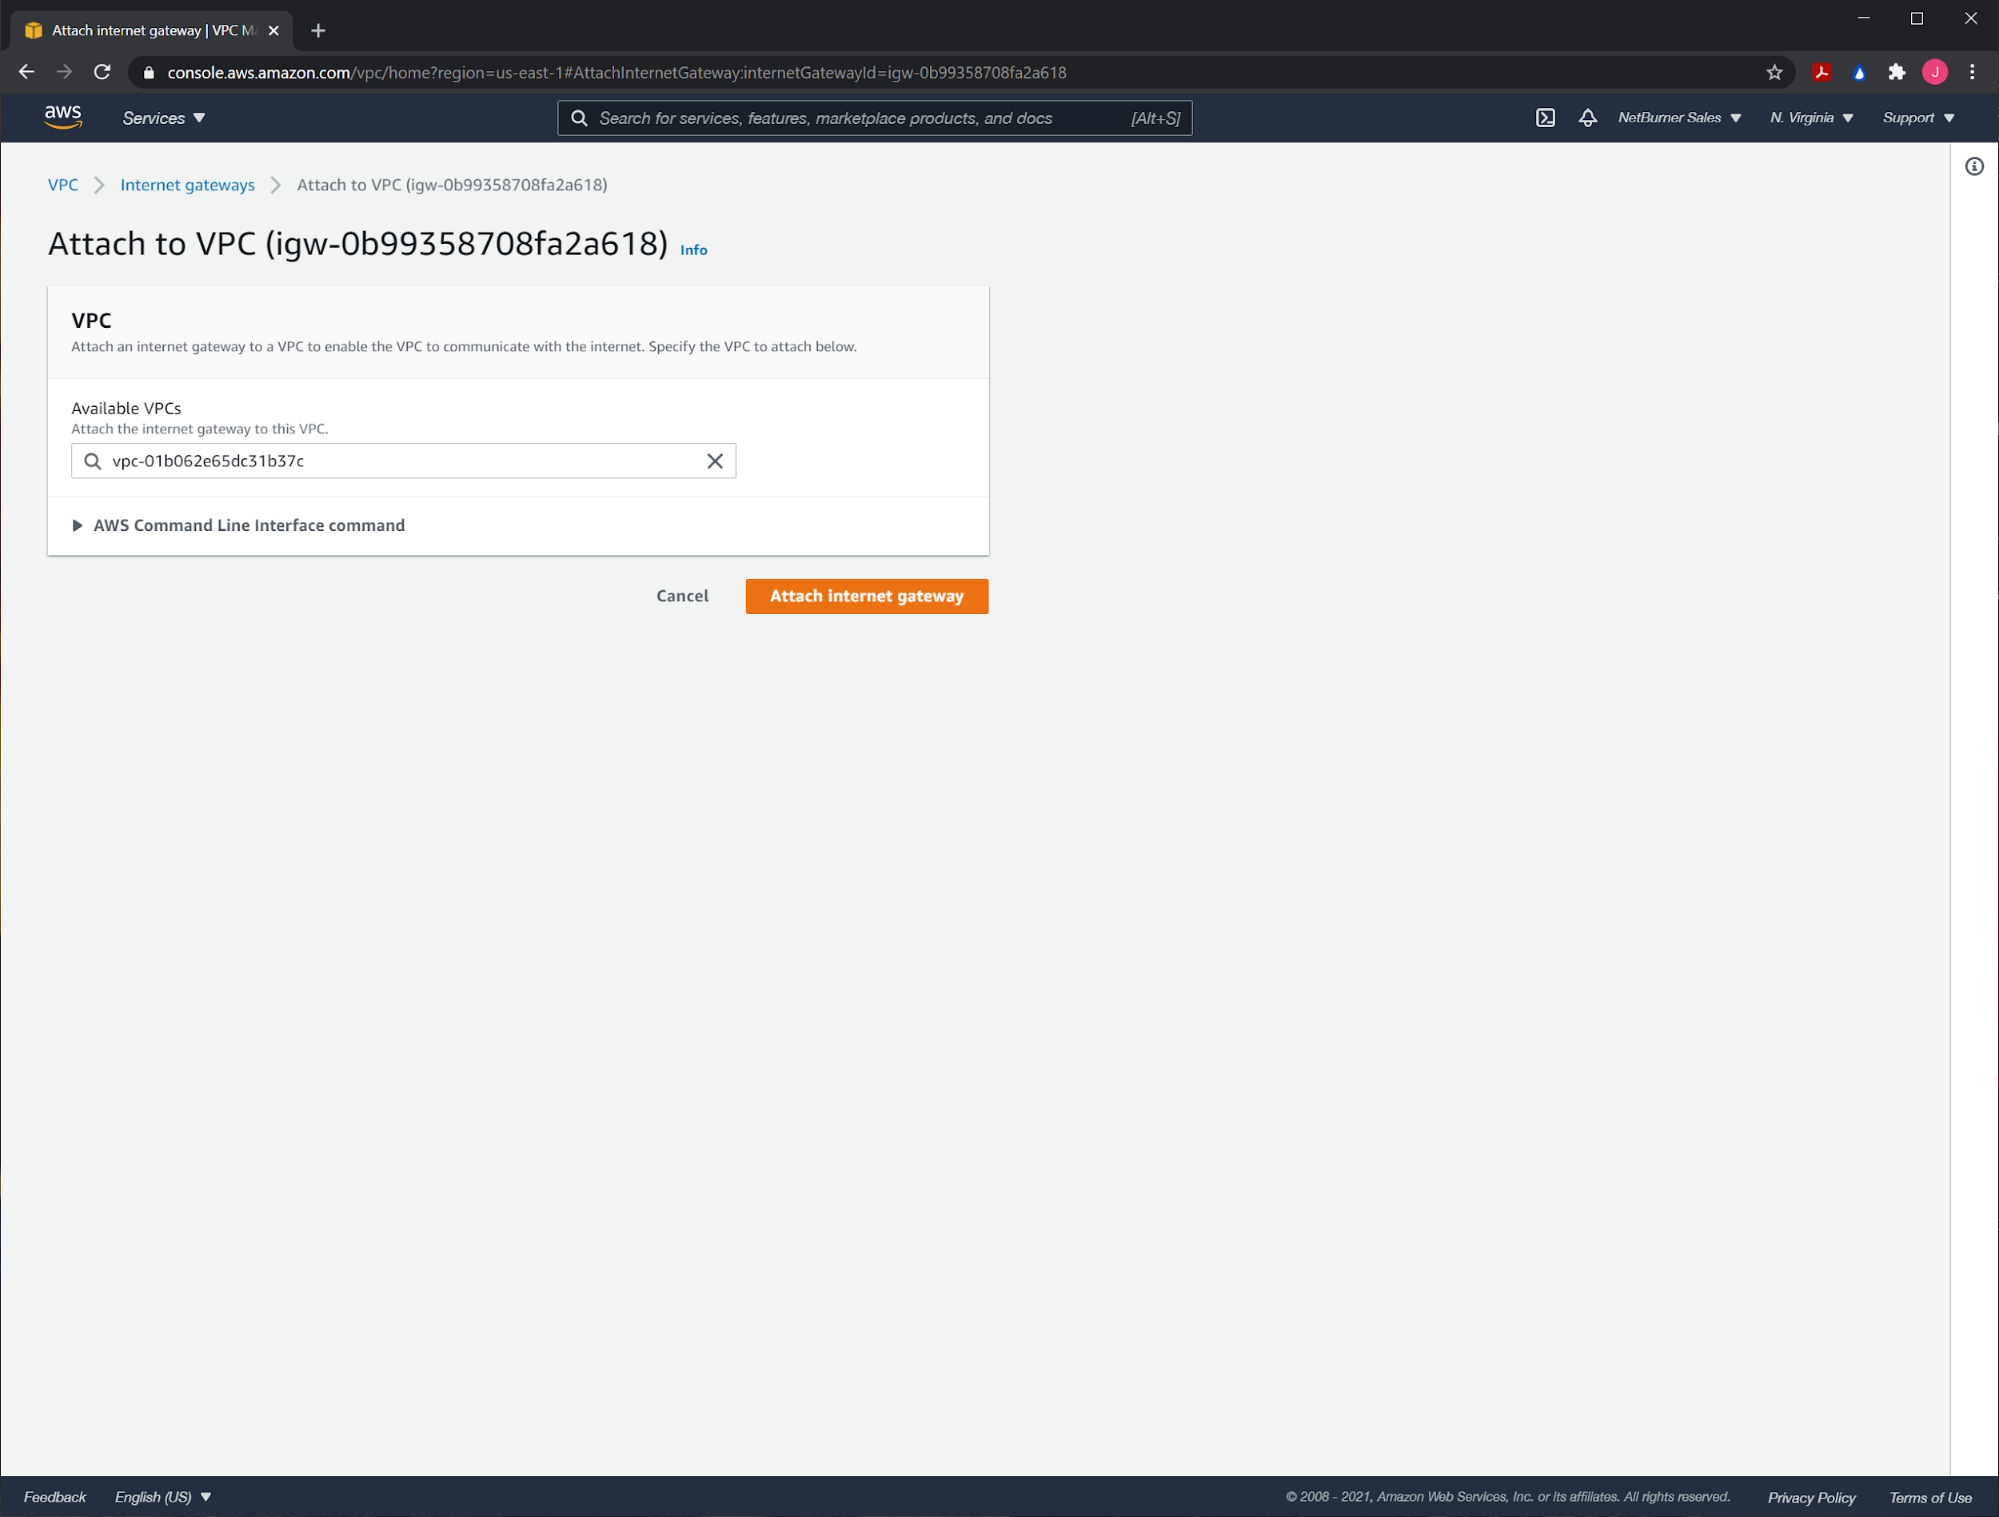
From here, pick the VPC that you created in the previous steps and hit the button “Attach internet gateway”.
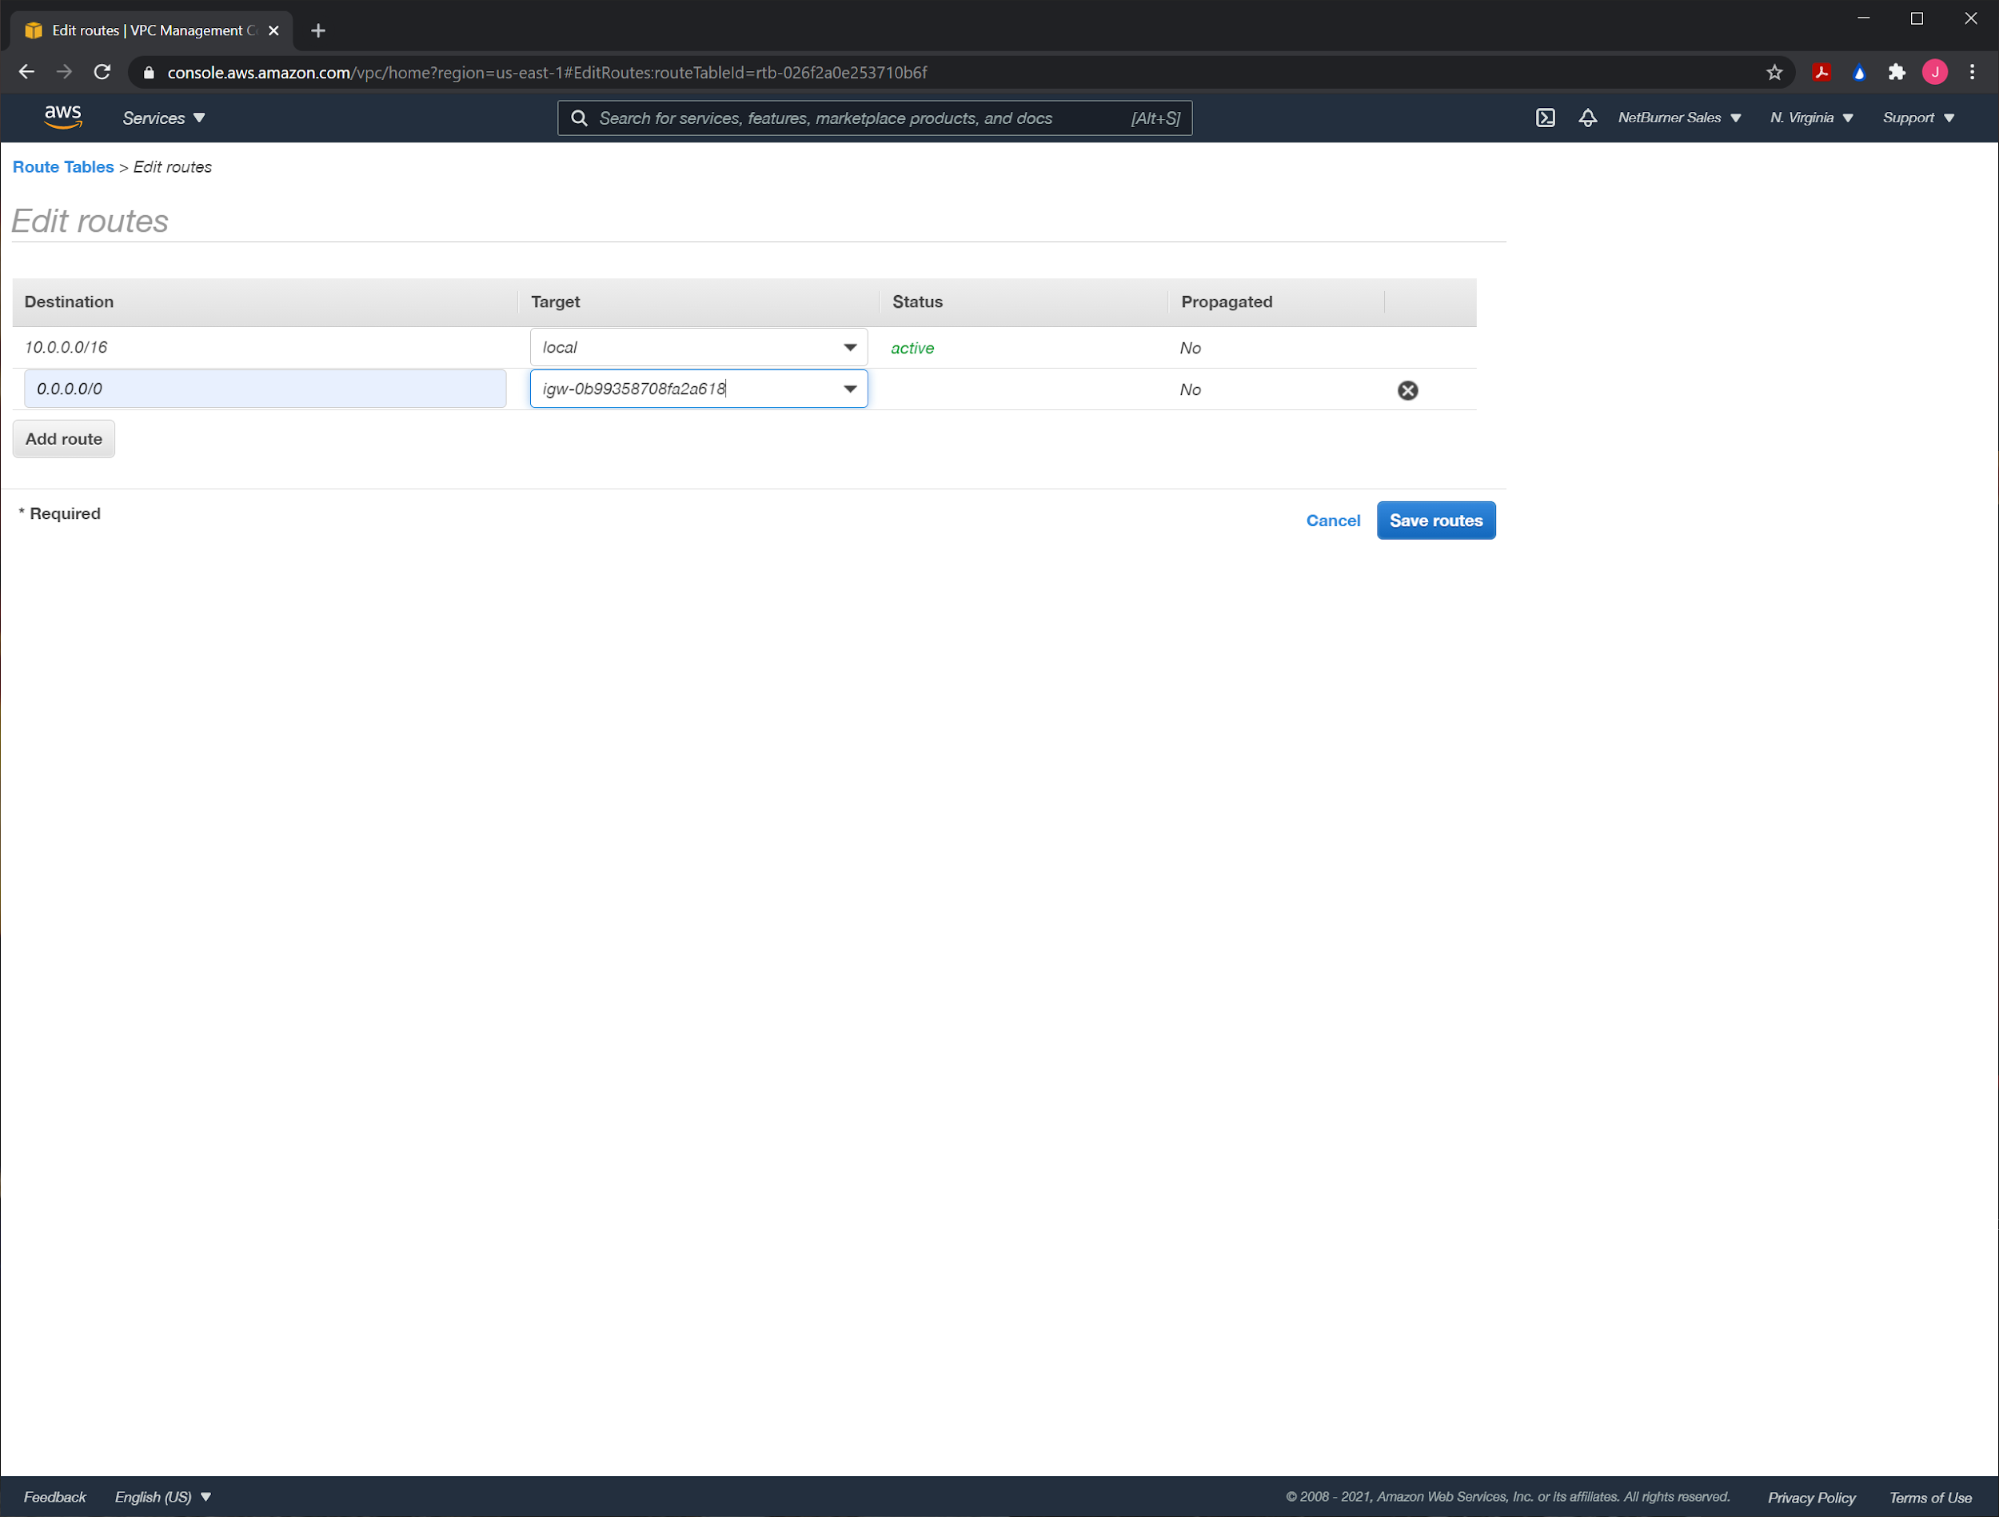
Now we need to attach it to our main route table. From the left sidebar menu, select the menu option, “Route Tables”. Choose the main route table (the one that doesn’t have the private subnets directly associated with it), and click on the “Routes” tab. From here, click on the button labeled, “Edit routes”.

On the resulting screen, click on the button, “Add route”. Set the “Destination” field to 0.0.0.0/0. For the “Target”, from the dropdown that shows up, select “Internet Gateway”. Then, choose the internet gateway that we just created. It should auto-suggest it. Finally, click on the blue button labeled, “Save routes”.
Create a Network Address Translation (NAT) Gateway
Now we need to do something similar with a NAT gateway. From the main VPC dashboard, choose the menu option, “NAT Gateways” under the menu titled, “Virtual Private Cloud”, on the left sidebar menu.

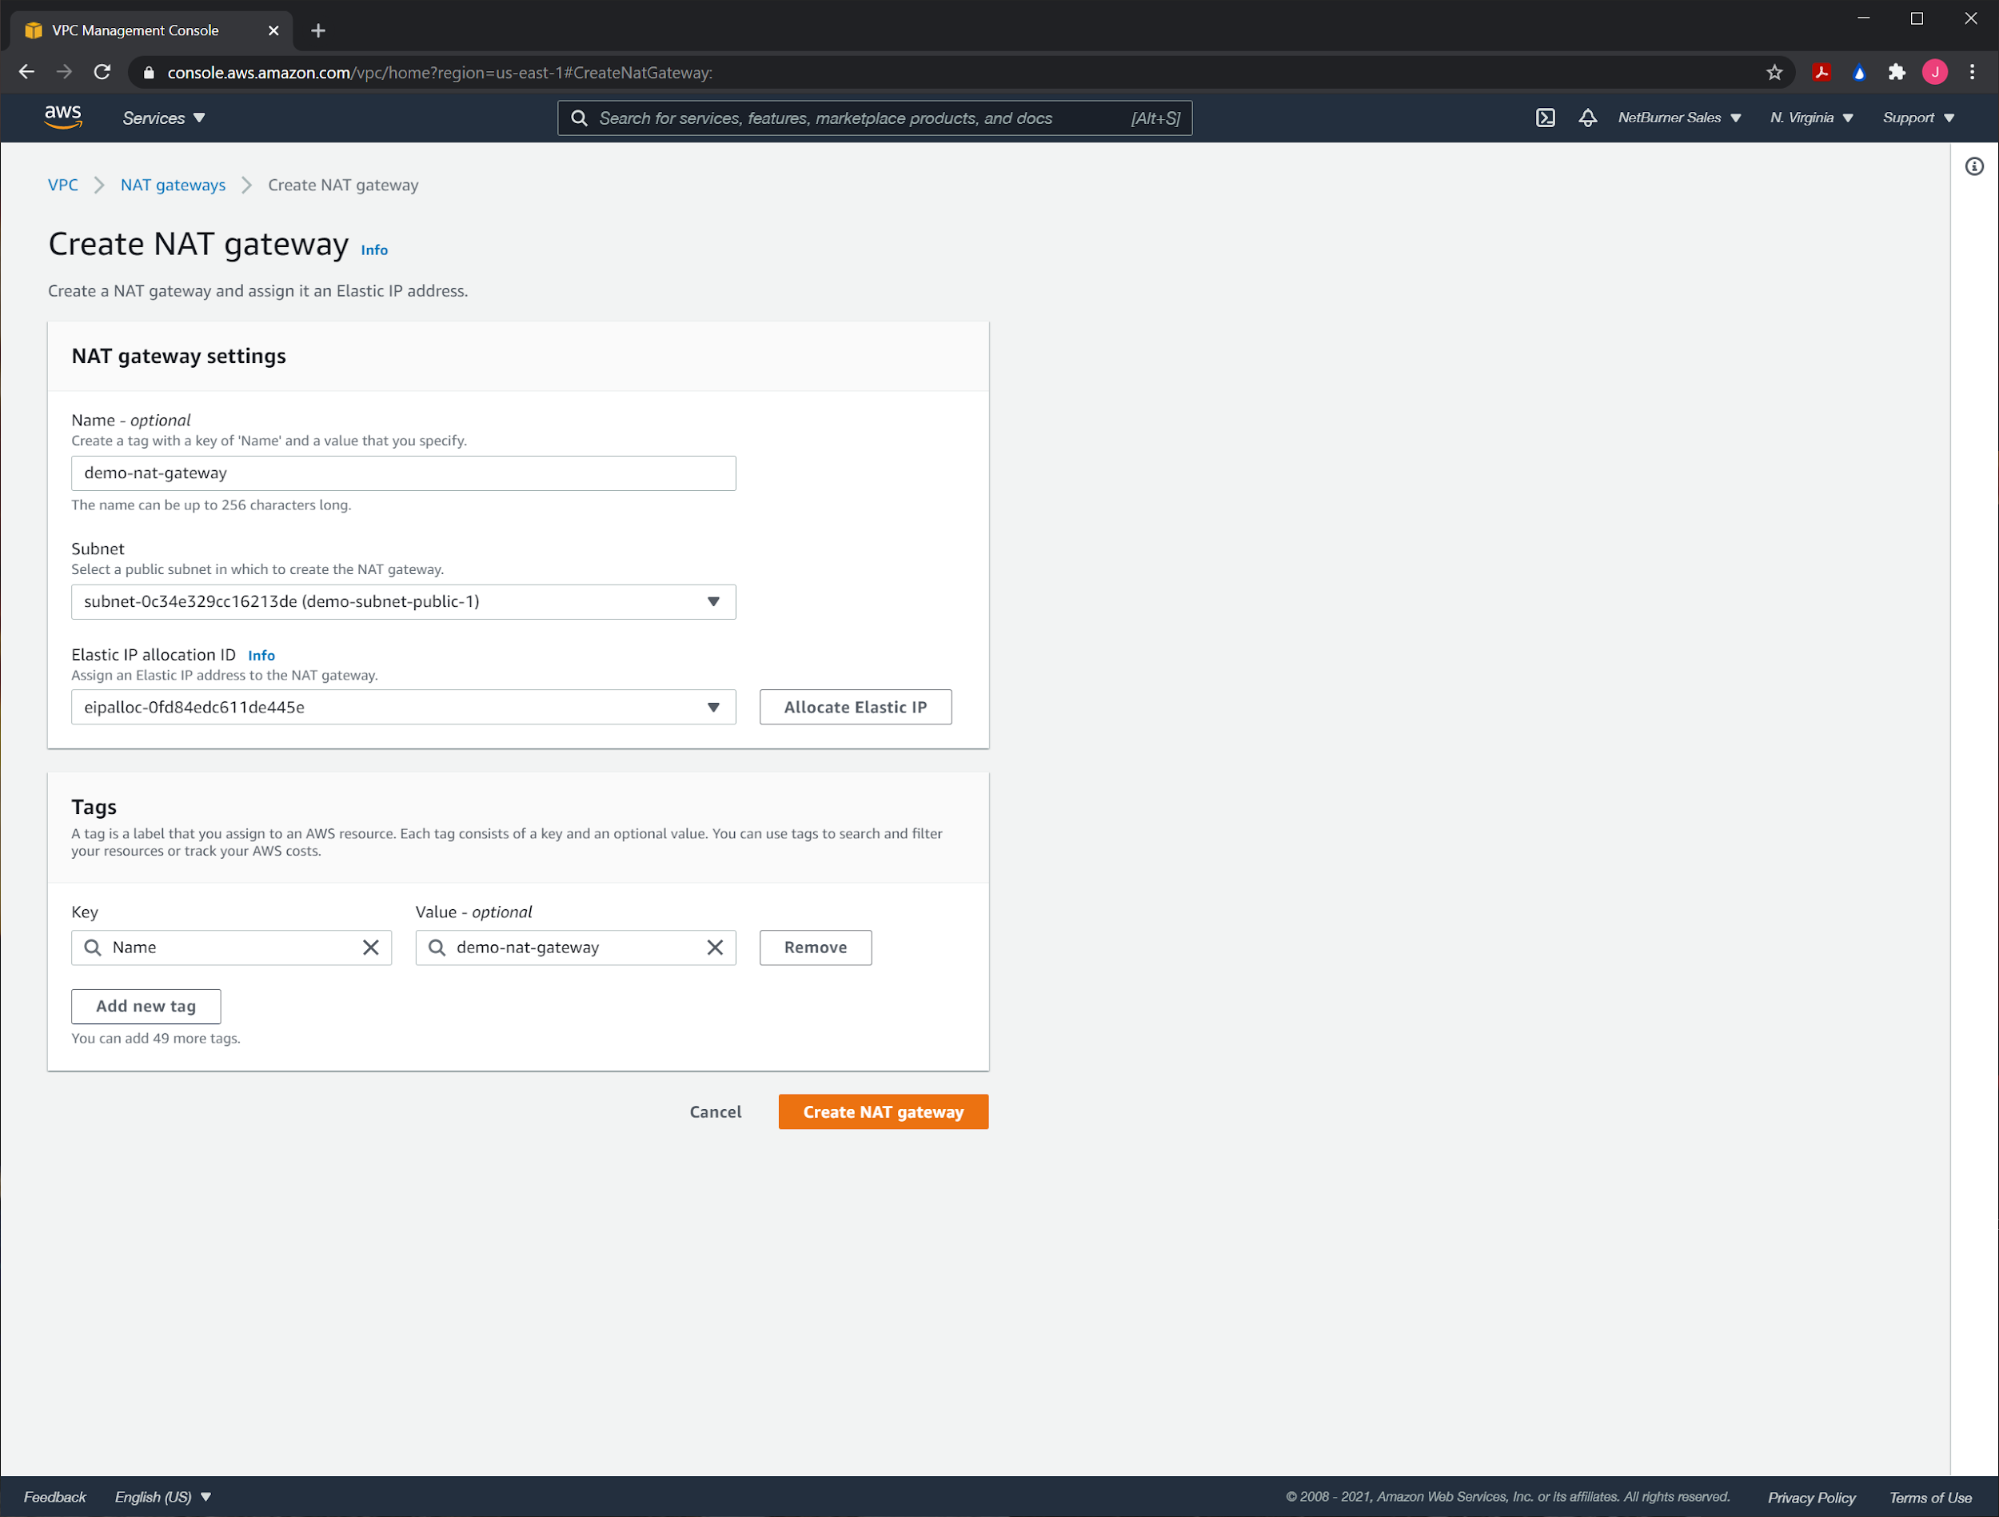
From here, choose the big orange “Create NAT gateway” button in the top right corner. This should take you to the settings page for the gateway. Choose a name you can remember. For the “Subnet”, choose one of the public ones that was created earlier from the dropdown list. Finally, for the “Elastic IP allocation ID” field, select the IP address that we just created from the dropdown. When these have all been chosen, click on the orange button labeled, “Create NAT gateway” at the bottom right of the screen.
This might take awhile to fully come up and be listed as “Available”, but when it does, verify that the Elastic IP address is actually associated with the NAT gateway.
From here, we’re going to attach this gateway to the route table we created previously that has the private subnets associated with it. Click on the “Route Tables” link under the menu titled, “Virtual Private Cloud” on the left sidebar menu. Choose the route table associated with the private subnets, and then click on the “Routes” tab near the bottom of the page.
From here, click on the button labeled “Edit routes”, and then “Add route” on the resulting page. For the “Destination”, enter 0.0.0.0/0, and for the “Target”, choose “NAT Gateway”, followed by the NAT gateway that we just created (it should auto-suggest it for you). Finally, hit, “Save routes”.


Create Identity and Access Management (IAM) Policies
Before we can proceed with creating the main Elastic Beanstalk server, we need to create some security policies that will be used to regulate what resources and get access to others and to what extent. The AWS IAM service is Amazon’s answer to managing security issues related to access management and authorization across their various cloud services.
In our use case, we will need to create two polices. These will be assigned to a roll that will allow Elastic Beanstalk have the access it needs to both DynamoDB and CloudWatch. To create an IAM policy, go to the main IAM Role dashboard.

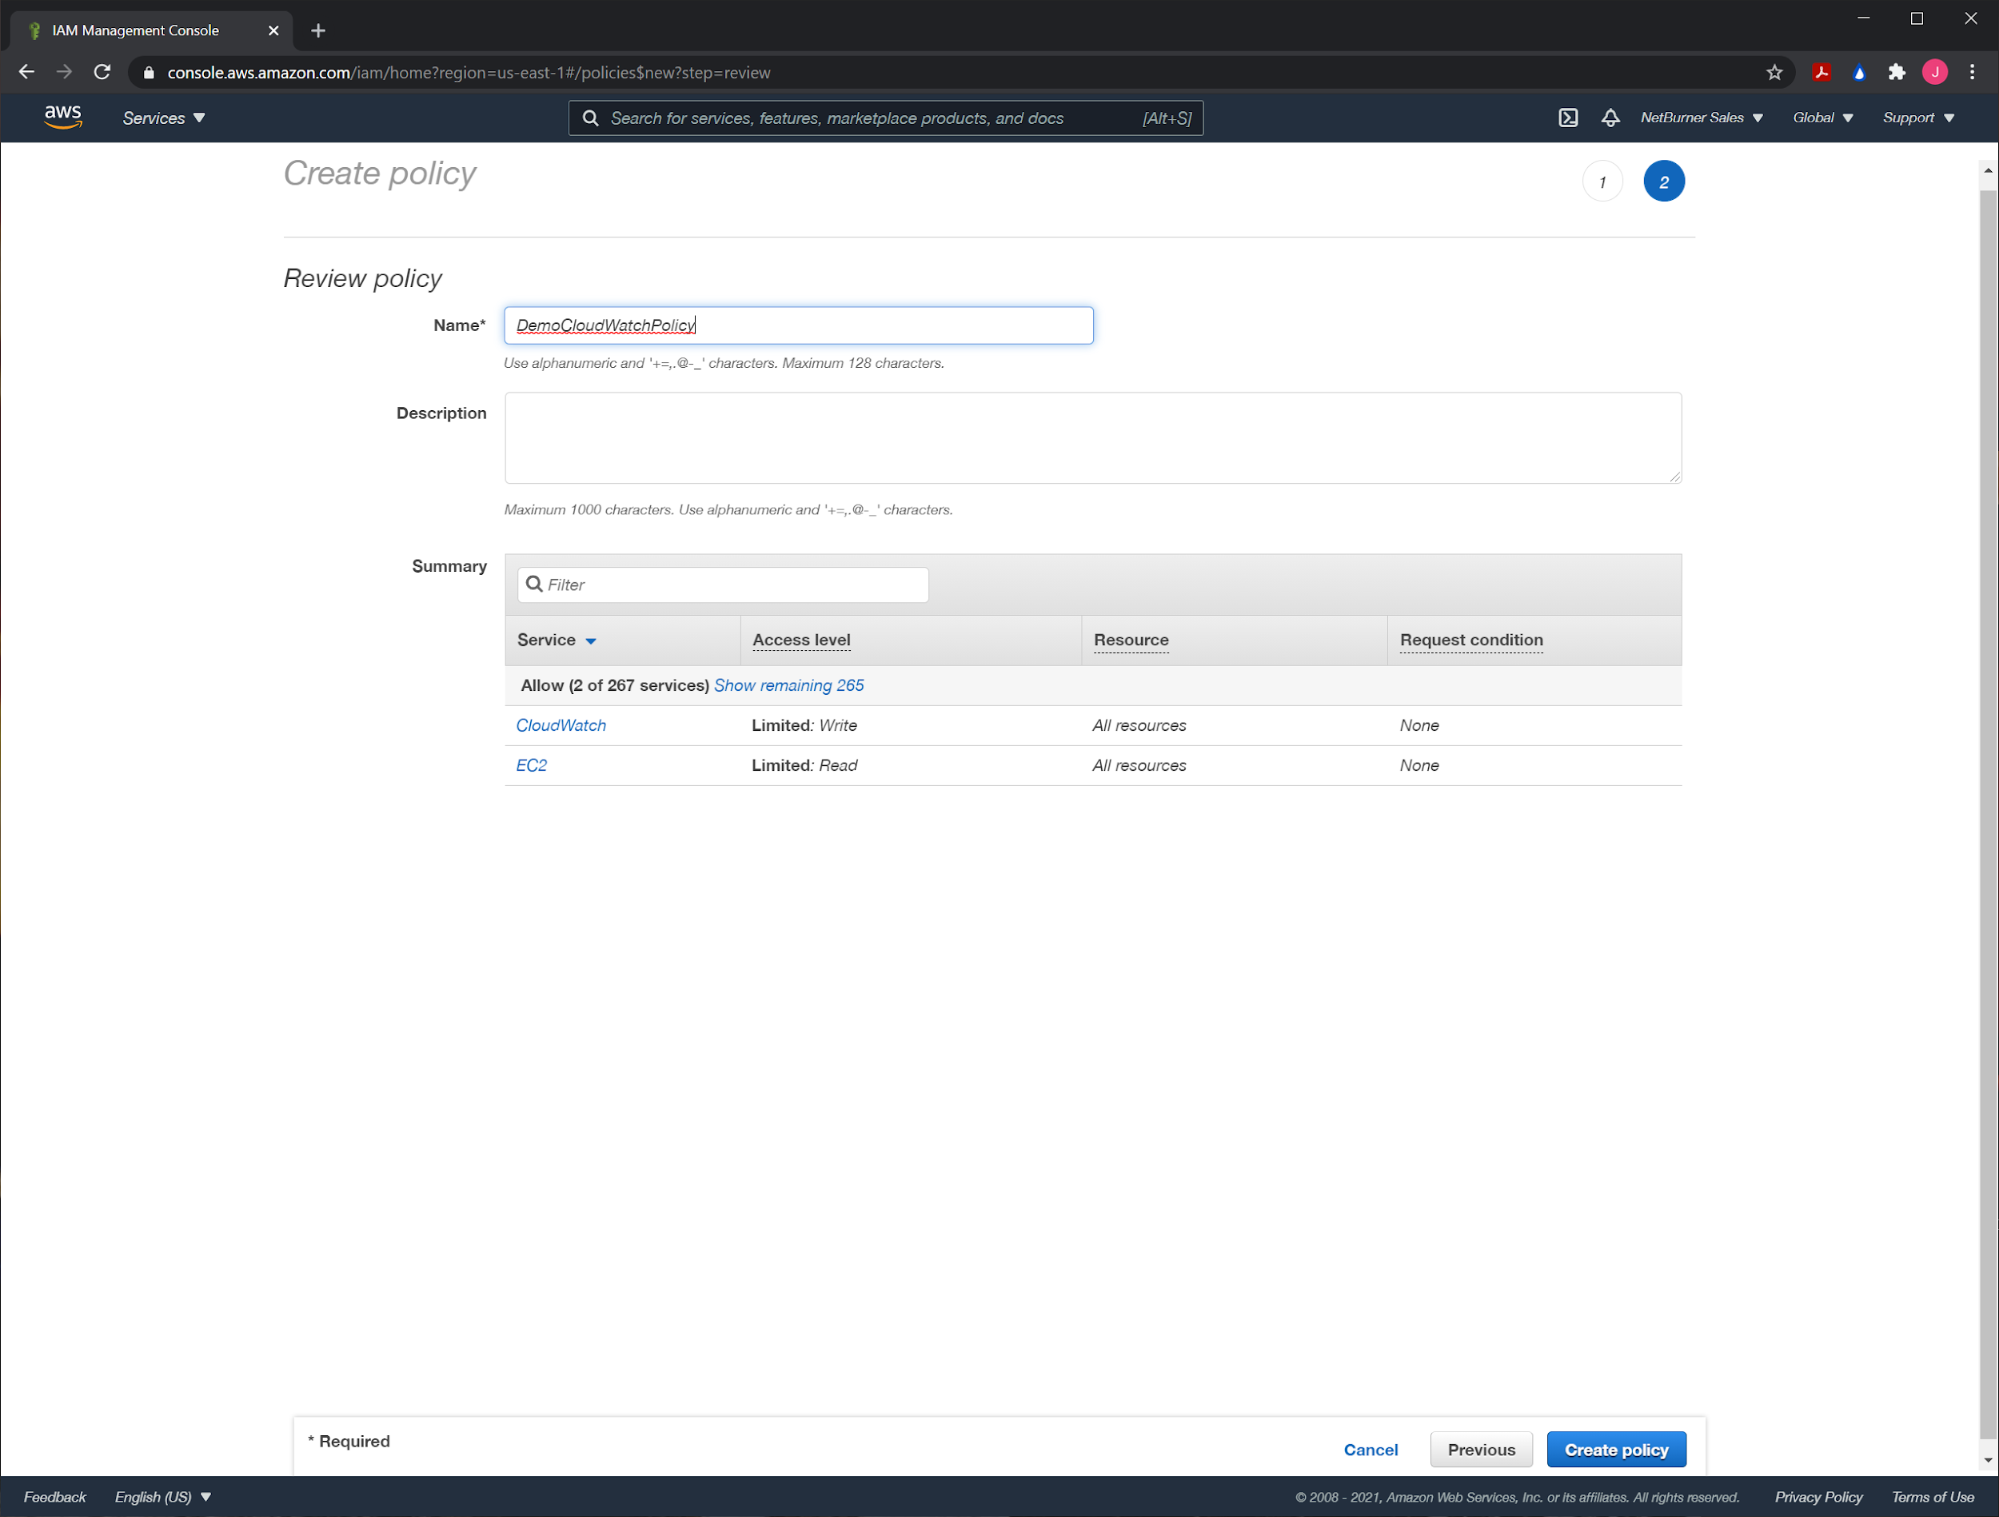
Click on “Policies” from the left side menu under the title, “Access management”. On the screen that’s displayed, hit the blue button at the top left labeled, “Create policy”. Because we’re going to just copy and paste a policy, we select the JSON tab. In the text are, copy and paste the following:
{
    "Version": "2012-10-17",
    "Statement": [
        {
            "Sid": "VisualEditor0",
            "Effect": "Allow",
            "Action": "dynamodb:*",
            "Resource": "*"
        }
    ]
}
This policy will give broad access to DynamoDB. When this is done, click on “Review Policy” in the bottom right. Give it a name that you will remember and then click, “Create Policy”.

We need to go through that process one more time, but this time we will be providing access to CloudWatch, which will allow us to set up alarms for server resource usage limits. This time, the policy to copy and paste will be:
{
    "Version": "2012-10-17",
    "Statement": [
        {
            "Action": [
                "cloudwatch:PutMetricData",
                "ec2:DescribeTags"
            ],
            "Effect": "Allow",
            "Resource": [
                "*"
            ]
        }
    ]
}
Again, review it, name it, and hit the button labeled, “Create policy”.
Create Identity and Access Management (IAM) Roles
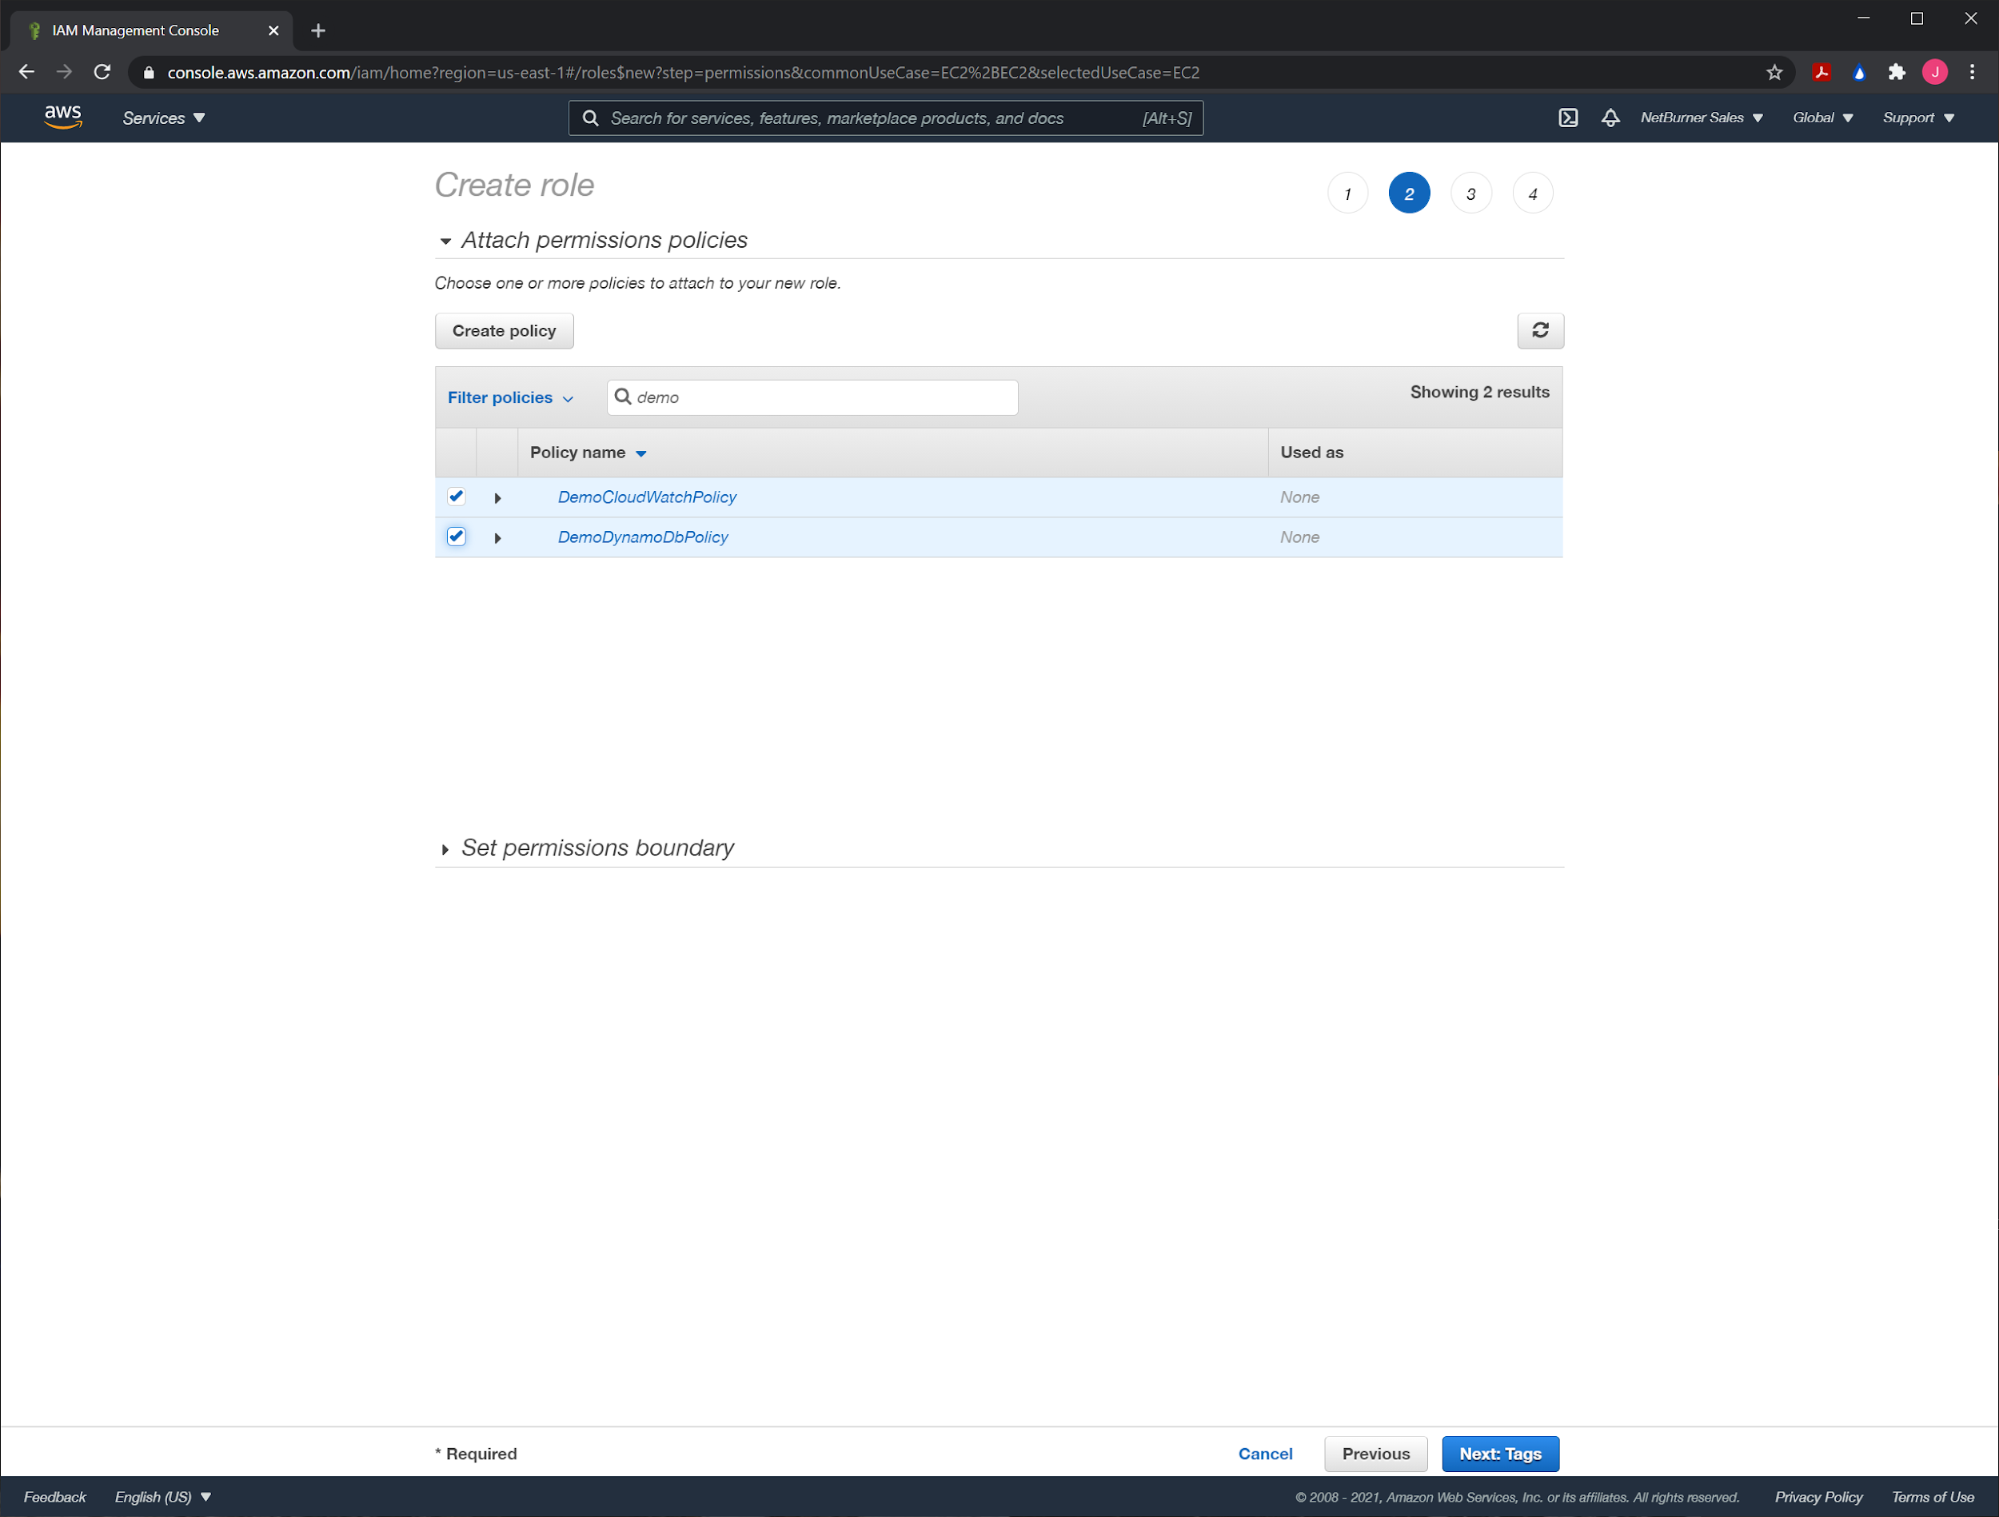
Now we will create the IAM role that will have the policies attached. This role will be assigned to our Elastic Beanstalk instance. From the main IAM Role dashboard, and click “Roles”. On the screen that’s displayed, hit “Create role”.

Select “EC2” under common use cases, and then click “Next: Permissions”.

Search for and select the two policies that were previously created and hit “Next: Tags”.
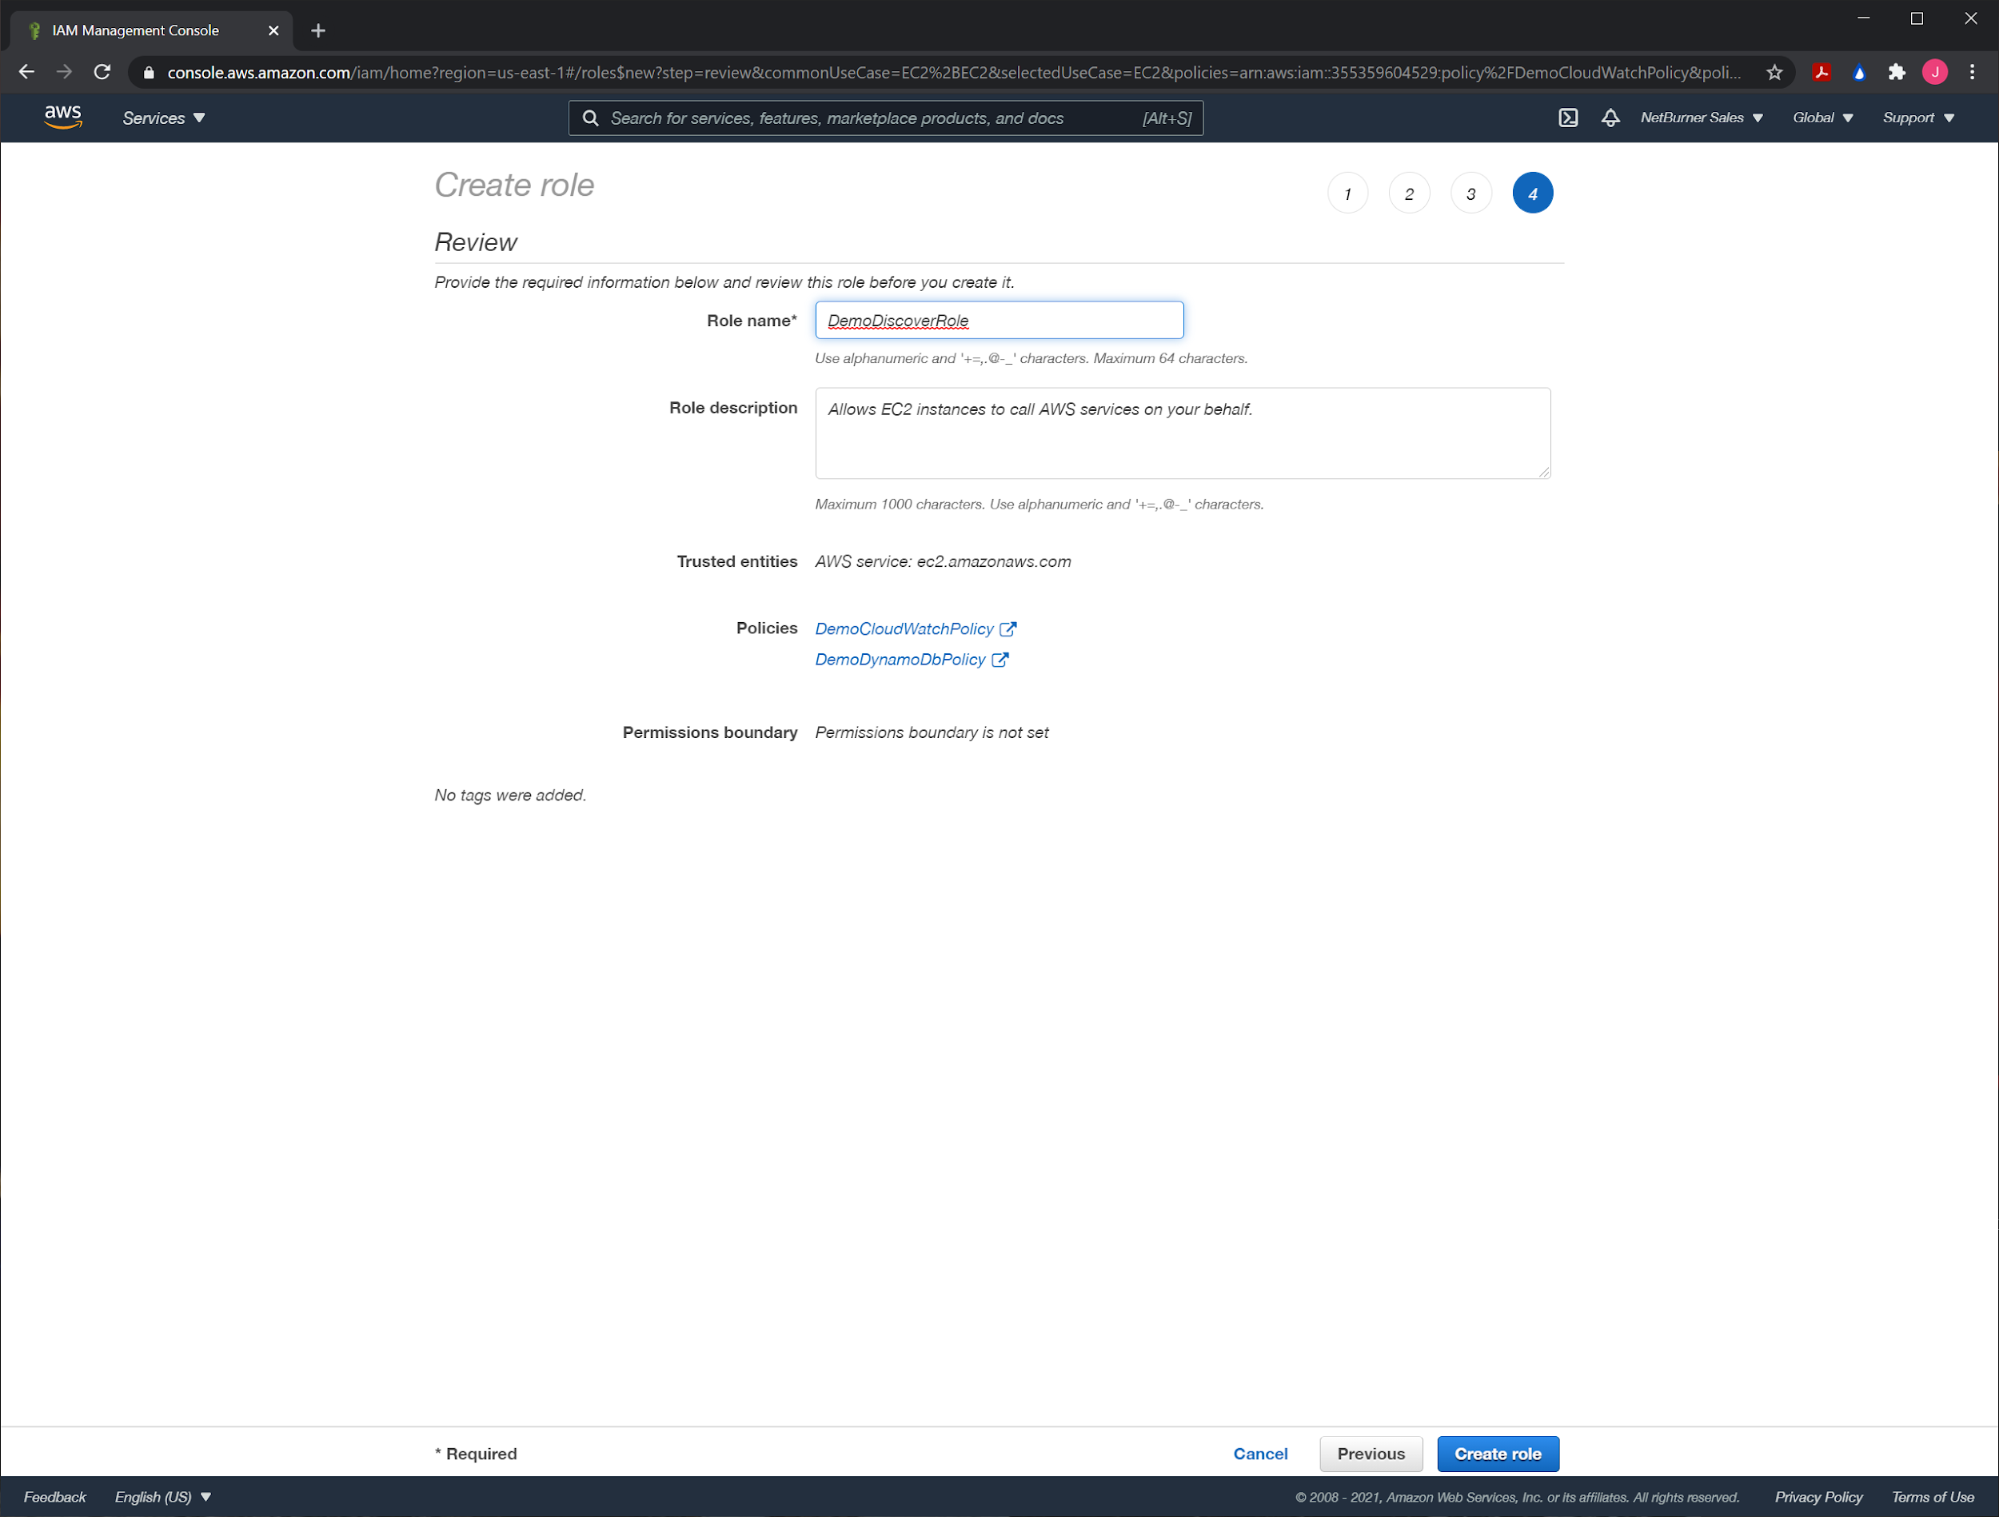
We don’t care about tags, so hit “Next: Review”. On the next screen, give the role a name, and a description if you like, then hit “Create role”.
Create an EC2 Key Pair
Our last step before creating the Elastic Beanstalk server is to create an EC2 key pair. To do so, first head to the main EC2 dashboard. Under the “Network and Security” menu on the left side bar, choose “Key Pairs”. Hit the orange button labeled, “Create key pair”.
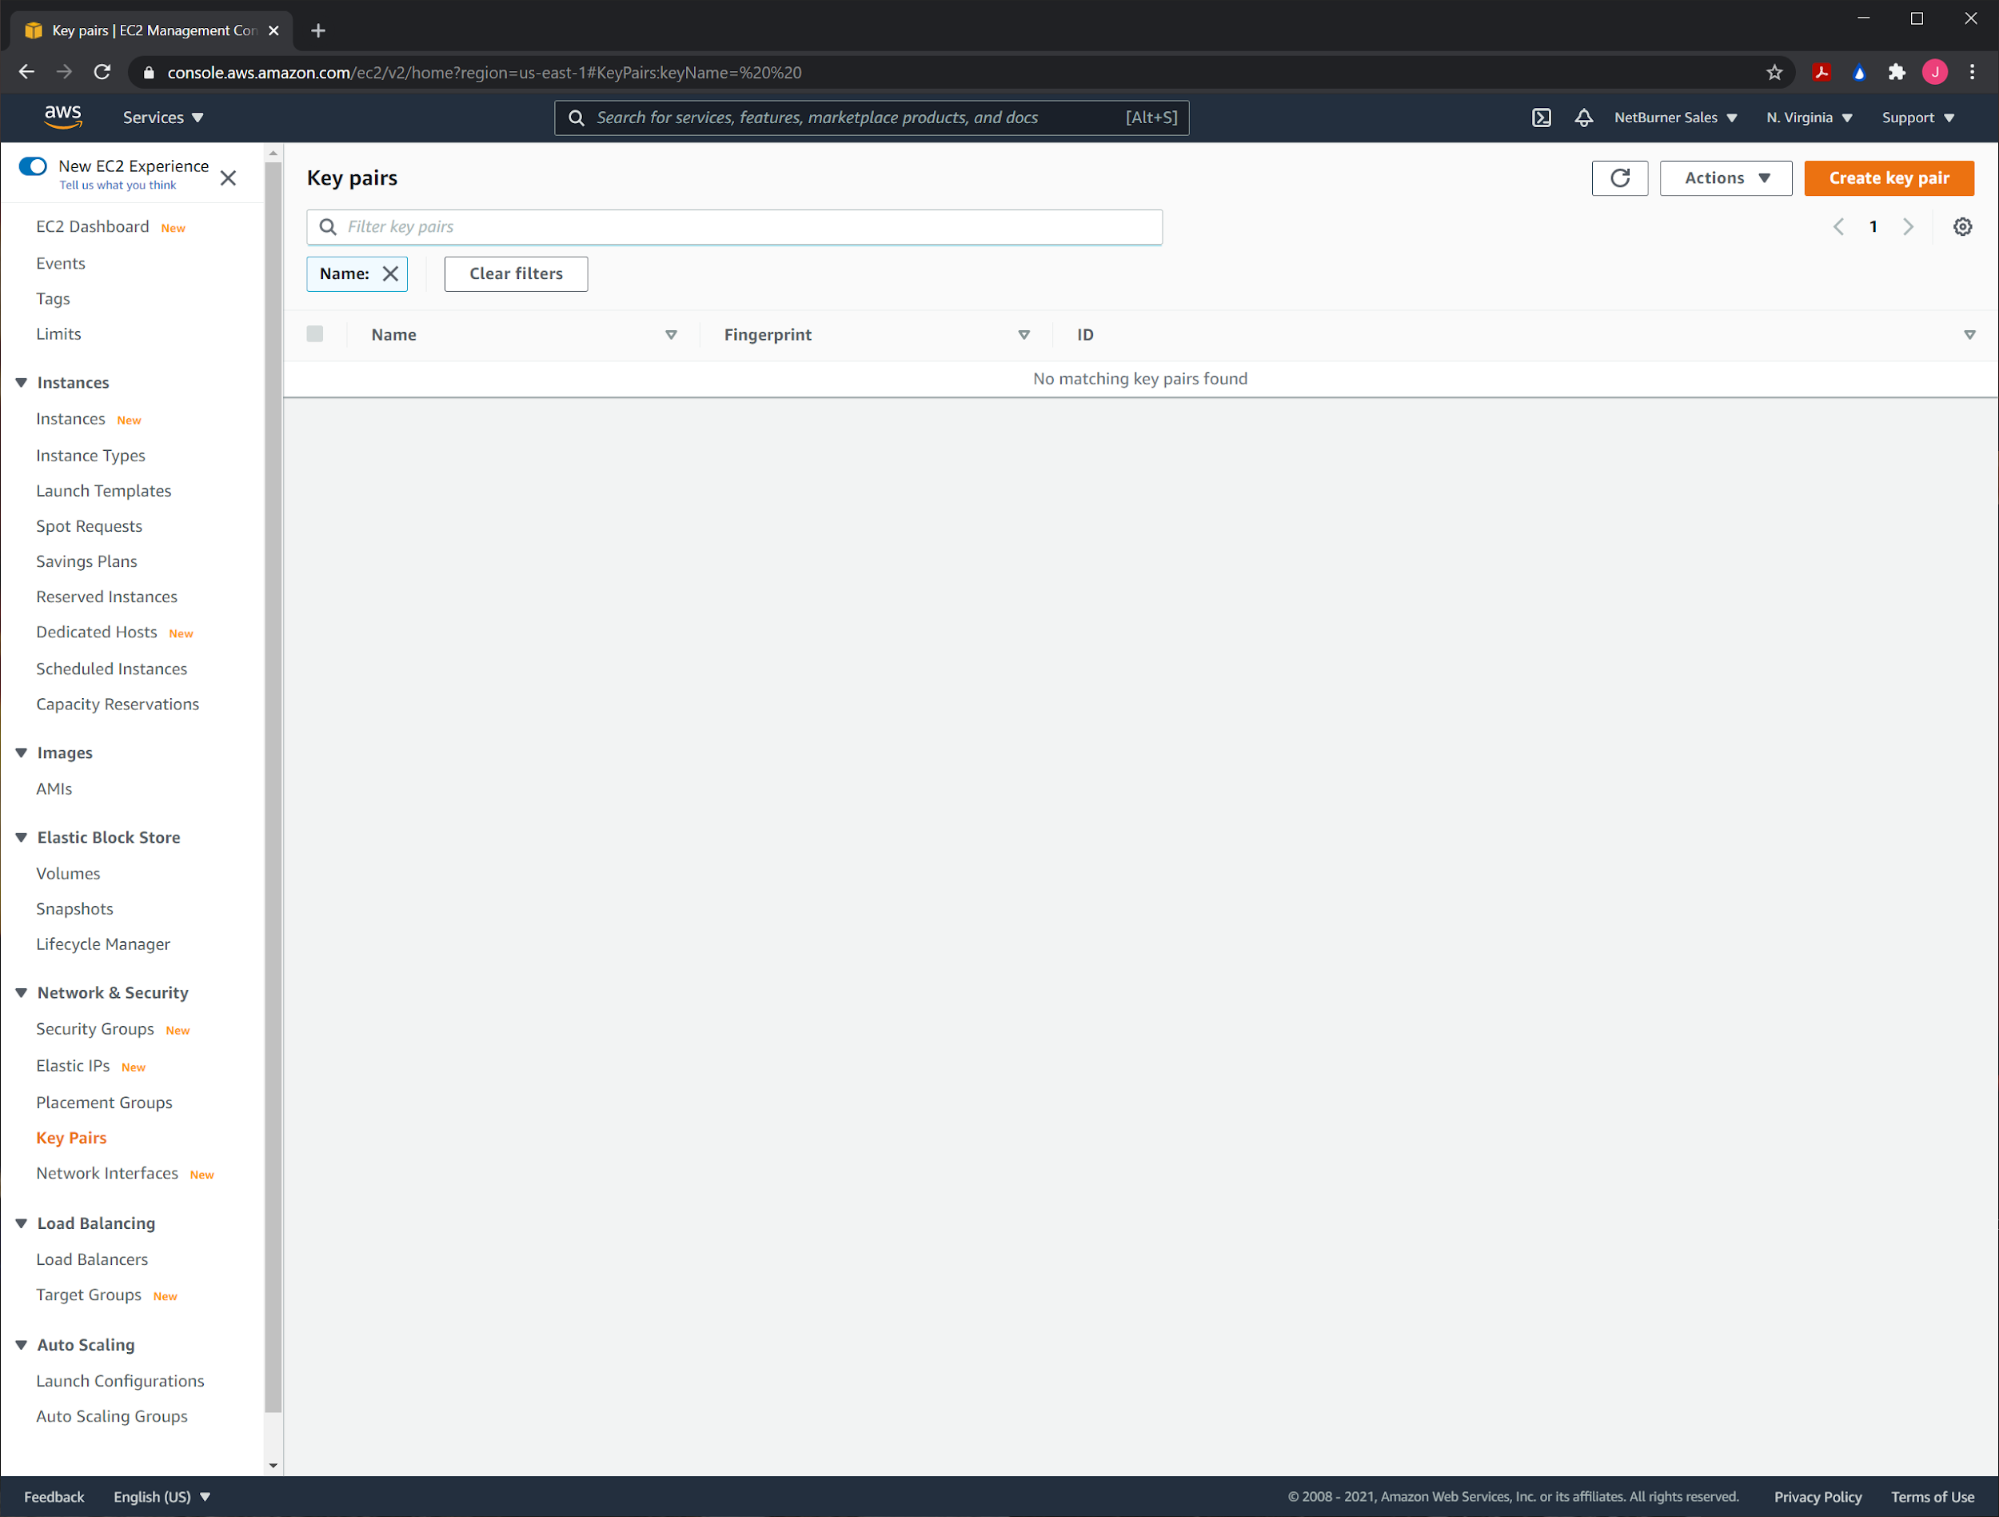
Give it a name, and then hit “Create key pair”.
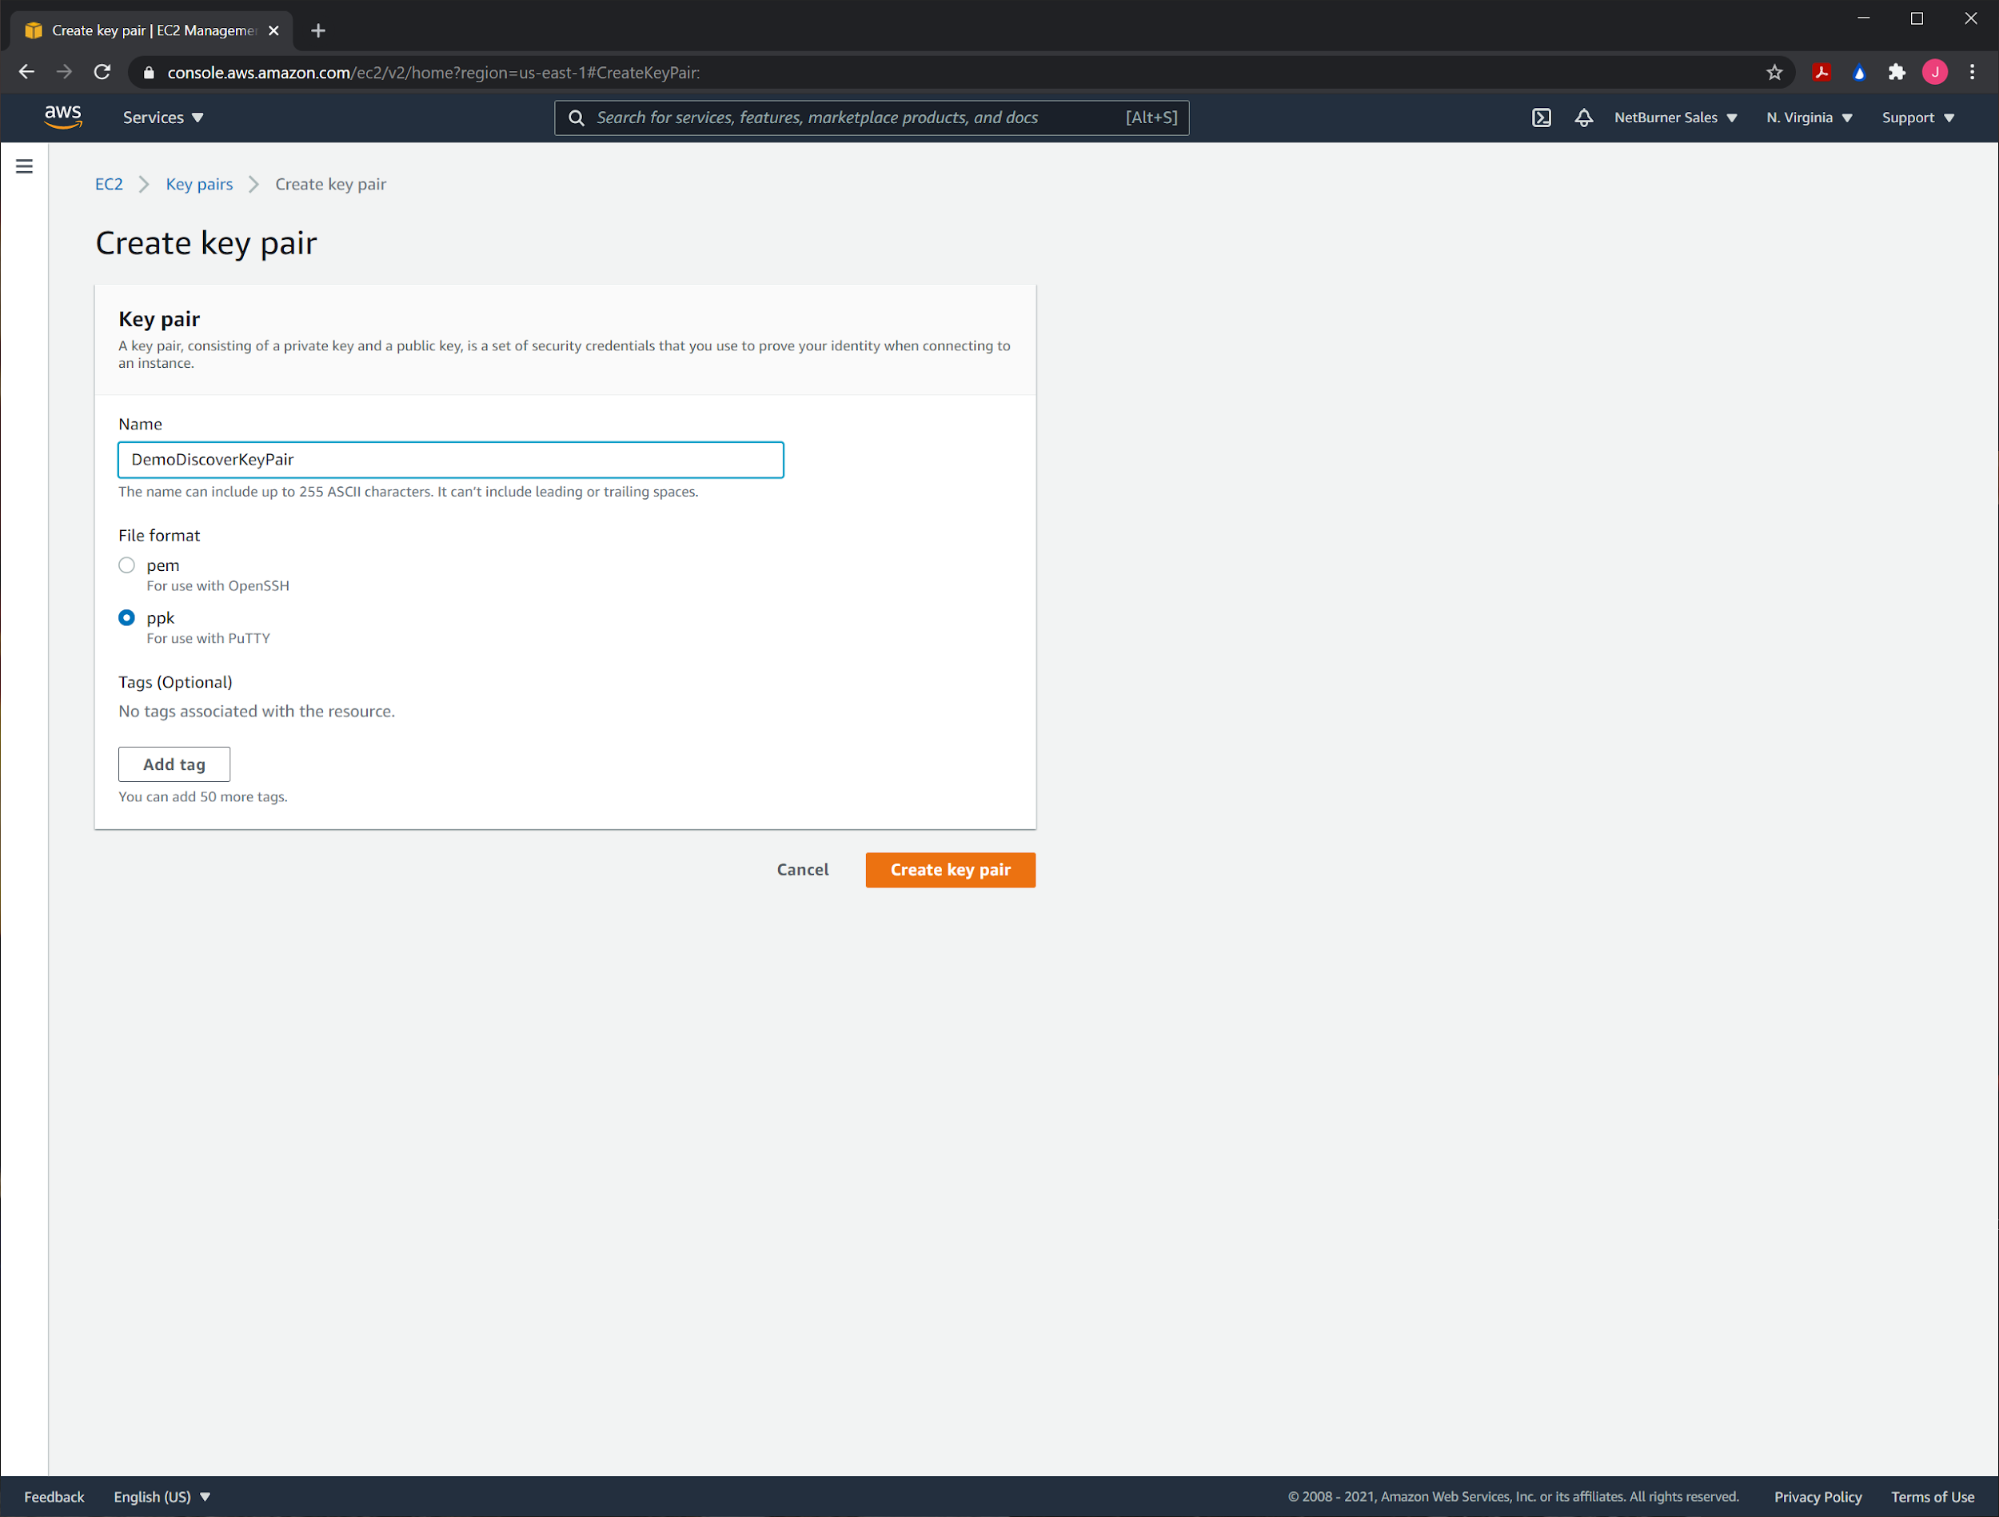
It will automatically download the keypair for you. It’s worth saving, though we won’t require it during the set up process.
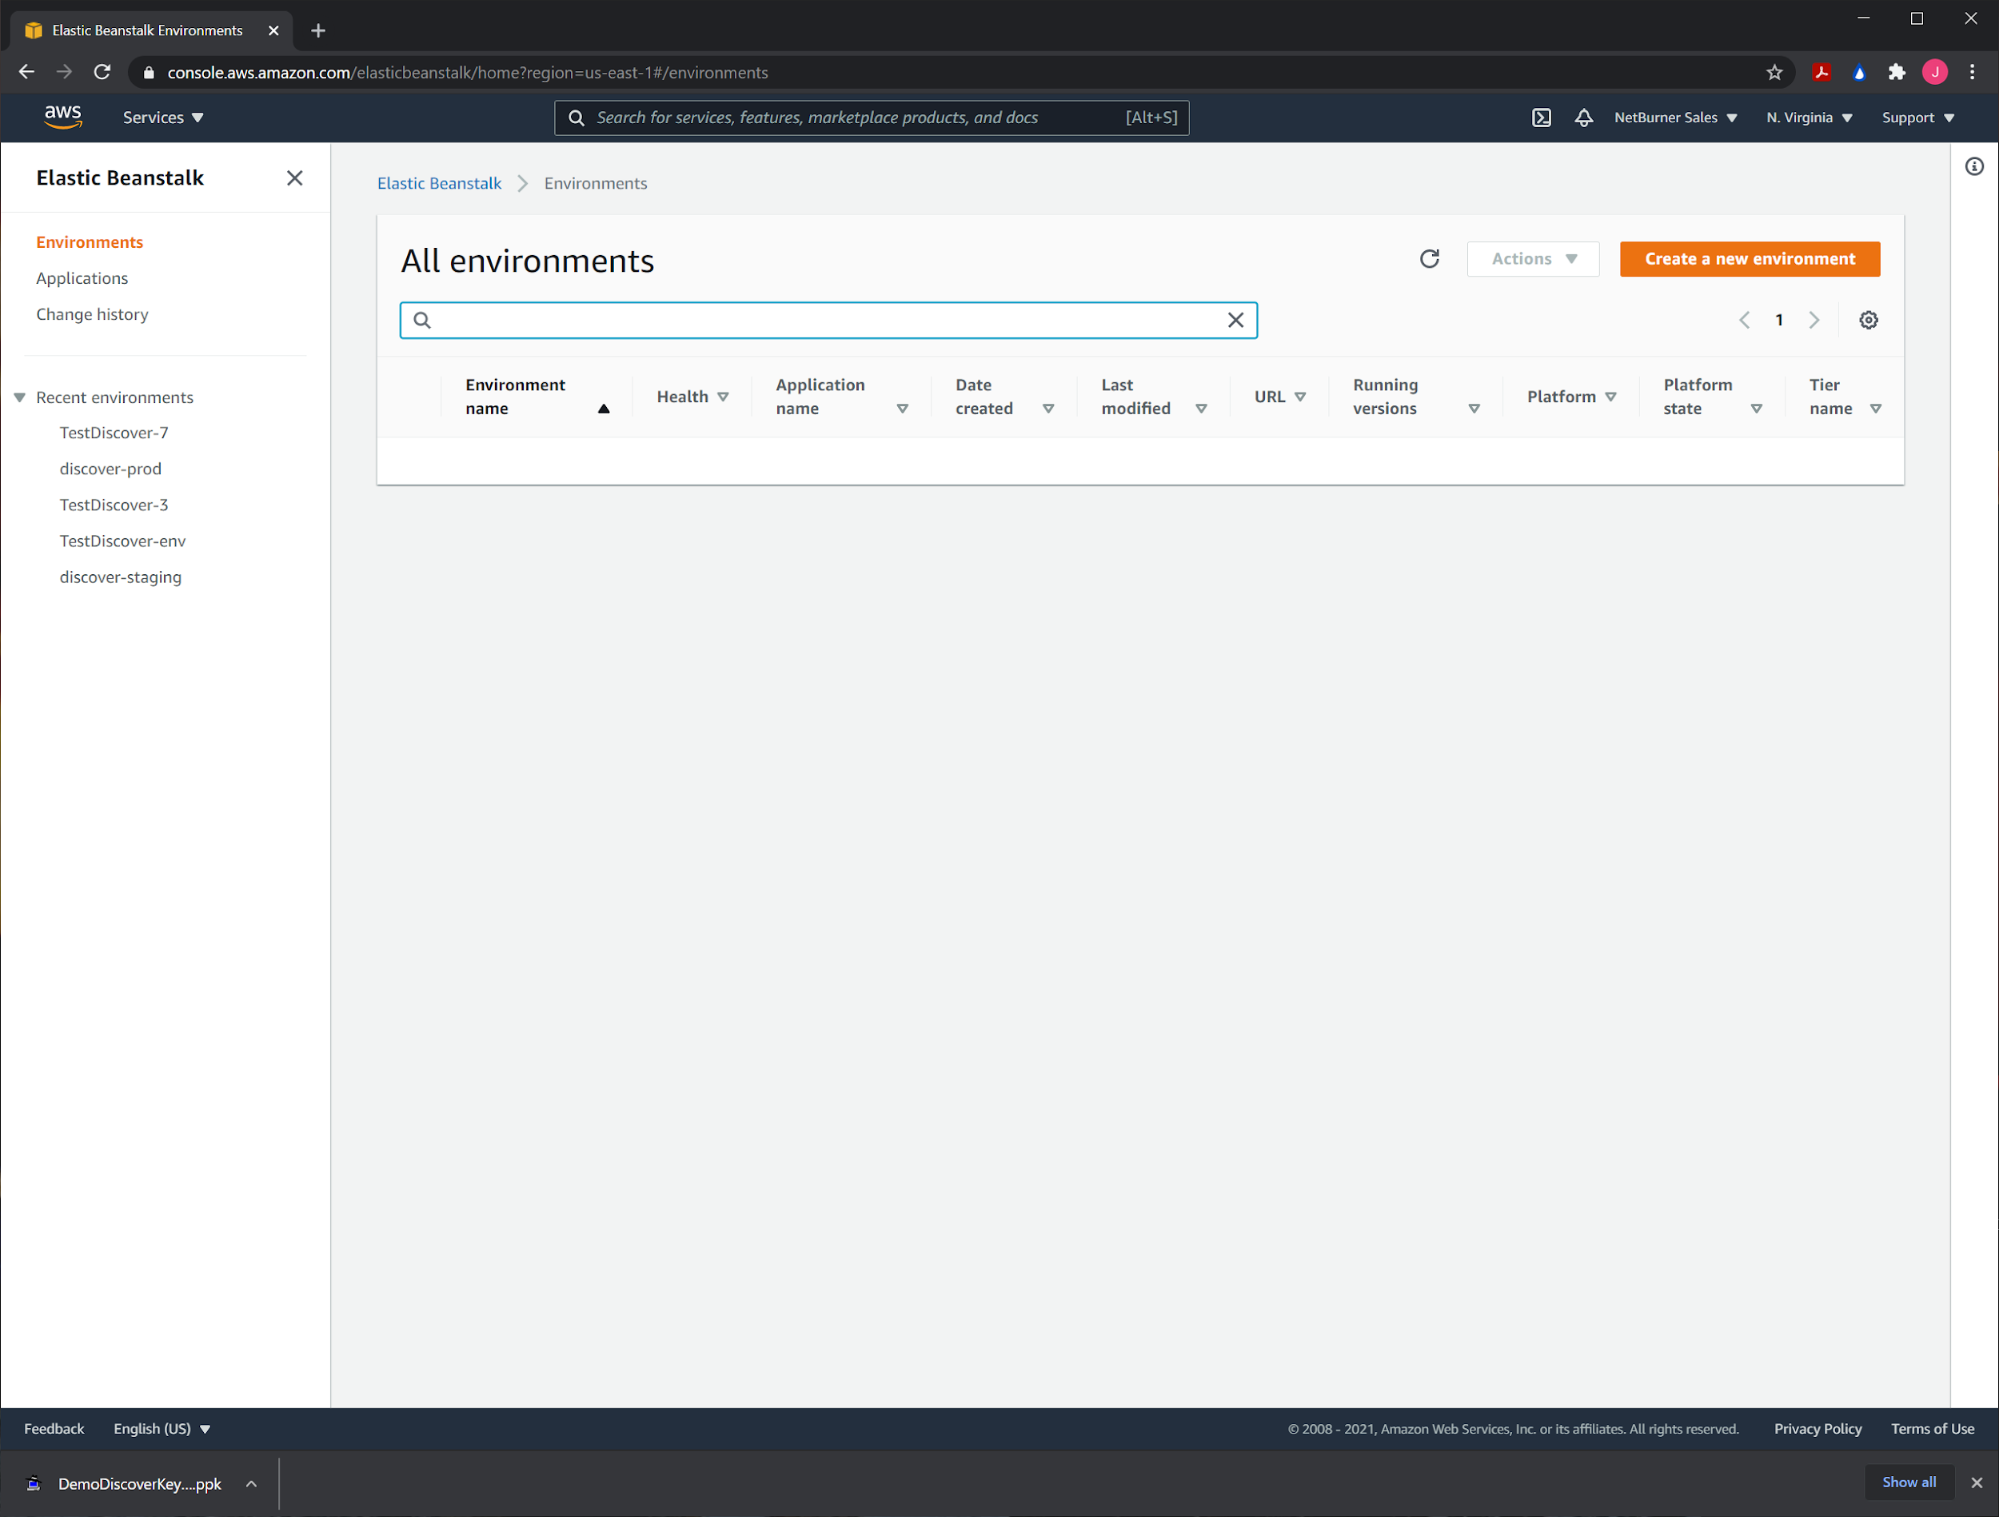
Set Up Elastic Beanstalk
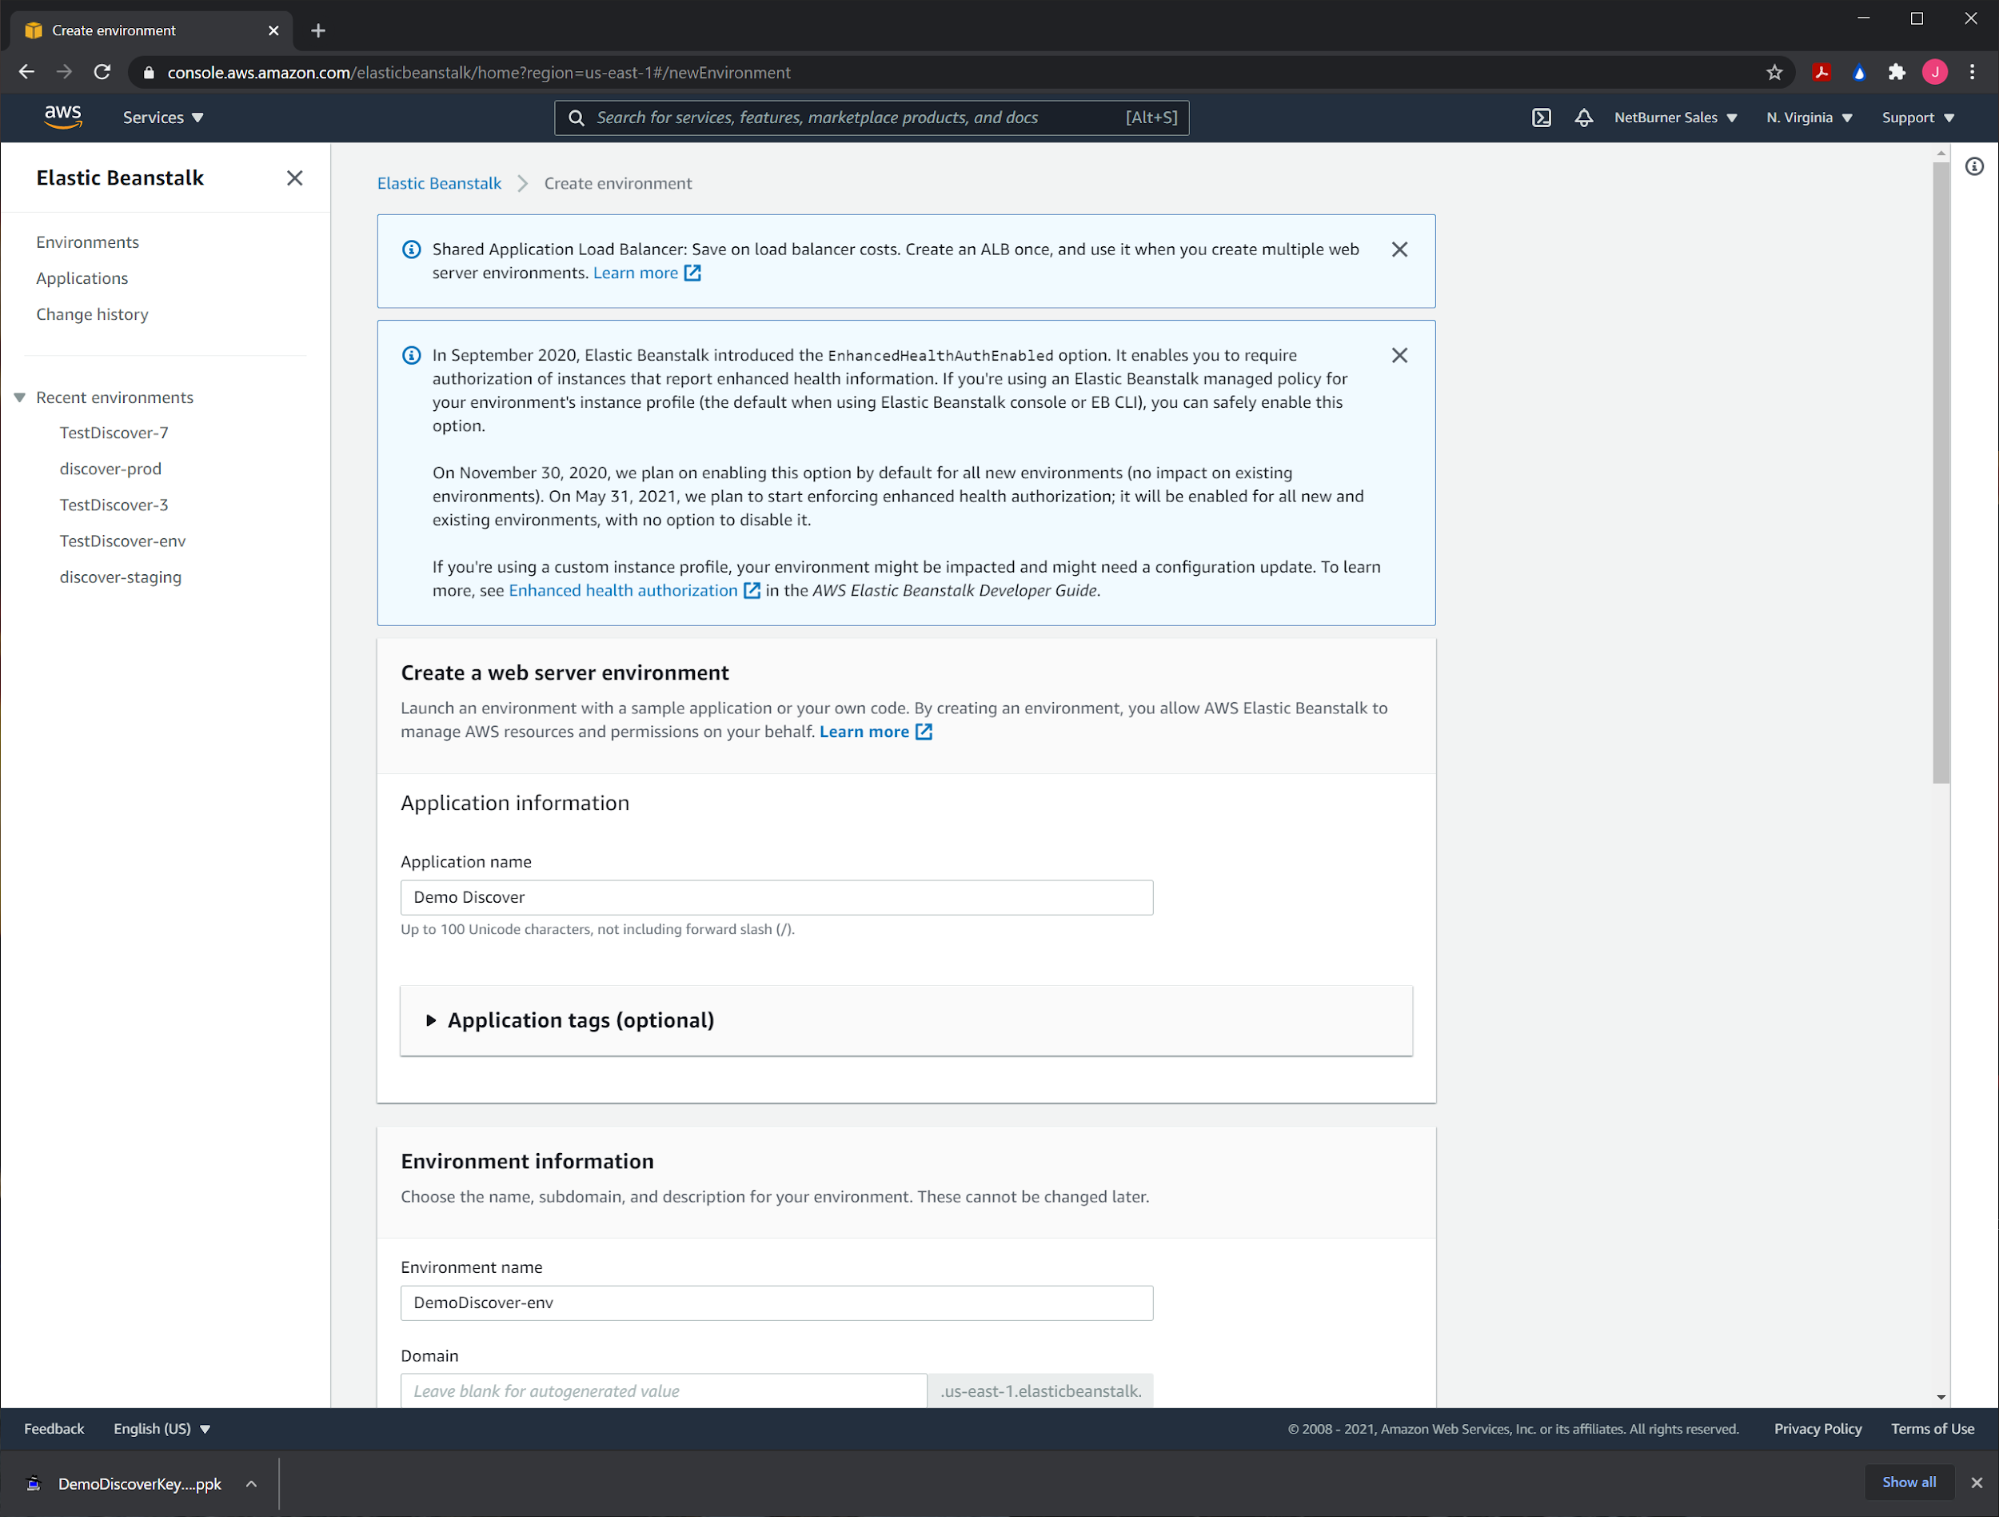
Finally, we’re ready to actually create our server. Head to the main Elastic Beanstalk dashboard, and set up a new application by clicking on the button labeled “Create a new environment” at the top right of the screen.
Leave it selected as a “Web server environment” and click on the button, “Select”. From the next page, provide an “Application name”. The fields under the “Environment section will automatically populate, but feel free to change the name if you like.
Under the section labeled, “Platform”, leave “Managed platform” selected. For the Platform field, select “Node.js”. For the “Platform branch”, select “Node.js running on 64bit Amazon Linux”. Set “Platform version” to “4.7.0”, and for the “Node.js version”, choose 10.13.0.
Under the section labeled, “Application Code”, select “Upload your code” and choose the .zip file that contains the Discover server application.
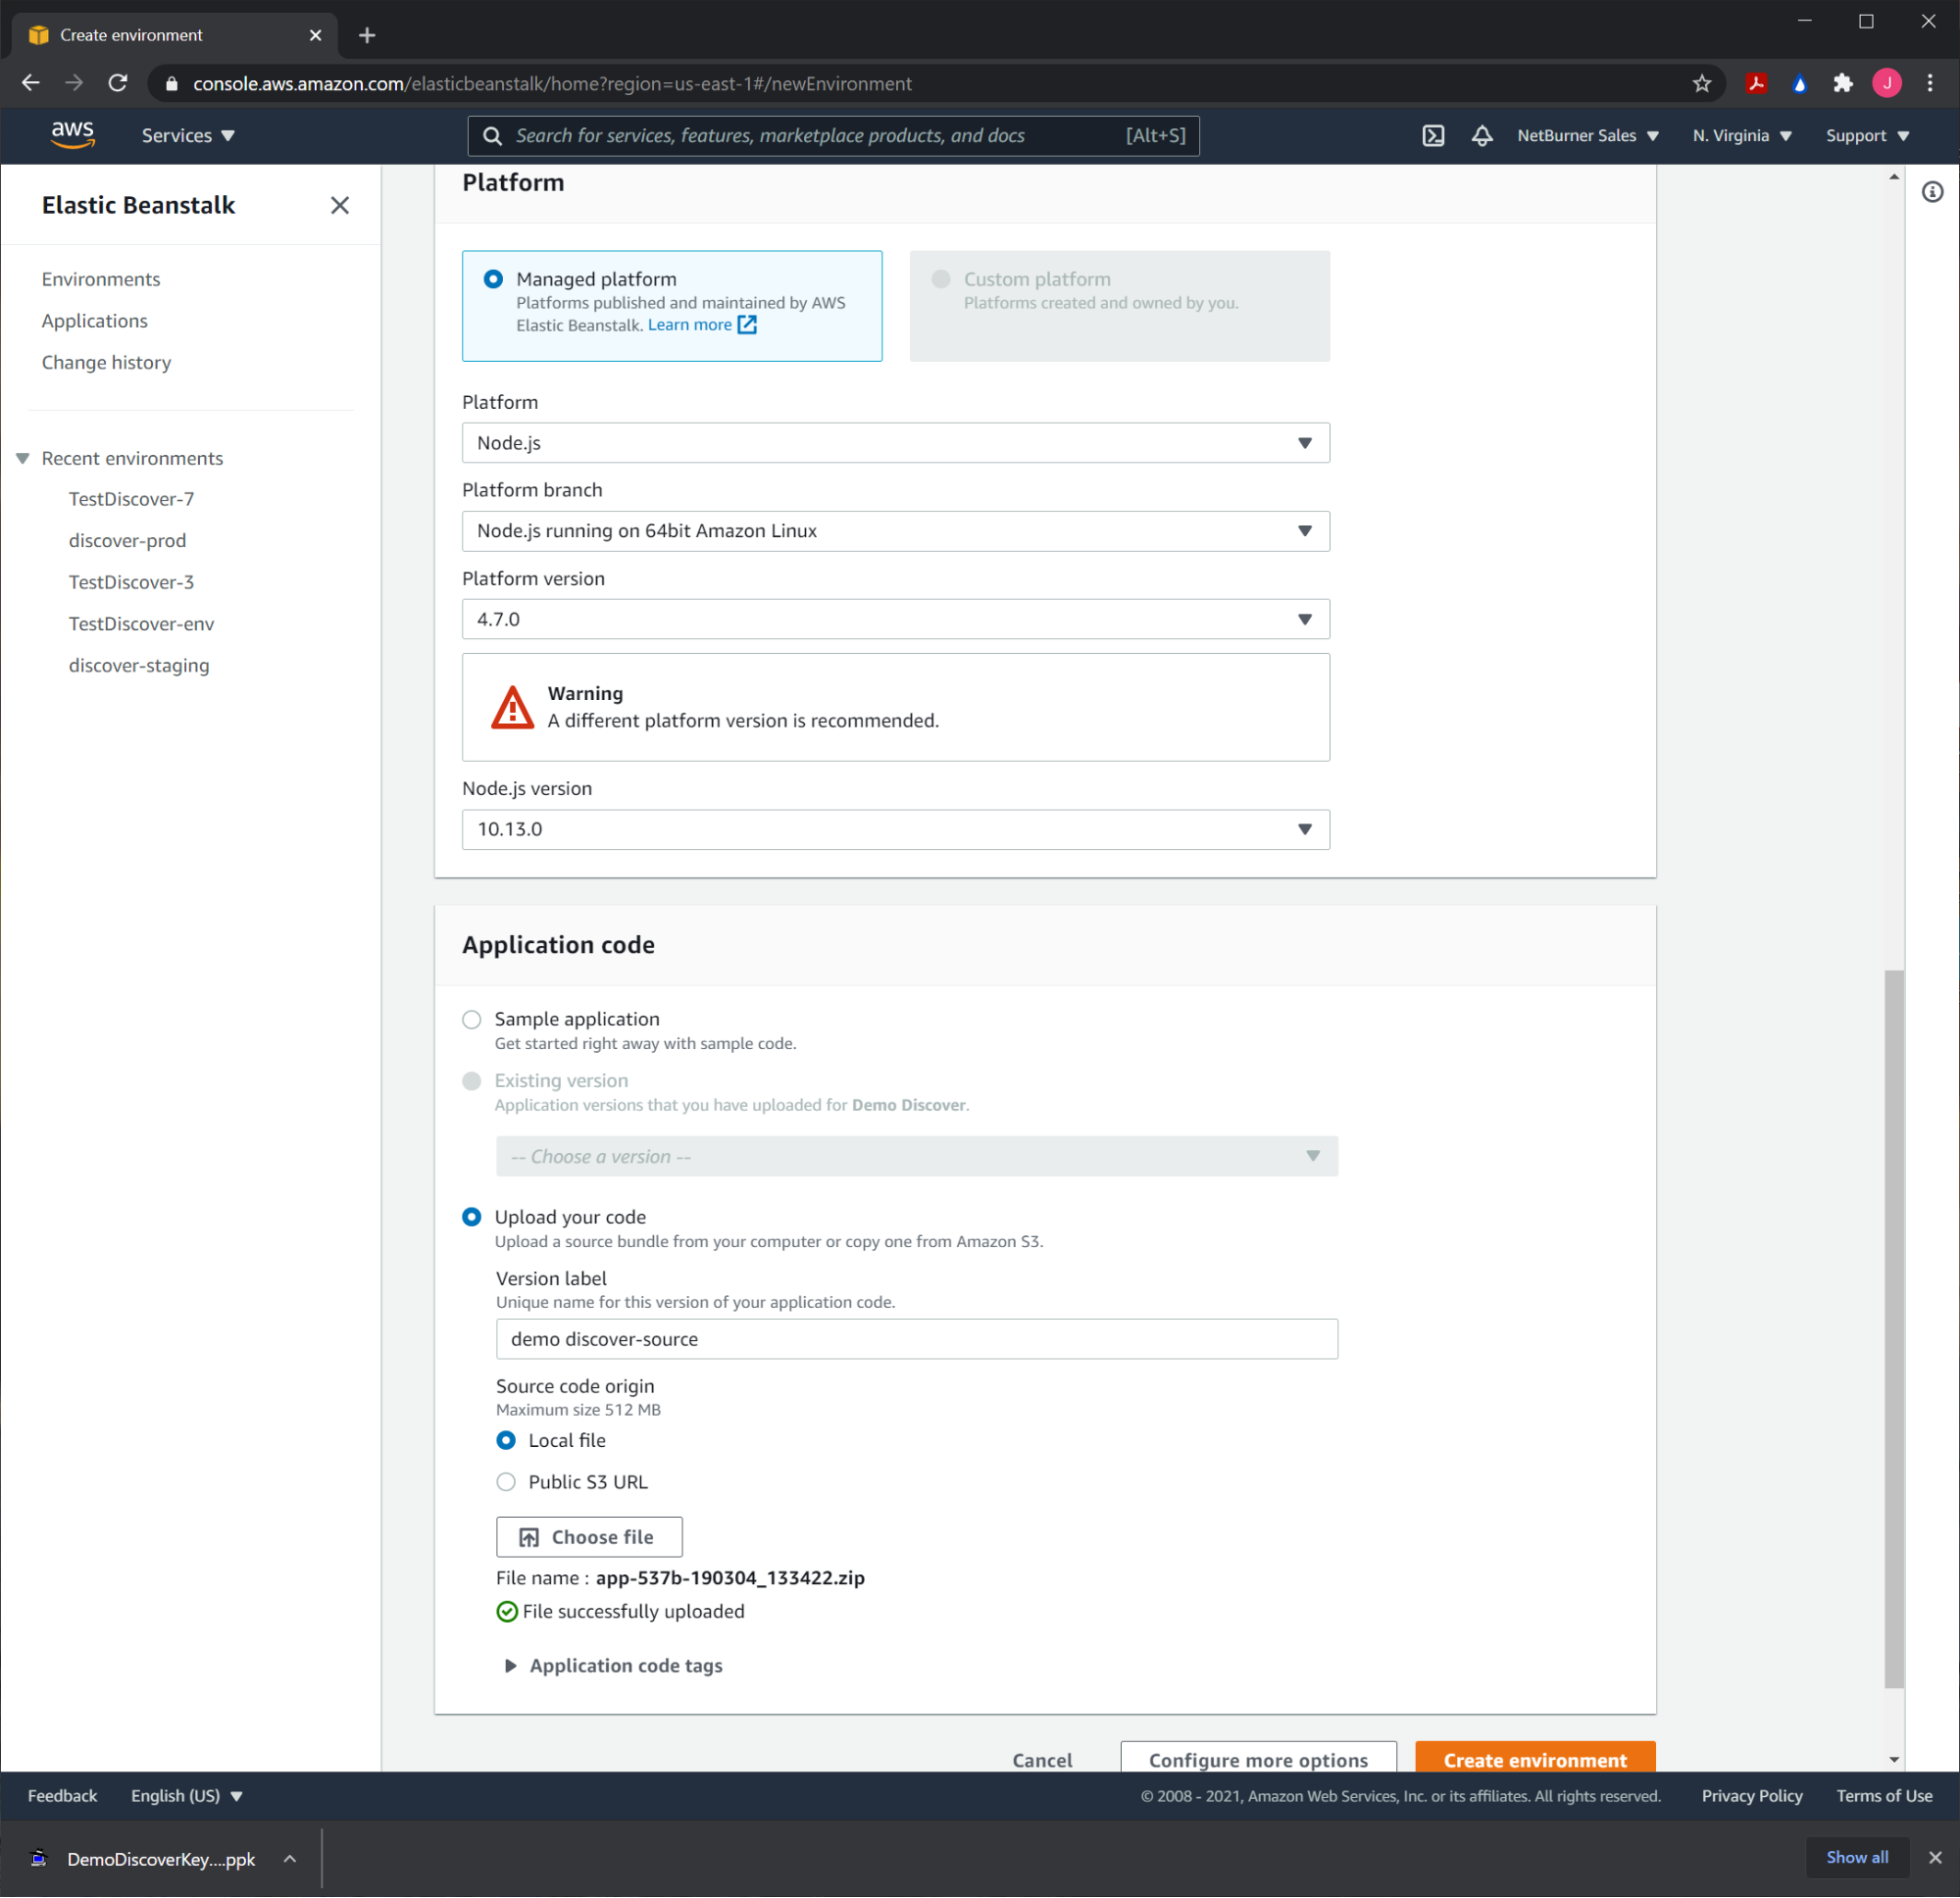
When the file has successfully uploaded, select the button labeled, “Configure more options” at the bottom.

“Software” Settings
Open up the “Software” tab with the “Edit” button. Set the “Node command” to npm start.
At the bottom under Environment properties, add the following:
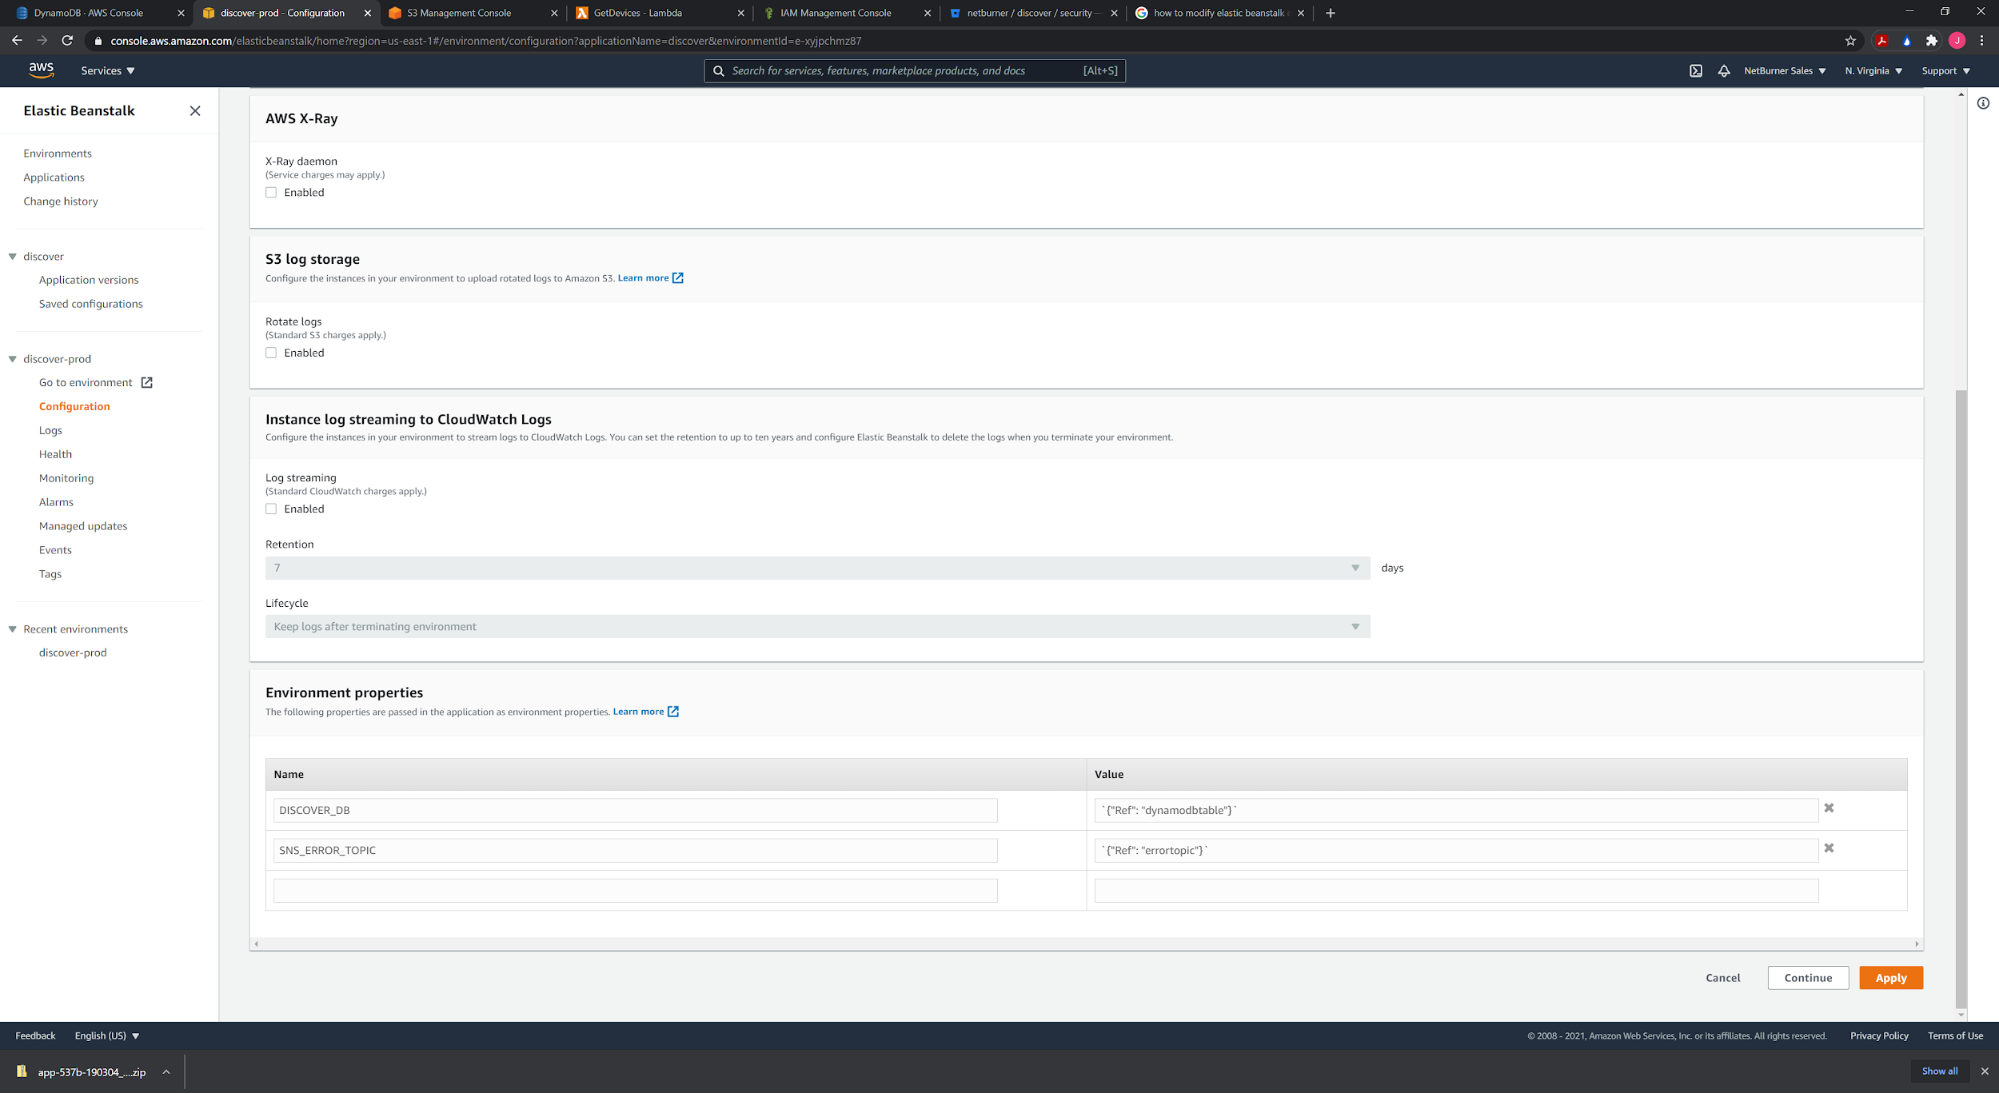
| Name | Value |
|---|---|
| DISCOVER_DB | `{“Ref”: “dynamodbtable”}` |
| SNS_ERROR_TOPIC | `{“Ref”: “errortopic”}` |
When these values are set, hit “Save”.
“Capacity” Settings
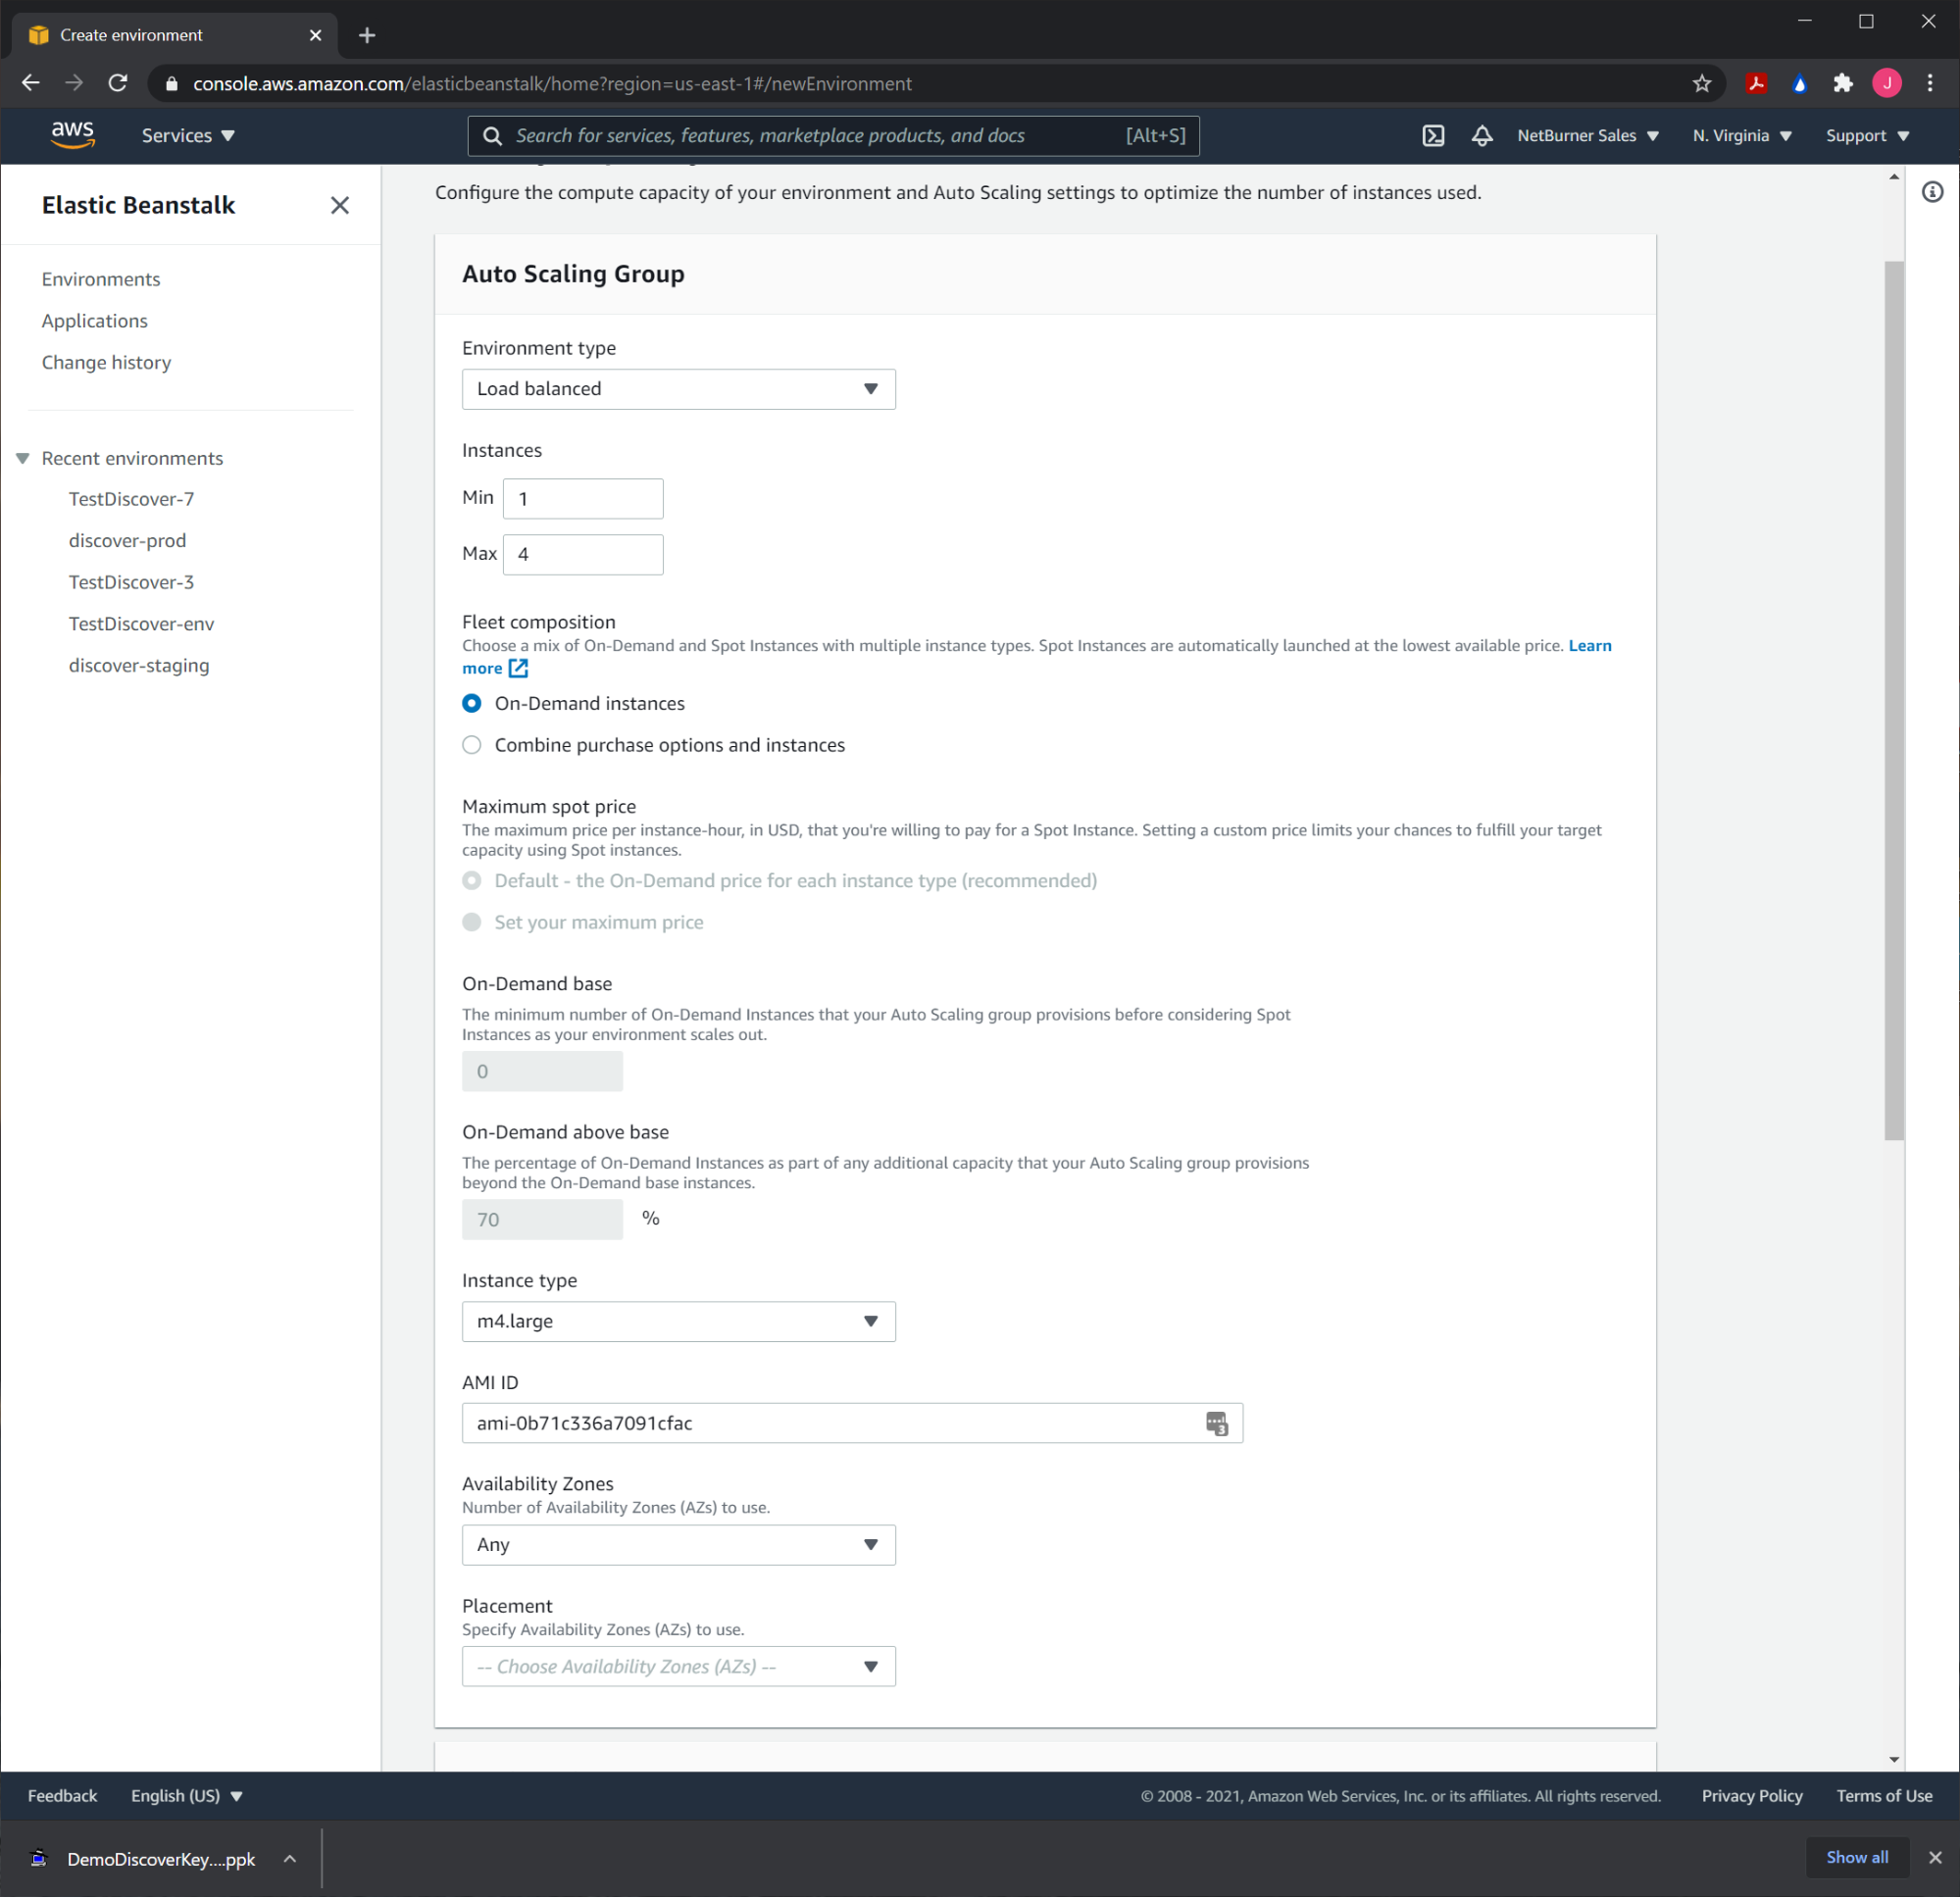
In the section labeled “Auto Scaling Group”, set the “Environment type” to “Load balanced”, the “Max instances” to 4, and the “Instance type” to at least an m4.large. When these are set, hit “Save”.
“Security” Settings
Under the card labeled, “Security”, hit the “Edit” button.
Select the “EC2 key pair” that you created earlier, and the “IAM instance profile”, and then hit “Save”.

“Network” Settings
Under the card labeled, “Network”, hit the “Edit” button.
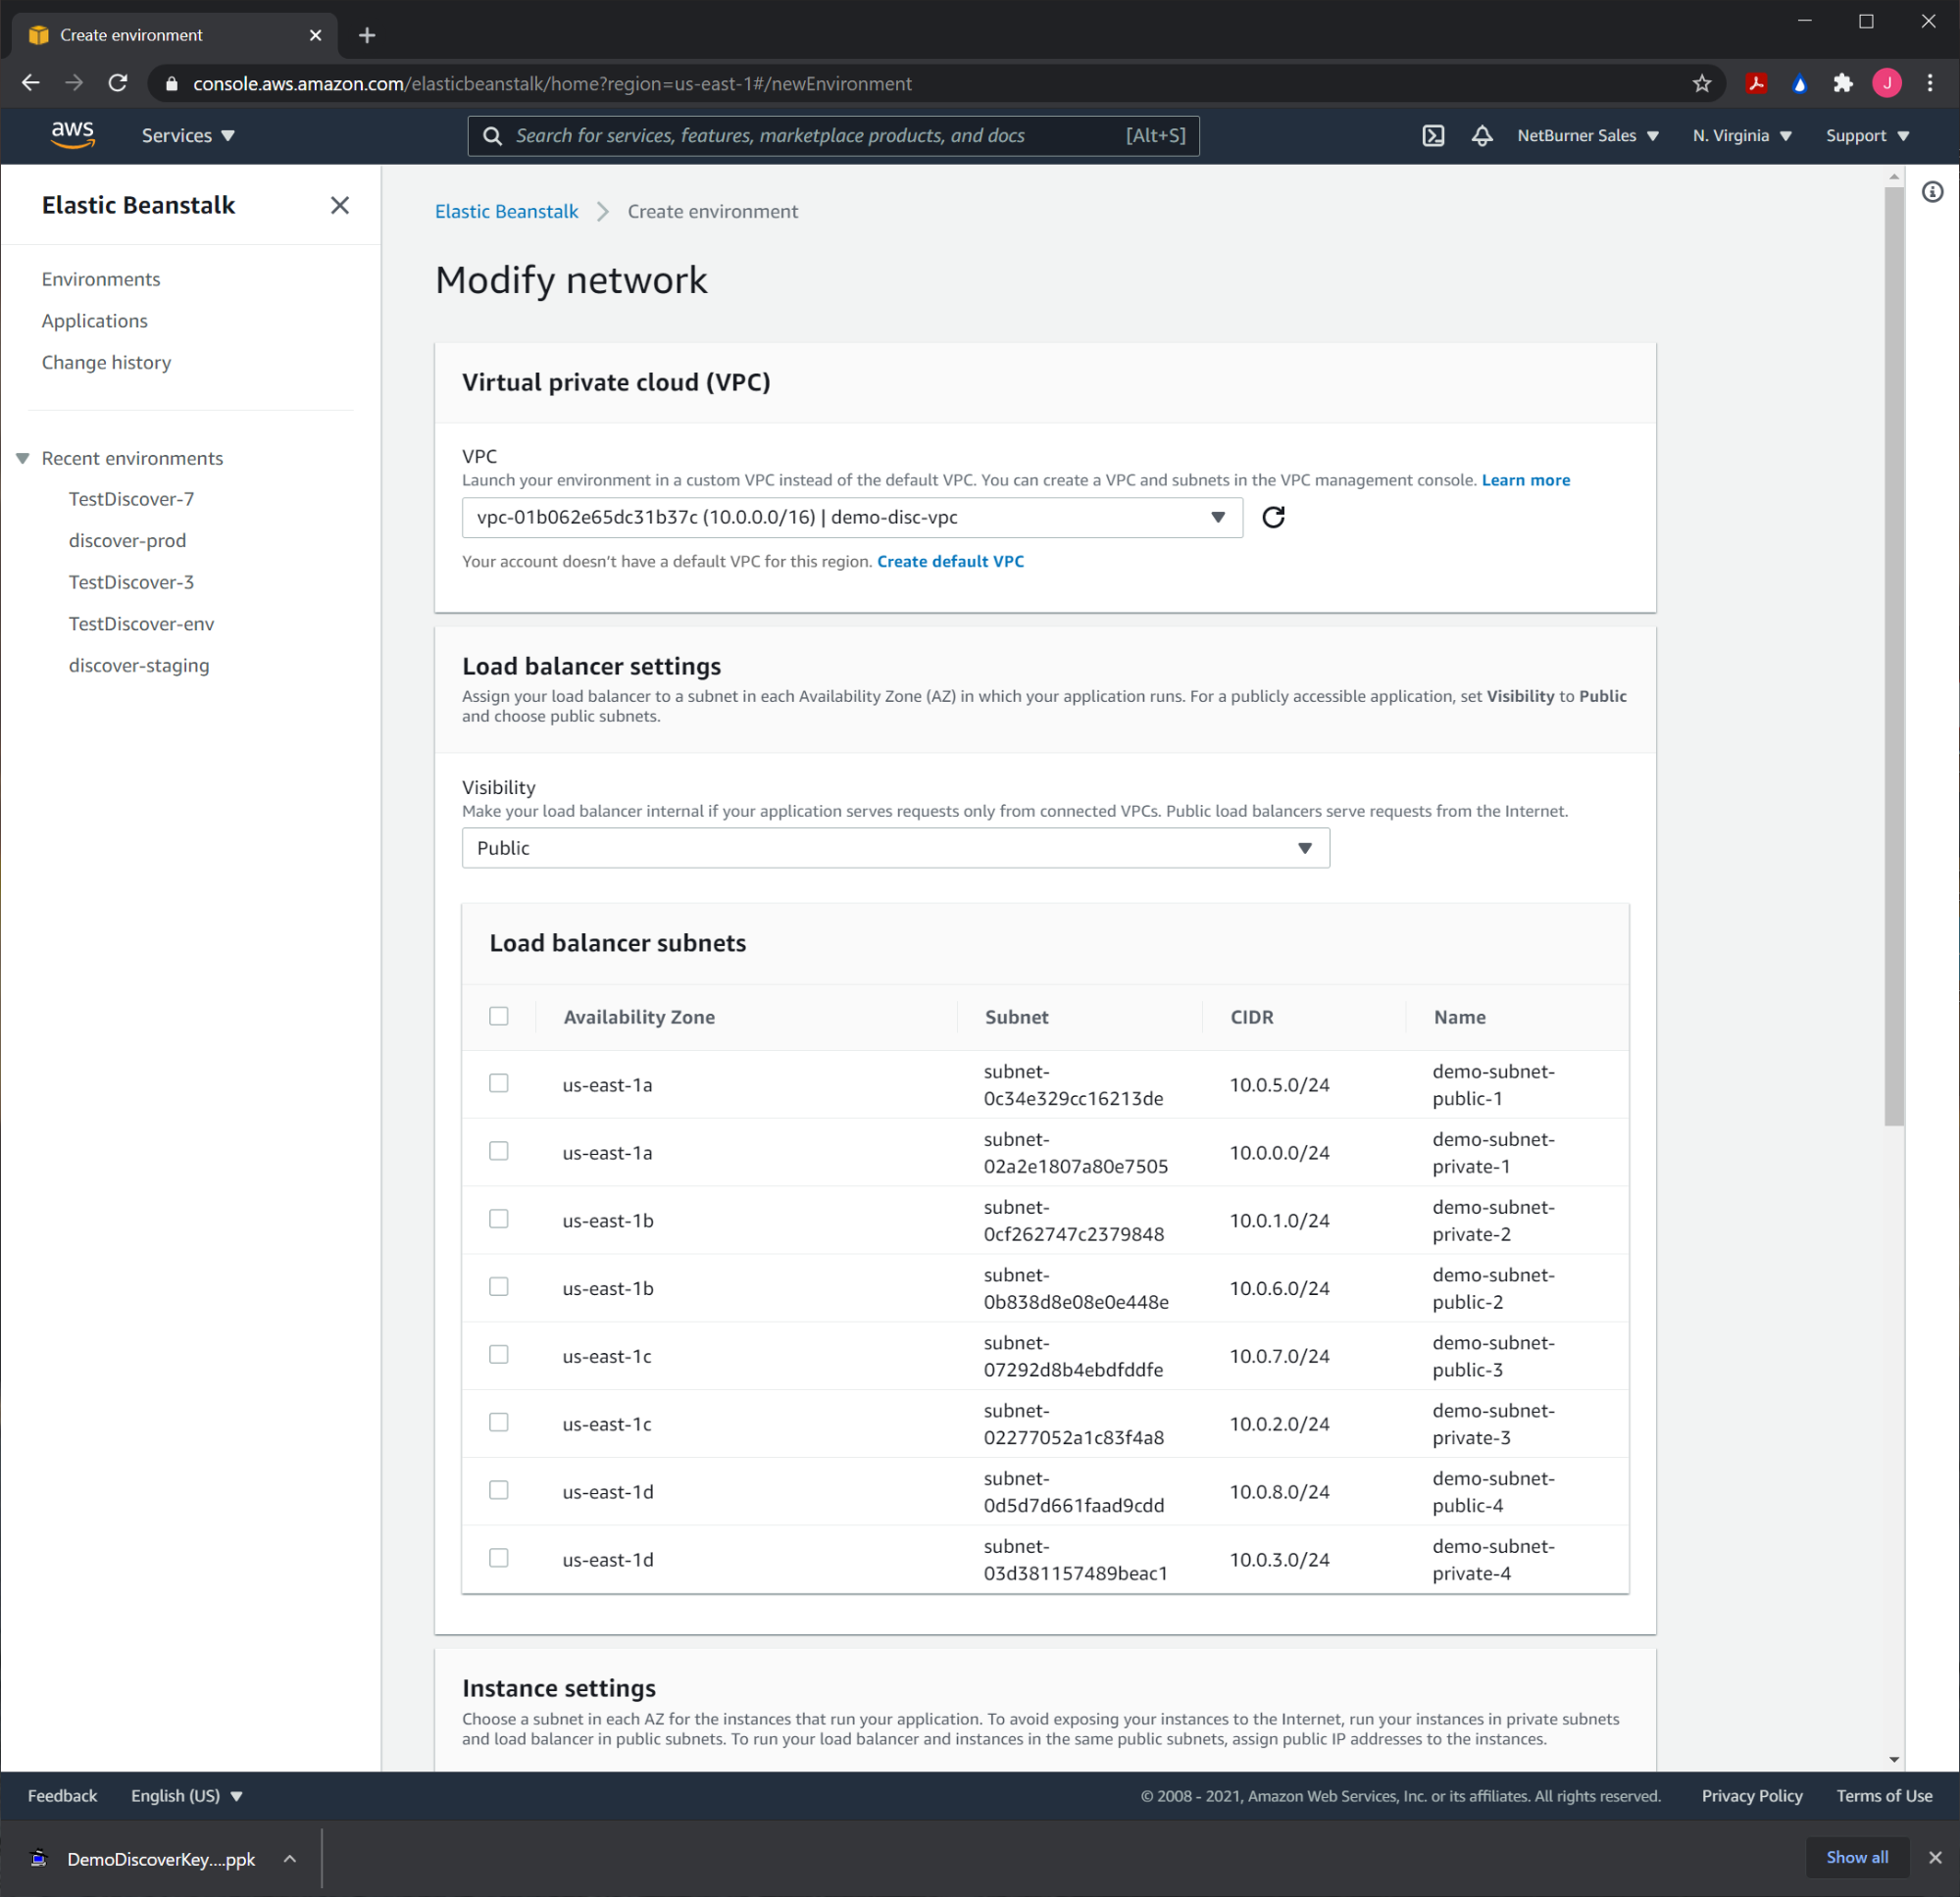
Select the VPC we created above.
For “Load balancer subnets”, choose the public subnets. For “Instance settings”, choose the private subnets. Then hit the button labeled, “Save”.

Create the Environment
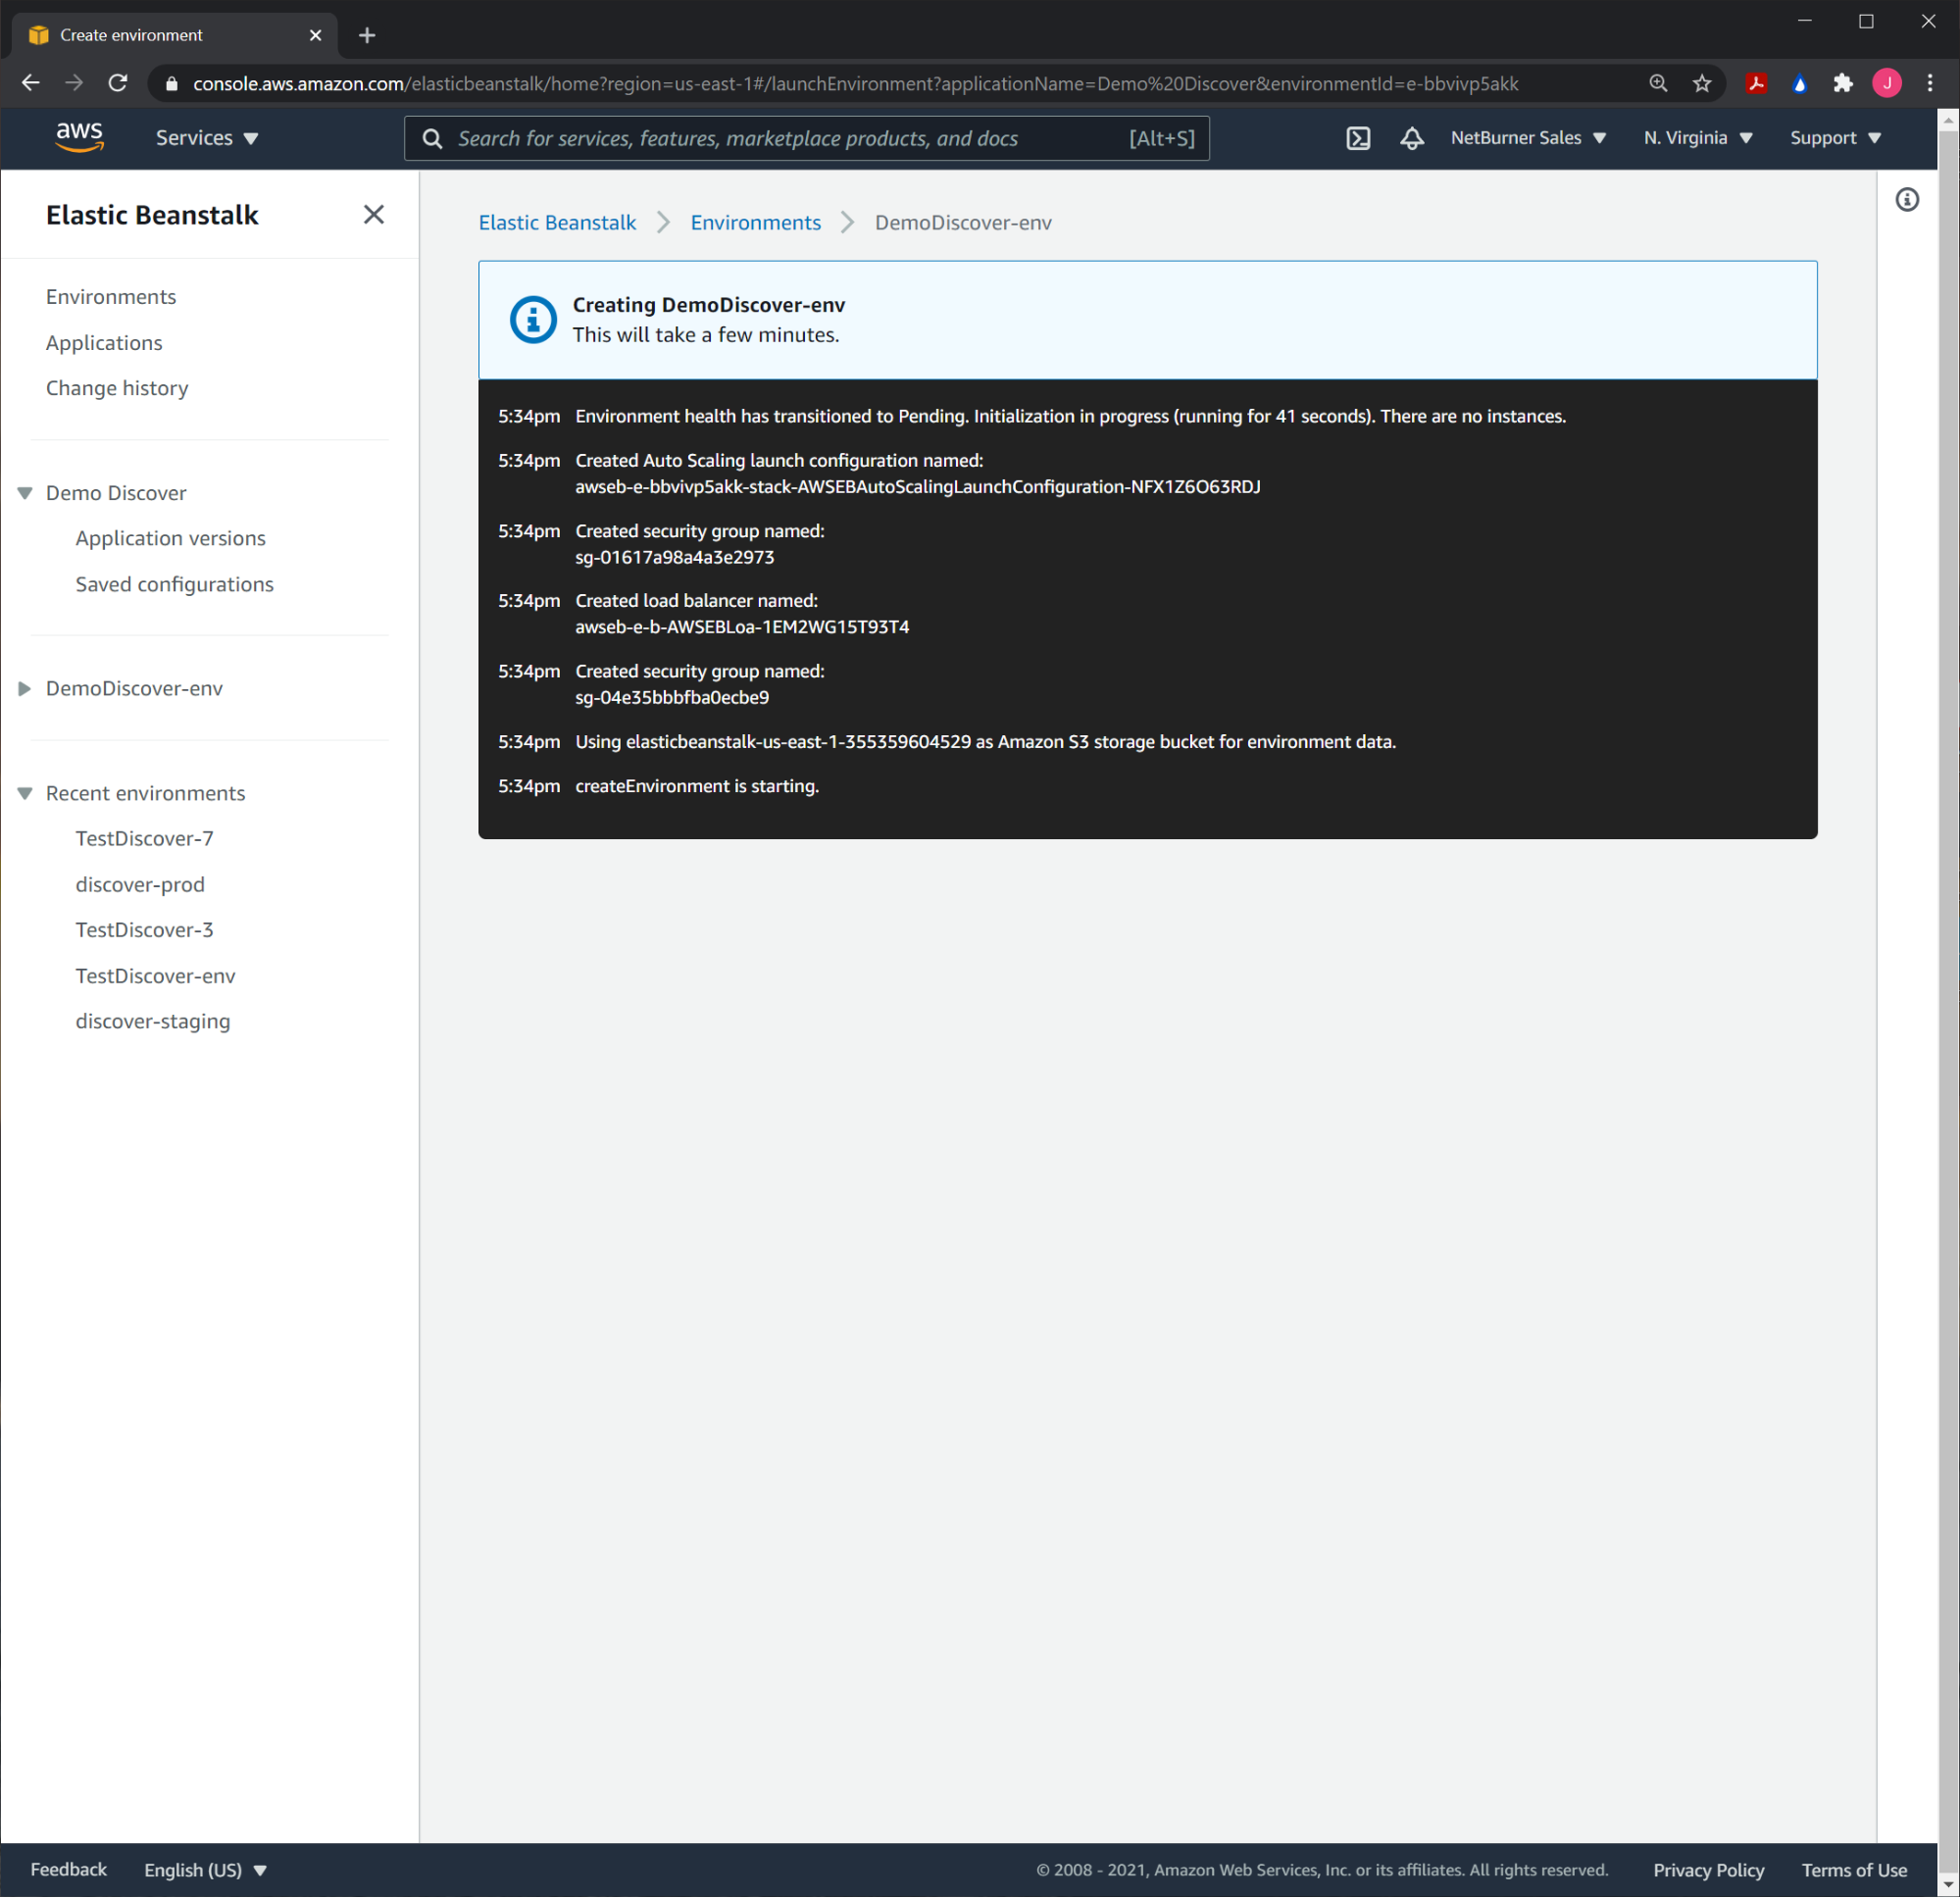
When all of these settings have been set, hit the button labeled, “Create environment”. This process will take up to several minutes, though you should see the log messages show up as the server is started and the application is run.
Eventually you will be redirected to the environment’s dashboard.

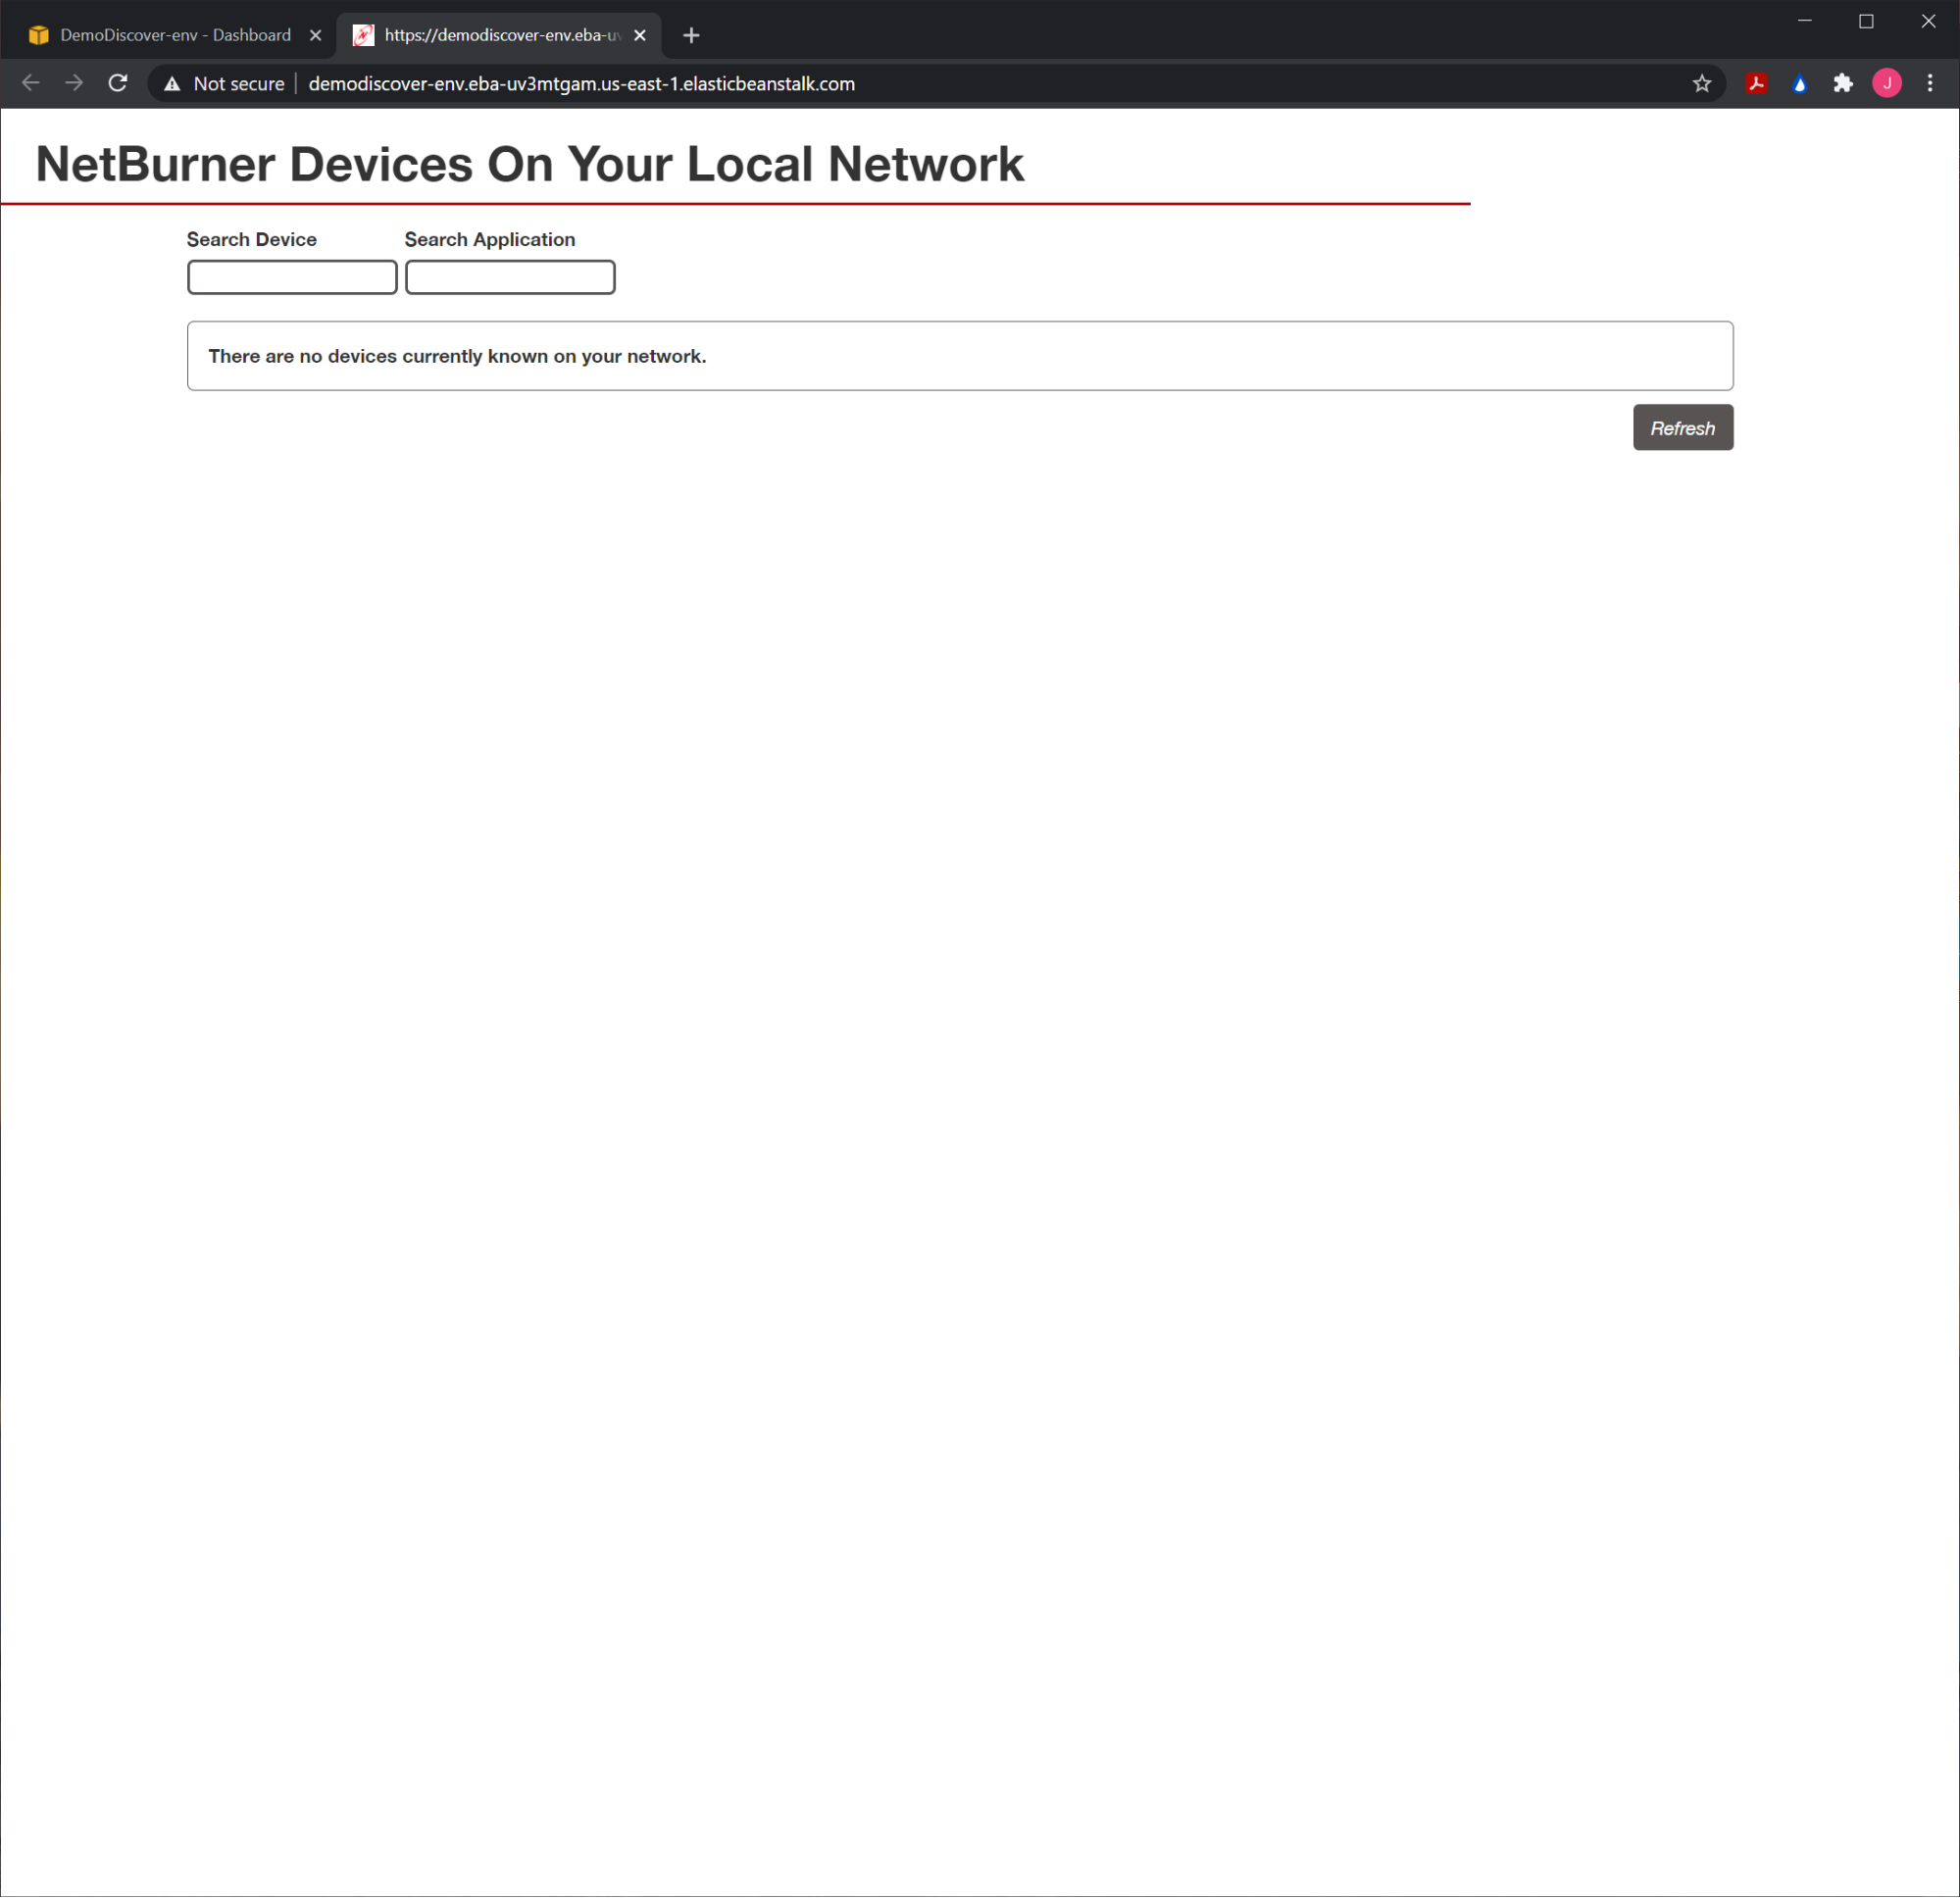
Testing Your Discover Server
To test whether the application is up and running correctly, click on the link listed underneath the environment name. It will open another tab (probably provide you with a security warning due to self signed certificates), and then take you to the discover server landing page.
Wrapping Up
We’re more than happy to provide the official NetBurner Discover Server for you to easily find your NetBurner devices on your network. That said, we understand that there will be circumstances where you’d rather have more control with regard to what servers your devices are communicating with, what the service looks like, and what information is passed between them.
To help with this, we provide the Discover Server code freely to our customers and have outlined how to get it up and running with AWS. If you’re interested in spinning up your own copy of the Discover Server, feel free to reach out to us at [email protected]. We’re always happy to hear from our customers, and would love to talk with you about the potential benefits that come with having your very own cloud based platform that can track and help manage your NetBurner devices.
If you have any questions or thoughts, please feel to leave them in the comments below, or email using the address listed above.