 |
NetBurner 3.5.8
PDF Version |
|
NetBurner 3.5.8
PDF Version |
The goal of the NetBurner Eclipse Getting Started Guide is to familiarize new users with the NetBurner Eclipse (NBEclipse) interface and basic operation. NBEclipse is based on the standard Eclipse release with additional features to support development with NetBurner hardware, such as the ability to locate your NetBurner device on the network, and download an application to the device’s flash memory. Topics include:
Source code for the examples in this document are located in the \nburn\examples directory of your NetBurner tools installation.
This document assumes you have a working hardware platform on which you can run the examples. Your NetBurner development kit hardware is pre-programmed with an example application at the factory. Before executing the examples in this document, it would be a good idea to connect your NetBurner device to your computer and verify you have serial and network communication with the device as described in the NNDK Quick Start Guide.
NetBurner software tools run on Microsoft Windows and OSX. When you receive your development kit there will be a bright red card with a keycode. Register this keycode at https://support.netburner.com to download the development tools.
Do not install over an existing version when upgrading from a previous version of the NetBurner tools. The upgrade requires that you either rename or uninstall the existing installation directory. The recommended procedure is as follows:
\nburn to \nburn2p8p8, then install the new version to \nburn. This way you can always get back to the previous installation and environment by renaming \nburn2p8p8 to \nburn. Newer versions of NBEclipse (3.3.3 and higher) bundle Java internally and so no separate installation is required.
Older versions of NBEclipse (3.3.2 and lower) require the 64-bit Java Runtime Environment (JRE) revision 1.8 or higher. Direct links to recommended versions are provided on the NNDK Download page. Download either the Java SE (Standard Edition) Development Kit (JDK) or Runtime Environment and follow the installation prompts. You may need to restart your computer after installation is complete.
Throughout this guide, we will refer to the "serial debug port". The serial debug port is one of the RS-232 ports that can be used to interact with your NetBurner device in the example programs. Stdout, stdin, and stderr are mapped to the debug port by default, so when you use functions like printf(), scanf(), gets(), they read and write to the serial debug port. Mapping of the stdio is configurable, as you can disable the serial debug port and use it as a general purpose UART, or reassign the stdio file descriptors to use other serial or network interfaces. Debugging in NBEclipse on network-enabled platforms will occur through the Ethernet connection, while debugging on non-network platforms will use the serial port.
Your NetBurner Network Development Kit provides two options for development:
The choice of what platform you wish to use depends on personal preferences. The command line tools use makefiles, which are included for every example program and can be used as a starting point for your own makefiles. The make utility can also be invoked from within other IDEs and code editors such as Microsoft Visual Studio.
The following points are useful to users who have not used a similar type of project manager. There are three primary methods to maintain and build a project:
<cntl> b will build the active project.<cntl> <space> invokes function auto-complete.
This is the most common type of project creation. It will be used to build and run example programs, and is a good starting point for your own projects. By "empty project" we are referring to creating a project without running the Application Wizard to auto-generate a minimal application. After we create the project we will use the project import feature to import source code files from an example into the project.
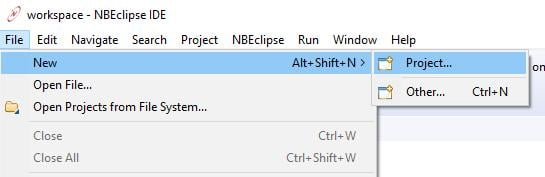
From the main menu, select File->New->Project:
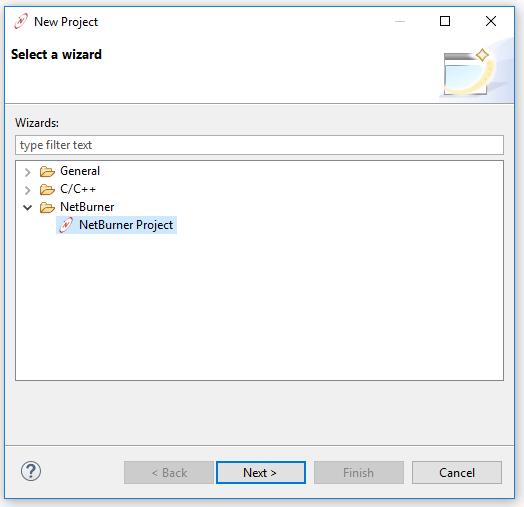
Select the NetBurner project type, then select Next:
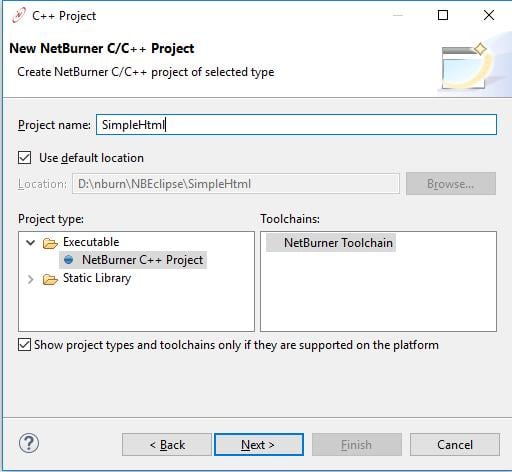
Enter your project name in the Project Name field (it is best not to use spaces with gcc tool chains). In this example we entered "SimplHtml", since that is the example we will import. Make sure the Executable is set to: "NetBurner C++ Project".
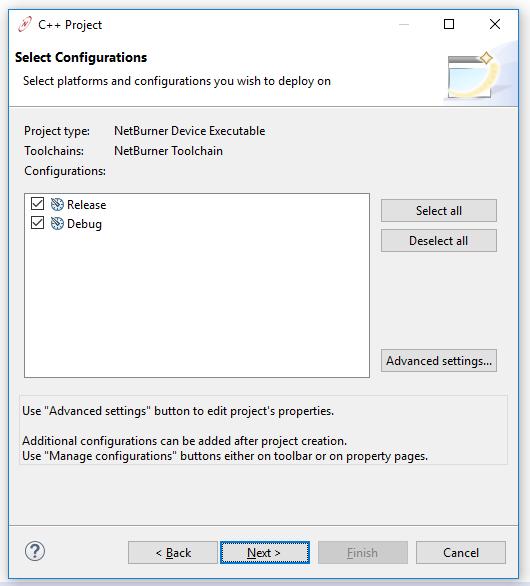
The default options for the project configurations are both Release and Debug. Leave the defaults and select Next.
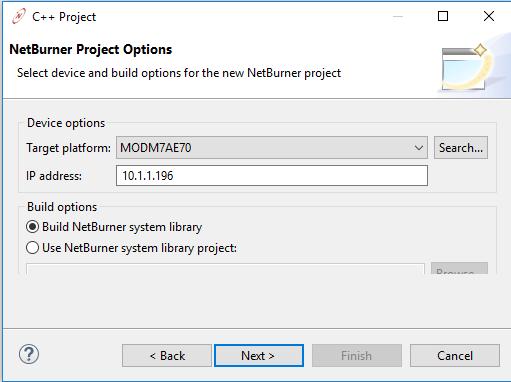
There are two ways to select your target NetBurner device:
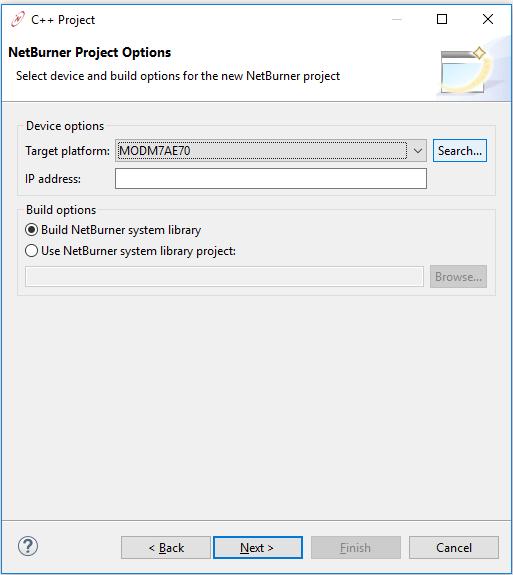
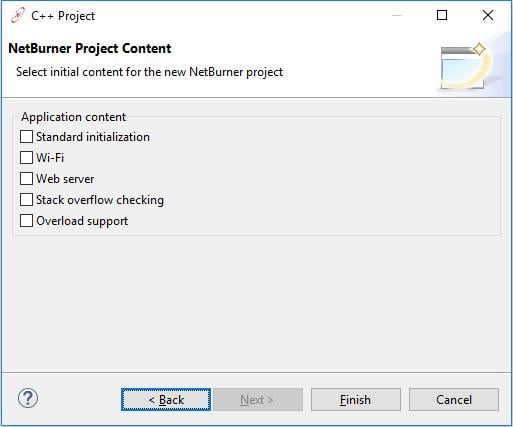
Since we are creating an empty project and will be importing our own source files we do not want to select any items here. However, if you wish to generate a minimal application using the Application Wizard, select both Standard Initialization and Web Server. This will generate a main.cpp source file to use as a starting point for your application.
Select Finish to complete the project creation.
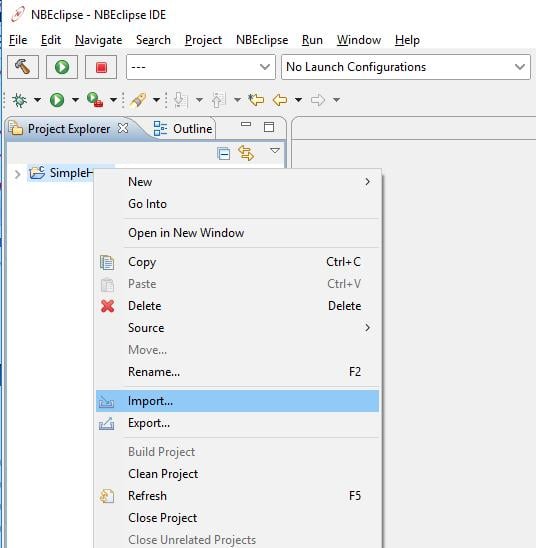
You will now see your new project in the Project Explorer pane. At this point we have a project, but still need to import our source files (if you did not use the Application Wizard).
![]()
The next step is to import the source files of an example. NBEclipse uses a make utility to manage projects, and will attempt to build all source files in your project directory. Do not import non-source code files, such as .o, .elf, .map, .mk, auto-generated htmldata.cpp files, etc. NBEclipse will store all output files similar to these in project subdirectories named "Release" and "Debug" corresponding to the build type preformed.
For this demonstration we will use "\nburn\examples\Web\SimpleHtml". The first step is to right-click on your project in the NBEclipse Project Explorer pane:
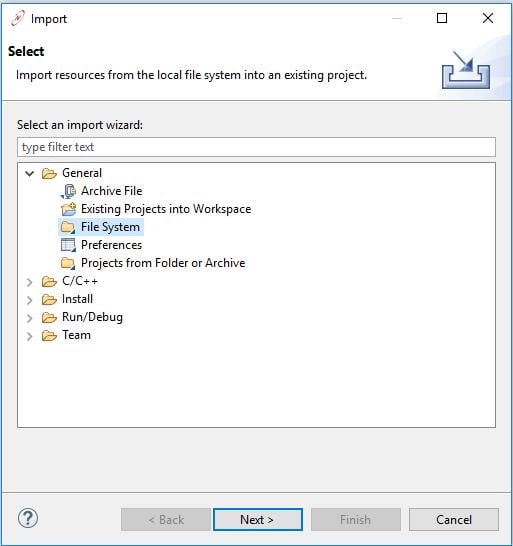
Next select the General->File System, then select Next:
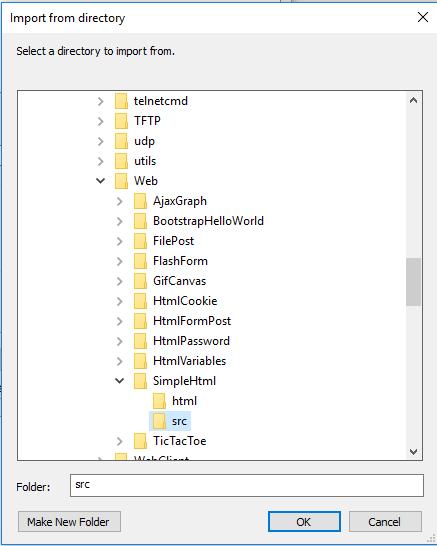
Select the Browse button to bring up a file selection window, navigate to \nburn\examples\Web\SimpleHtml, and select the OK button:
Once back at the File System dialog box, click on the ">" symbol next to the SimpleHtml name to open the tree structure. You can see that there is a folder named src and a folder named html. We want the files in both folders, so select the checkbox next to the name "SimpleHtml", which will select all folders underneath it. Note: the makefile you see is only used for command line builds, but it does no harm to import it as well.
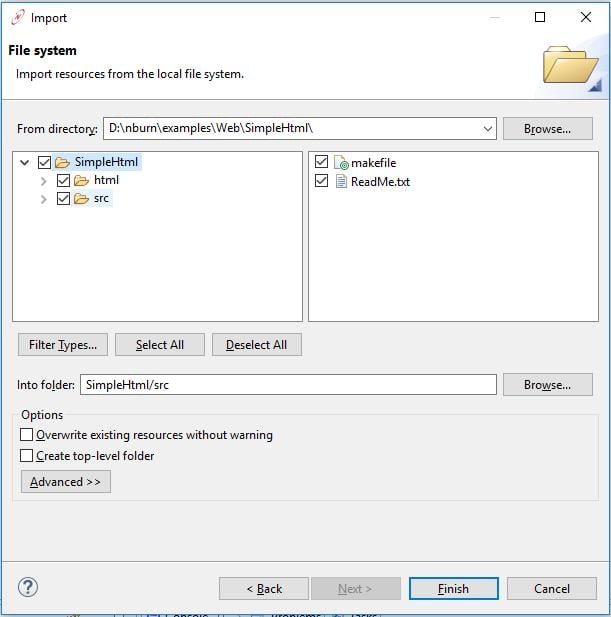
Select Finish, which will import the files and automatically build the project. You can view the status of the build process in the console window, located in the lower right corner of your screen. In the Project Explorer, click on the ">" symbol next to SimpleHtml. Some important items of note:
\nburn\examples\OverloadDirectory for more details. 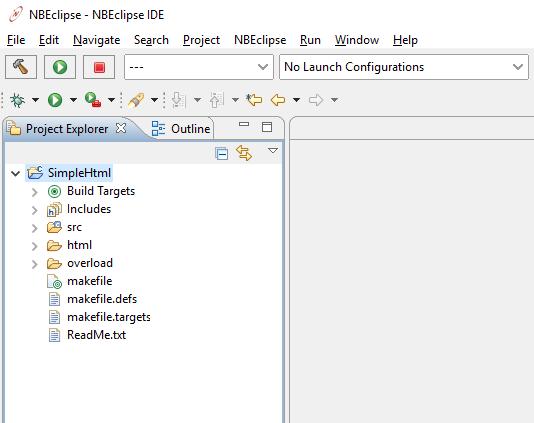
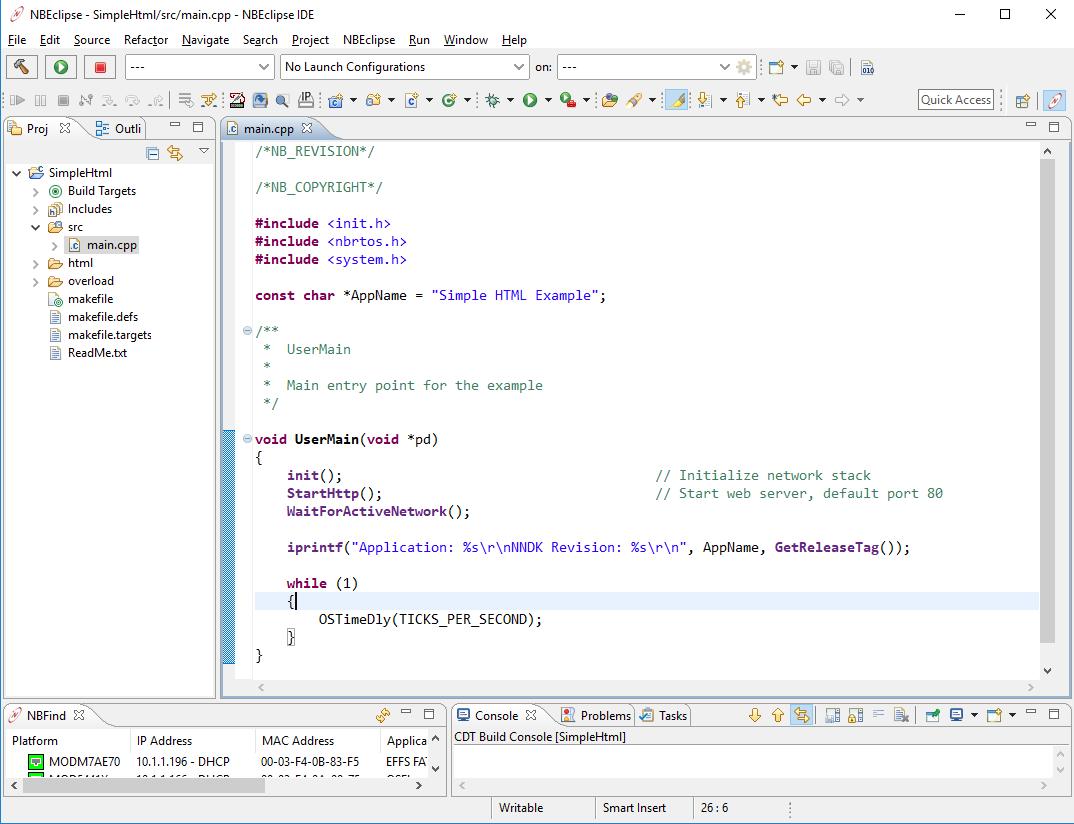
Clicking on the ">" symbol next to the src folder, you can open main.cpp in the editor
At this point you have a project complete with source code files. You can use the editor to modify both src and html files. If you wish to open a html file in text mode to do things like add dynamic content tags such as CPPCALL, VARIABLE, etc, right-click on the html file and use the Open With option to select the text editor:
By default, any time you modify and save a source file, the system will automatically build the application. If you prefer to turn off the auto-build option, to build the project: from the main menu select Project->Build Project, or use the <cntl> b keyboard shortcut.

Now that an application image has been built, the next step is to download the binary image to your NetBurner device. NBEclipse can simultaneously handle multiple NetBurner hardware platforms of the same or different types. For example, multiple MODM7AE70 core modules, or a mix with some MOD54415 modules. Targeting a project to a specific hardware device, is accomplished by creating a Run Configuration for release mode project builds, or a Debug Configuration for project debug builds. An important part of such a configuration is associating the device's IP address with the project so NBEclipse knows where to download the project's binary image.
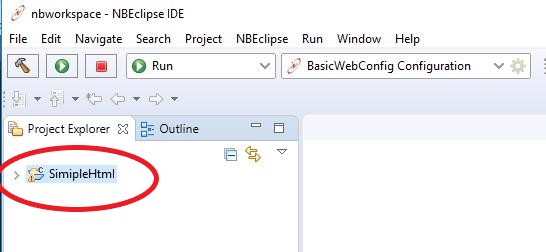
When you create a new project and select the download option for the first time, NBEclipse will create a Run Configuration for you (Run and Debug Configurations can also be created manually). First select your project by left clicking on it in the Project Window:
Then click on the Run button in the upper right corner of NBEclipse:

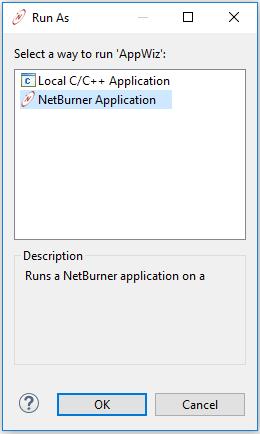
The Run As dialog box will appear. Select NetBurner Application, which will run the application on the remote system: When you click the OK button, NBEclipse will download the binary image to the remote device and reboot it.
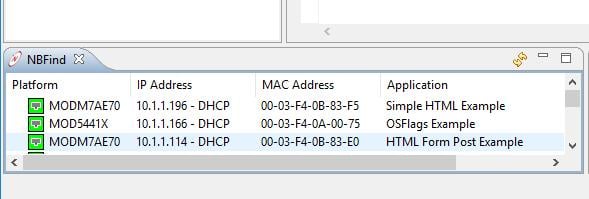
The application should now running on the device. If you do not remember the IP address of the device, you can find it using the "Find" window in the lower left of NBEclipse. In the screen shot below there are 3 devices. The device running SimpleHtml has IP address 10.1.1.196.
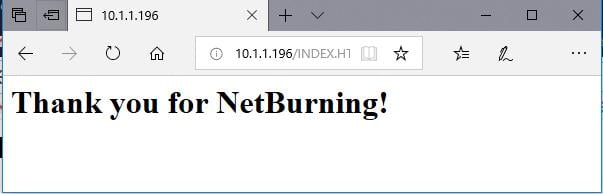
Opening a web browser and typing 10.1.1.196 in the URL field:
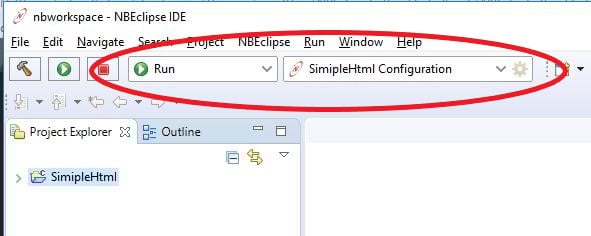
If you now look at the upper left side of NBEclipse, you will see the configuration set to Run, and the project set to SimpleHtml for the configuration.
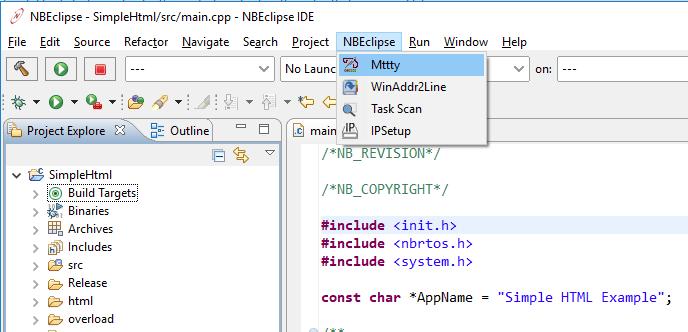
All NetBurner examples make use of the debug/console serial port to provide status messages. You will need to have a serial connection to your device either through USB or the DB9 on the development board, depending on your hardware configuration. You can then use the MTTTY serial terminal application to view the serial output. To open MTTTY:
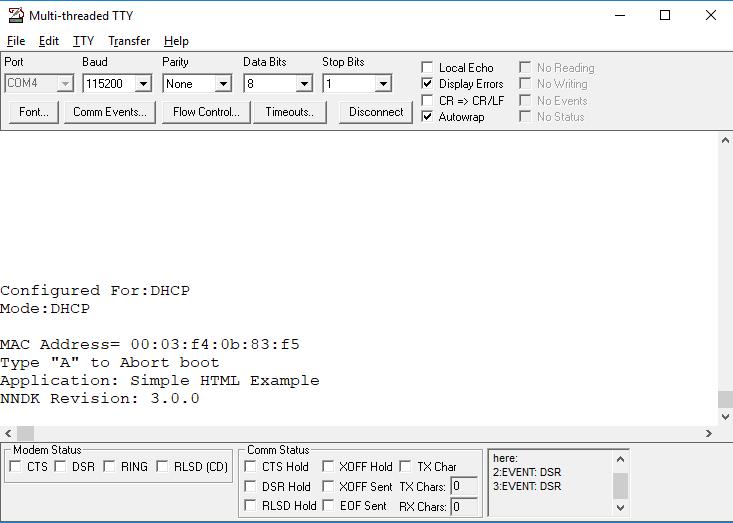
When the device boots the SimpleHtml application you will see:
In the previous section we created and ran a project in release mode. To use a debugger, the application must be built in debug mode. All debuggers require the code be built in a different manor than a release build:
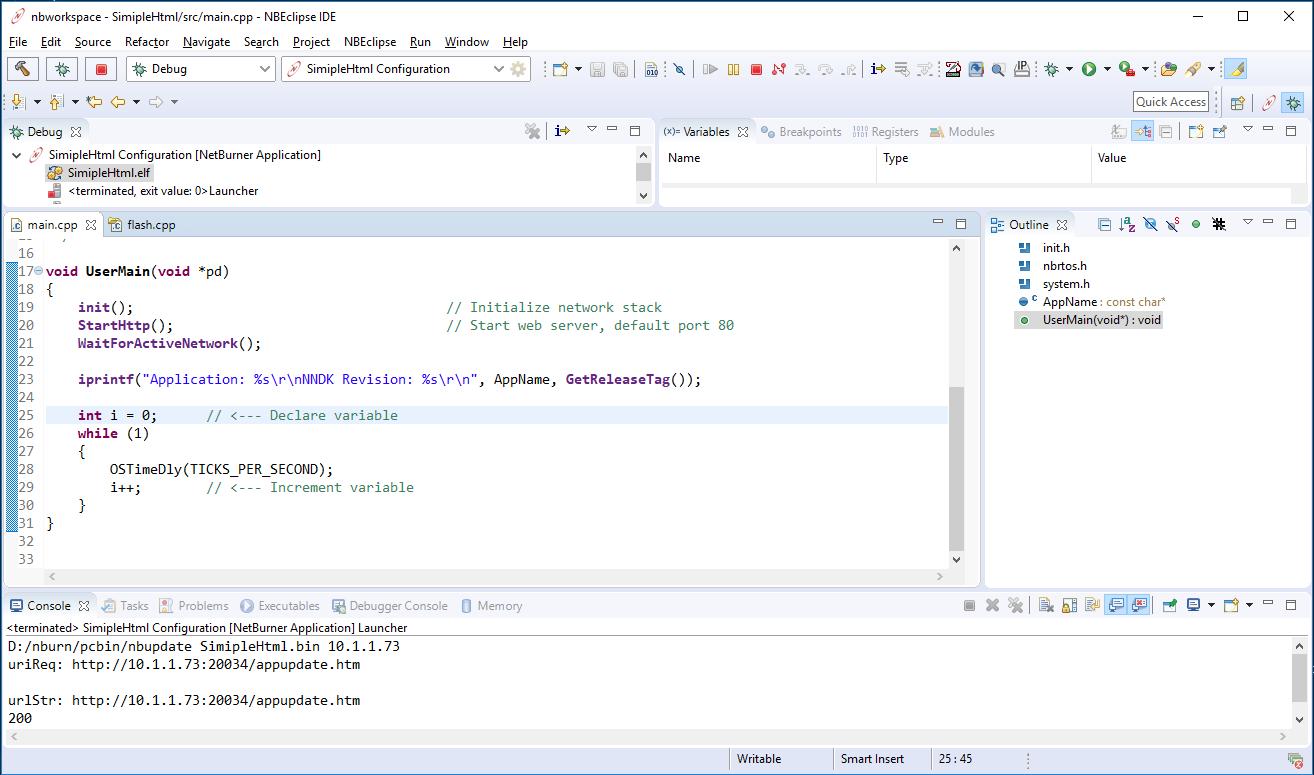
We will pick up right where we left off for the SimpleHtml example project in the previous section. First, lets open main.cpp and add a variable. UserMain() is shown below:
Add two lines of code to create an integer and increment it:
So UserMain() becomes:
Previously for the Run Configuration and download we clicked on the green play button in the upper right corner of NBEclipse. This time we will click on the debug button, which is next to it on the left:

It will take a few seconds for the debugger to connect, and the NBEclipse Perspective will change from the NetBurner perspective to the Debug perspective:
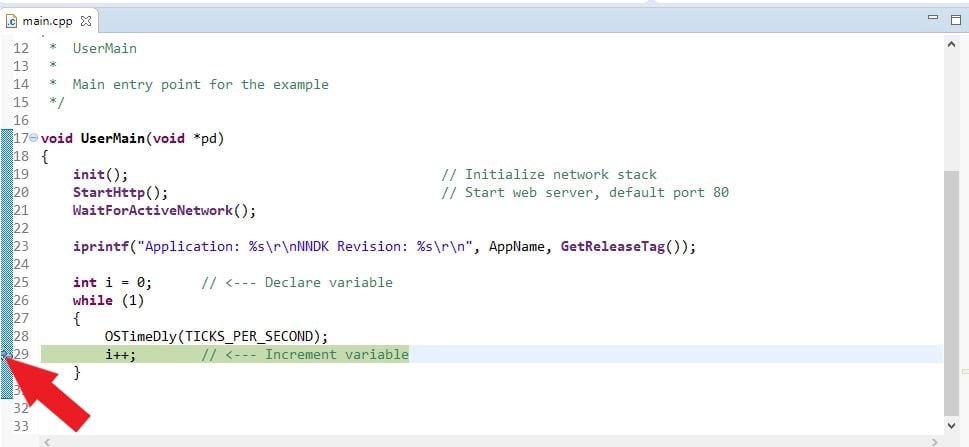
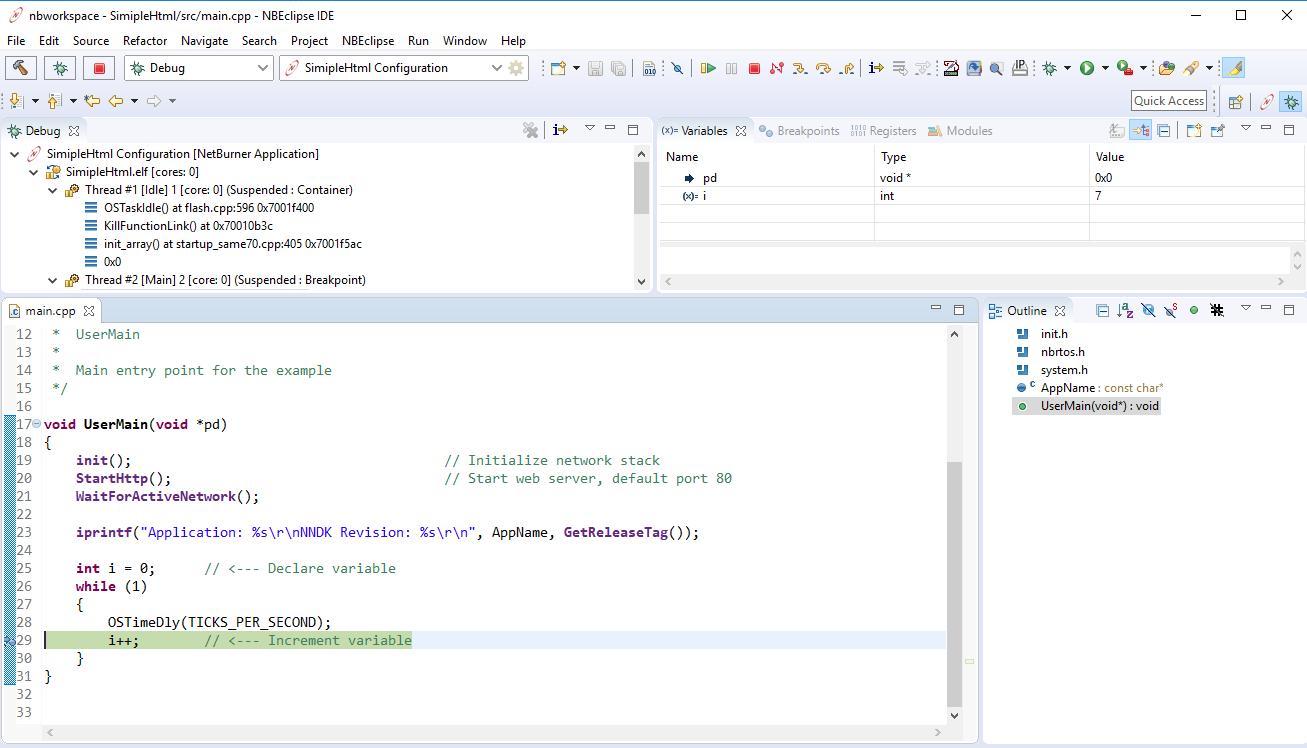
At this point the code is running. To set a breakpoint on our new variable, double click to the left of the line of code. In this example it is just to the left of line 29:
The screen shot below shows the program stopped at line 29. The Variables window in the upper right shows the variable 'i', which has incremented 7 times so far.
The debugger operations are controlled with the tool bar at the top of the screen. If you hover the cursor over the icon the tool tip will describe what it does. Common features are:
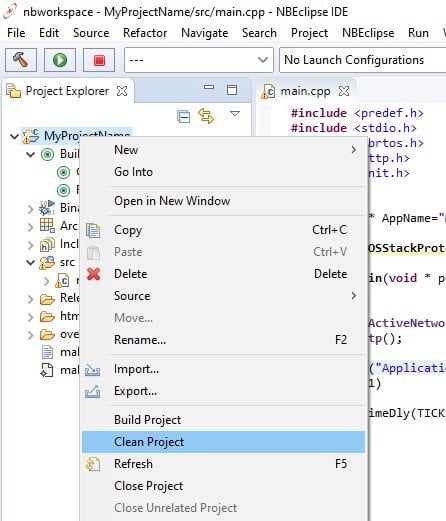
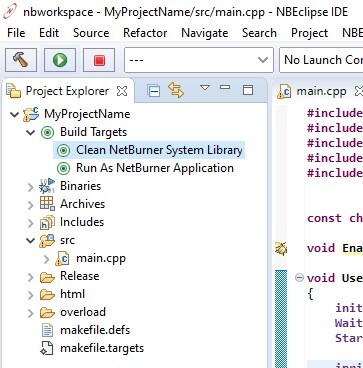
A project "clean" will rebuild all of the project's source code files. It does not affect the library system files associated with the project. From the Project Explorer pane, right-click on your project, then select Clean Project:
This is normally not necessary, but there are cases in which the user may want to rebuild the NetBurner system library files. For example, if the user made changes to system source files or added a system source file to a project's overload directory. In these cases, it's recommended to rebuild the NetBurner system library files followed by "cleaning" the project's source files.
To force a rebuild of the NetBurner library files associated with a project, double-click on Clean Project Library in the Build Targets tree:
The overload directory, located inside a project, is used to override any system file by including local copies of system source or header files. This allows the user to isolate system files changes to a specific project. The overload directory provides an alternative to modifying the original system files, which would affect all projects.
One file that is frequently overridden to modify how NBRTOS works is predef.h, however we suggest using predef-overload.h instead for portability.
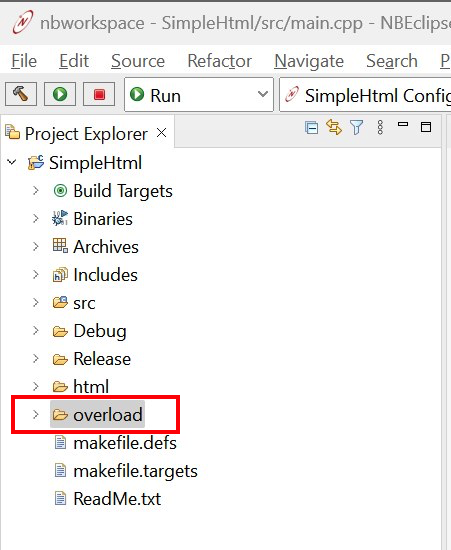
To use this feature, the file to be overloaded should be placed in the overload directory under a directory structure that matches the file's location relative to the NNDK install directory.
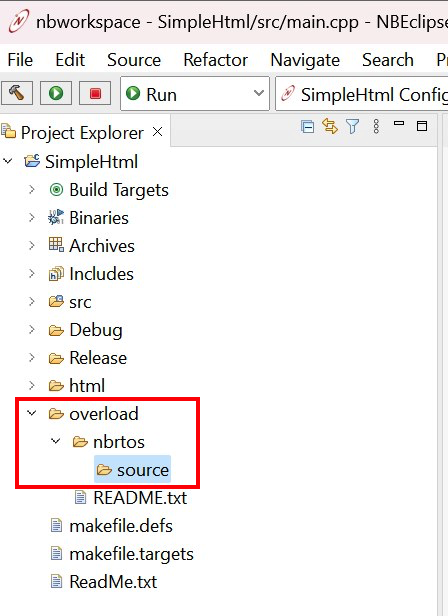
To demonstrate the usage and configuration of the overload directory, we will show an example. Let's say the user wants to overload the system's timezone structure so that they can change the name of a timezone. Perhaps the user is deploying their device in a non-English speaking country and would like to change the language used for timezone names. The timezone names are defined in a system file located in the following directory:
/nburn/nbrtos/source/timezones.cpp
Therefore, the directory structure is replicated inside the overload directory with the following structure:
<project root>/overload/nbrtos/source/timezones.cpp
The directory structure can be created by right-clicking the overload directory and selecting New->Folder. The overload directory must have a matching directory structure to the path of the system file to be overloaded. For this example, the overload directory should look like the following:
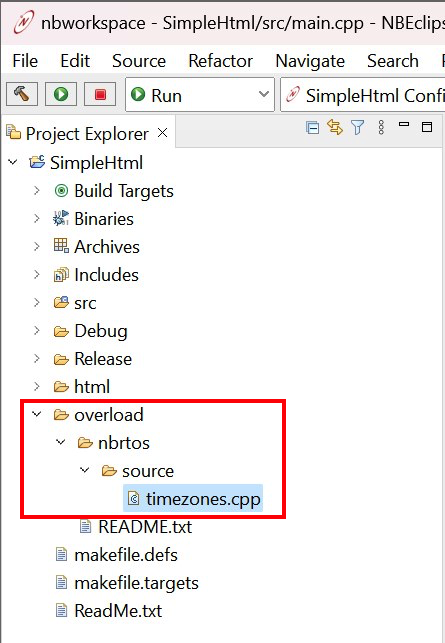
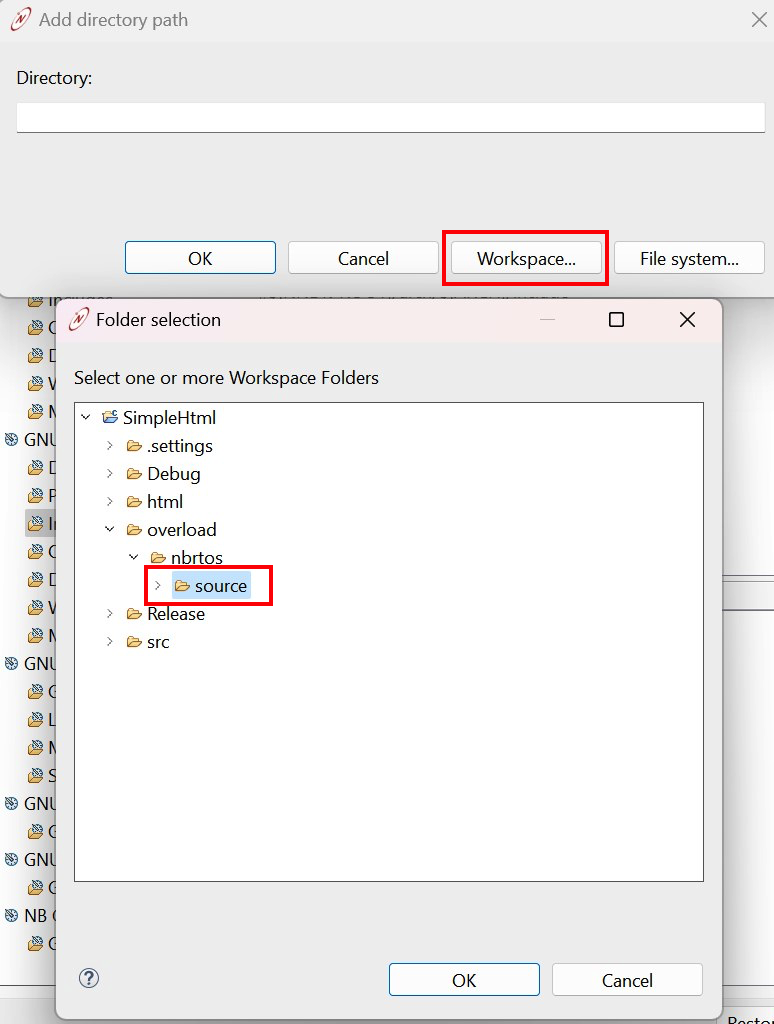
Next, the modified source file must be placed in the correct path in the overload directory. The file can be drag and dropped in place. Alternatively, the file can be imported into the overload directory by right-clicking the overload directory and navigating to Import->General->File System and navigating to the source file. After adding timezone.cpp, our overload example would look like the following:
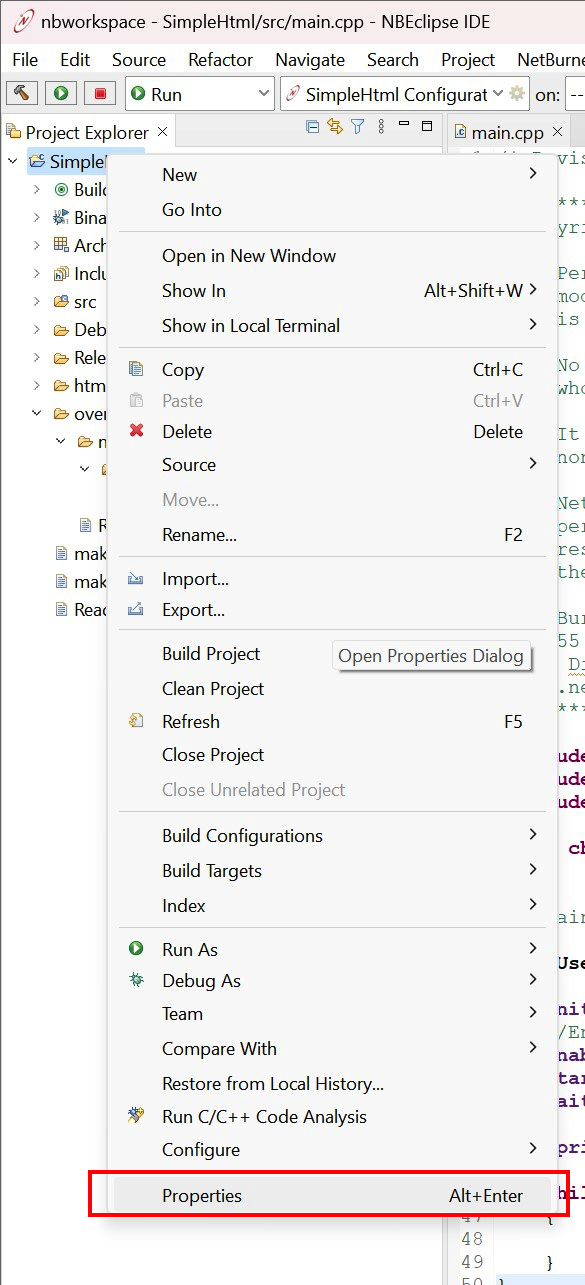
Next, the project properties must be configured so that the C++ compiler knows to include the path to the overloaded source file. This can be done by right-clicking the project and selecting "Properties" as shown in the image below.
Navigate to C/C++ Build->Settings, select GNU C++ Compiler->Includes.
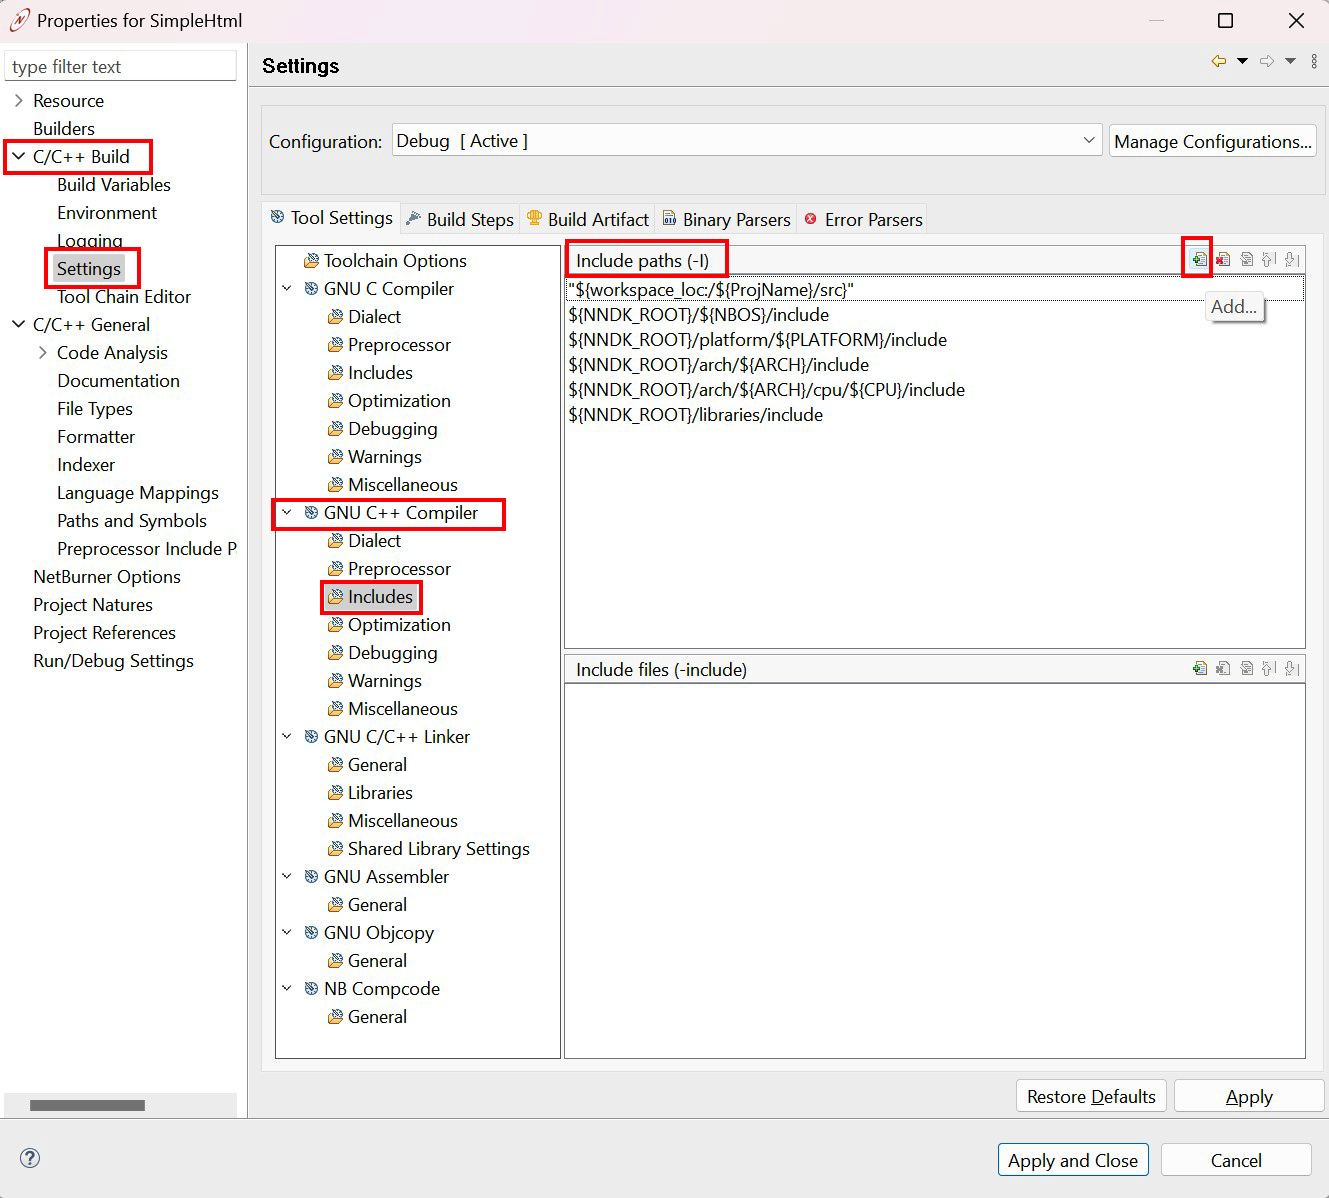
Add the overload directory path to the "Include Paths" list by selecting the "+" logo. If utilizing C code, then the path to the overload directory should be added to GNU C Compiler->Includes as well.
After adding the overload directory path to the list of "Include Paths," the list should look like the following:
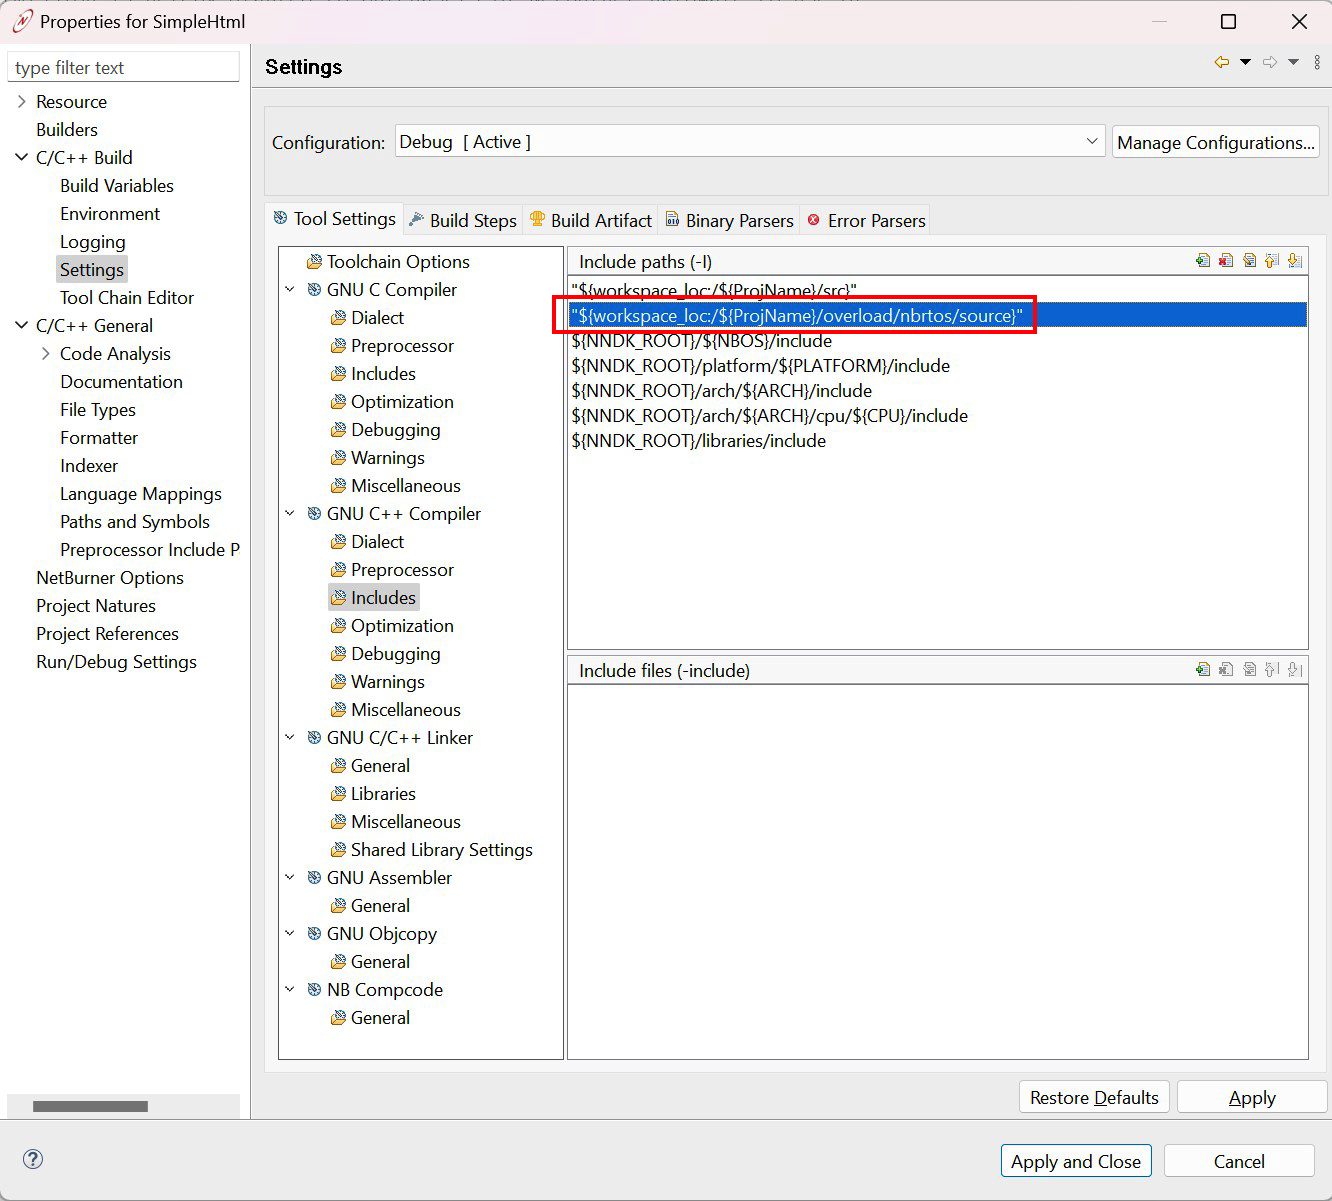
Confirm that the new overload directory path has been added to the "Include paths" list above the paths that begin with "$(NNDK_ROOT)/" as shown in the image above. If not, use the up-arrow button to move the overload directory path higher in the list.
Select "Apply and Close" to apply the modifications.
Last, we need to rebuild the NetBurner system library files then clean the project files (the order of operations matters). For instructions on doing so, see Rebuilding Projects & Libraries. From this point on, modifying the overloaded source file, timezone.cpp, will automatically re-build the necessary files in the NetBurner system files when the project builds.